
Single hose air conditioners can't cool a room: Convert them to dual hose
Single hose air conditioners (AC) should be banned. By design, they are inefficient; they can blast cold air at a person sitting directly in front, but will never be able to cool the rest of the room. Single hose ACs are bad news for the environment, energy bills and your heatwave comfort!
The problem for UK residents is that single hose ACs are the only type of portable model available. Dual hose models, window units or portable split units are not available, despite their superior performance and efficiency.
But what makes single hose ACs so bad? This is a long article, so a table of contents will help get you to what you need:
- Background: Air conditioners are refrigerators with fans
- What makes single hose ACs so bad?
- Solution: Convert the single hose AC to dual hose
- Known working AC model conversion examples
- Challenge 5K (5,000 BTU)
- Delonghi Pinguino EX120
- Matsui MAT-7KACW
- Sharp CV-H9XR
- Dimplex DCP9
- Blyss A018I-12CH
- Silvercrest SMK 7000 B2
- Silvercrest SMK 7000 B2 (with 3D printed cowl)
- ElectriQ Airflex15-v2
- HOMCOM 5000BTU
- Inventor Magic M2GHP290-12
- Garvee CF10 (TAC-10CPB/DM7)
- ElectriQ AC9000E
- Kingfisher WAP31A15E (5000 BTU)
- TRONIC TLK 7000 C2
- MeacoCool MC12000CHR Pro
- Converted your model successfully?
Background: Air conditioners are refrigerators with fans
Most air conditioning systems work by exchanging heat from the inside air to the outside air, using vapor-compression refrigeration. All efficient designs (anything that’s not a single hose) do this without ever mixing the separate air masses or causing any pressure differential between the outside and inside. It doesn’t matter whether it’s a split AC unit in a commercial property, the AC in your car, or your kitchen refrigerator, they follow this operating model:
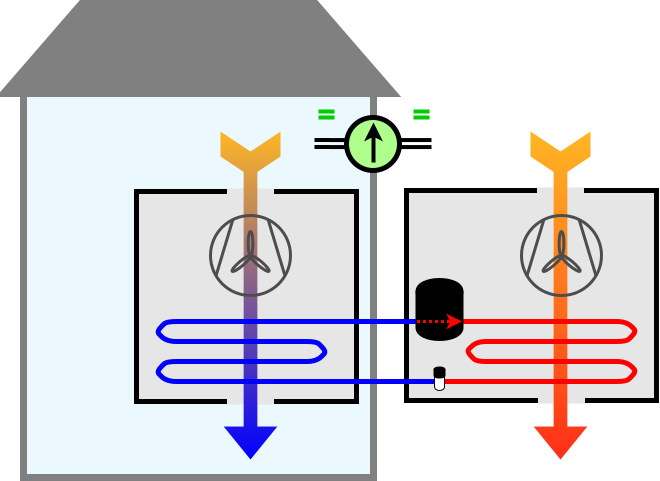
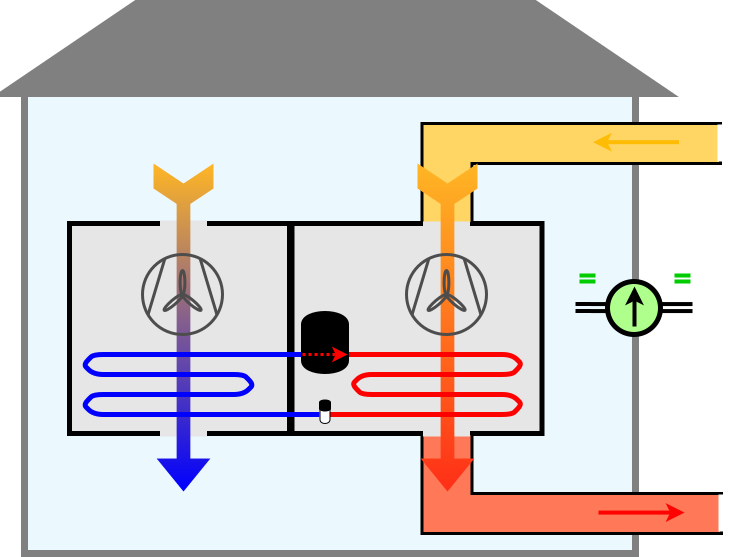
Dual hose portable air conditioners are perfectly fine too, as they follow the same principles. The only difference is that they incorporate the outside unit into a single inside unit; instead using ducting hoses to draw outside air over the condenser coils and back to the outside again. They are more convenient as no permanent installation is required. They are marginally less efficient due to heat loss through the hoses and the additional heat generated from the compressor, which is now inside the room that needs to be cooled.
What makes single hose ACs so bad?
Single hose models are the only type that violate this principle, which is why they are so inefficient. Instead of using two hoses to keep the air masses separate and drawing outside air to pass over the condenser coils, they ditch the intake hose and just draw the inside air instead — destroying the working principles of air conditioning. Why? Probably because it’s easier to market and sell the convenience of one hose rather than two. They forgot to mention in the fine print that having only a single hose makes the machine close to useless.
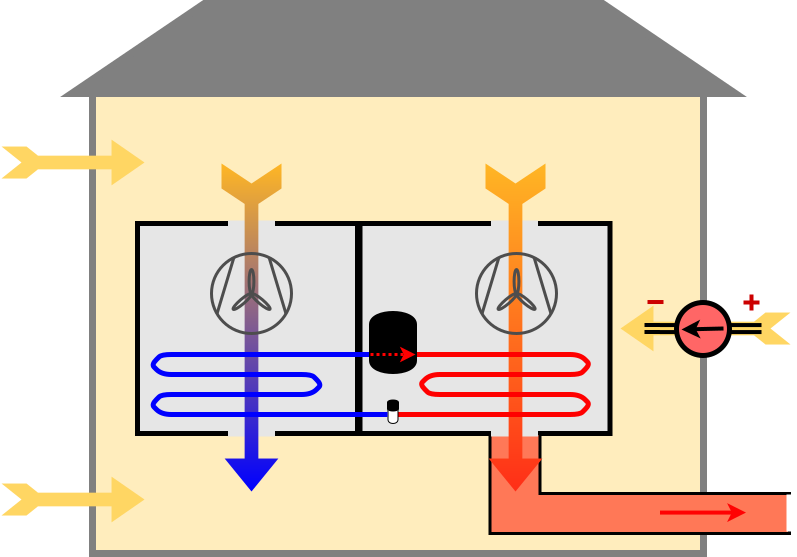
This single hose design has a huge performance cost. With the inside air now being forced to the outside through the exhaust hose, the inside is now always at a lower pressure. No room is perfectly sealed, so to equalise the pressure, hot air from outside is continuously drawn through door frames and a multitude of other tiny gaps in the room. This is why single hose units will never cool an entire room, they are constantly fighting against hot air rushing back into the room due to the negative pressure.
Don’t believe me? Turn the AC on in a small room, use a good seal between the exhaust hose and the window, then close all doors and feel around the gaps between the door and the frame. You’ll be able to feel the air rushing in to the equalise the negative pressure in the room you’re trying to cool.
Don’t believe me still? Leave your AC running for an hour, then come back in the room. You’ll be dissapointed. Walk round the edges of the room, it’ll feel barely cooler than when you left. Touch the walls, they’ll be warm still. In any other setting like an office, restaurant or car, you’re used to the whole room being cool, not just the tiny space directly in front of the air conditioner.
Solution: Convert the single hose AC to dual hose
Thankfully, many single hose ACs can easily be converted to dual hose systems. Single hose systems are often designed with two separate intake ports just like dual hose units, despite only needing one; it’s like the engineeers knew that a single hose was a bad idea so left in the ability for modification. By fashioning an adapter to duct the condenser intake port so that it draws from the outside air, it will perform with the same efficiency as a dual hose unit.
WARNING
I am not an expert on air conditioners, safety or anything related. You must be aware that you are following instructions from some random person on the internet that spent 20 minutes with cardboard, duck tape, trial, error and some luck. If you choose to try it, you are doing so completely at your own risk.
Some important warnings:
- No liability: Everything on this page is done at your own risk. By choosing to follow any of these instructions you accept full and sole responsibility for any and all outcomes, including but not limited to property damage, personal injury, or death. I'm just some person on the internet that had a personal project work well and wanted to share it to help others stay cool in the heat. I accept zero liability for any outcome. If you're not comfortable with that, don't proceed.
- Flow restriction: The most common mistake with this conversion is not ducting well enough and accidentally restricting the airflow into the condenser intake. The original grille was wide open; your adapter needs to match that as closely as possible. Seal up as little of the grille as you can get away with, just enough to make a good connection for the hose. Any restriction on the intake reduces cooling performance and puts more strain on the whole AC system. Also make sure the intake hose itself is at least as rigid as the exhaust hose already on the unit, ideally more so. Unlike the exhaust hose, which is under positive pressure, the intake hose is under suction. Suction can collapse a hose that isn't sturdy enough. This risk is higher on the hottest days of the year, when the heat softens most materials and makes collapse more likely. A collapsed intake hose means no airflow, which means the condenser will overheat.
- Overheating risk: This modification might increase the risk of the unit overheating, especially if modified incorrectly. It is easier for the ducted intake hose to become blocked or the flow rate impaired, compared to a wide open grille that was present before. If you are ducting, make sure to not introduce any flow restrictions.
- Thermostat probe location: If the thermostat temperature probe happens to be on the condenser (hot) side intake rather than the evaporator (cold) side, once it's ducted it'll measure outside air temperature instead of the room, so it'll never think the room is cool enough and the compressor will run continuously. Check the flow block test section below before proceeding.
- Fire safety: Buy a fire alarm for the room with the AC. This recommendation stands whether or not you're doing this modification. If you're sleeping in a room with any electrical appliance running, a fire alarm in that room is just a sensible idea. With the doors closed, smoke fills a room very quickly. The alarms in the rest of the house won't help you in time. You've spent a lot on an AC unit, spend a little extra on a fire alarm too. During the first few uses after the conversion, don't leave it running unattended for extended periods until you're satisfied everything is working as expected.
- Electrical safety: Don't open or tamper with the internal wiring of the unit.
- Warranty: It will almost certainly invalidate any manufacturer warranty.
- High temp materials: Materials used in the conversion must be able to withstand the same high temperatures as the exhaust hose, just in case they accidentally come in contact.
Will this work with my AC? The flow block test…
Every AC unit is different, so there are no guarantees this modification will work with every model. As a guide, there are two major requirements that an AC unit must meet to make conversion possible:
- The machine must have internal separation and air tight seals between the evaporator and condenser air flows.
- There must be two separate air intake ports, one for the evaporator (cold out) and one for the condenser (hot exhaust) air flow.
There’s a quick way to check whether both requirements 1 and 2 are met, and also establish which intake needs ducting — I call it the flow block test:
- Attach the exhaust hose and turn the unit on. Keep the hose inside the room with you.
- Using a sturdy but flexible item in one hand, such as a magazine or cardboard cutout (something strong enough to not get sucked in), temporarily block one of the air intakes while the machine is running. Don’t do this for more than 2 seconds at a time, because you might burn the AC fan motor out with the extra stress.
- Use your other hand to check the flow rate changes as you block the intake.
To pass the test, when the intake is blocked, both:
- The air flow rate out the exhaust hose must significantly reduce, or stop entirely.
- There must be no change or reduction to the flow rate of air exiting the cold air output grille.
- If both of those flow rate tests pass, then congratulations the machine can be converted, and you’ve just found the intake that needs ducting to the outside with an extra hose.
An additional minor requirement is that thermostat temperature probe must be on the evaporator (cold) side air intake/flow also. This usually looks like a small plumb bob dangling in front of the evaporator (cold) coil fins. The trouble comes if the probe is located in the condenser (hot) side air intake, because once the intake is ducted it will no longer measure the room temperature, it’ll measure the outside air temperature. This means that the unit can never tell when the room has reached the correct temperature and will always call for more cooling. Aside from your room ending up like a fridge, this also increases the risk that the unit could overheat, because the compressor never switches off as never detects the room is cold enough.
Instructions for conversion after flow block test
If all machine requirements are met, you should once again read, be aware and mitigate the risks mentioned in the red warnings box further up on this page.
Once aware of the risks, the steps to convert the unit from single hose to dual hose are simple:
- Buy an additional fire alarm to have in the room with the AC. I’m not joking about this, see the warnings section.
- Source an additional air conditioning hose or equivalent. This should be a similar diameter to the exhaust hose, so that flow rate is not restricted. It’s also important it is sturdy and suitable for high temperatures, as this will be used partially outside in the sunlight on hot days. Unlike the exhaust hose which is under positive pressure, the intake hose is under suction. Suction can collapse a hose that isn’t rigid enough. On the hottest days of the year the heat softens materials further, making collapse more likely. Use a hose that is at least as rigid as the exhaust hose already on the unit, ideally more so.
- Create an adapter to duct the condenser (hot) air intake that you identified earlier, into the additional air conditioning hose, so that it draws air from the outside instead of inside. Make sure it’s a good seal, but block up as little of the grille as you can get away with. The original grille was wide open and your adapter needs to keep as much of it unobstructed as possible. Any unnecessary restriction on the intake reduces cooling performance and puts more strain on the whole AC system.
- Place the new hose through to the outside along with your exhaust hose
- Ensure there is enough distance so that the hot air of the exhaust isn’t being drawn straight into your new intake.
- Secure the outside part of the intake hose. If left dangling, the suction could draw it onto close objects and block the flow. I found this out through experience, one day my intake hose had stuck itself to the outside wall like a limpit.
How will I know if the conversion worked?
Place both hoses out of the window, ideally with some separation between them, then turn the unit on. An AC window sealing kit is a worthwhile addition - search for AC window sealing kit, they’re about £20.
Close all of the doors and other windows, then do a quick feel with your hands (or face) around the door frames. If you can’t feel any air rushing in, then you’ve ducted the right intake and there is no longer a pressure differential in the room.
Then leave the room for at least an hour. Even if the conversion was successful, a perfectly functioning AC will still take a while too cool a whole room down due to the latent heat in all of the furniture and walls. After an hour, the room should have started cooling down. After many hours, everything in the room should be cool to the touch and feel like a fridge.
Further tips for optimum efficiency
- Purchase a window sealing unit designed for your type of window. They’re only around £20, but make a big difference to the cooling performance, plus keep those summer bugs and flies outside.
- Keep the intake and exhaust hoses away from each other when outside of the window. Having them close to each other increases the chance that the hot exhaust air is being drawn straight into the intake hose. If stacking vertically, I like to keep the intake hose below the exhaust hose for this reason too, as hot air rises slightly.
- Keep the length of the hoses short, to minimise losses back into the room. Move the unit as close to the window as possible.
- Keep the filters clean. Most portable ACs have a filter on the evaporator (cold side) intake and some have one on the condenser side too. Check your manual and clean them regularly; monthly during heavy use is a reasonable starting point. This is especially important after the conversion, because any ducting you’ve built over the condenser intake now hides the filter from view. Out of sight out of mind, and a blocked filter will quietly block the airflow and undo a lot of the efficiency gains you’ve just worked to achieve.
Known working AC model conversion examples
Challenge 5K (5,000 BTU)
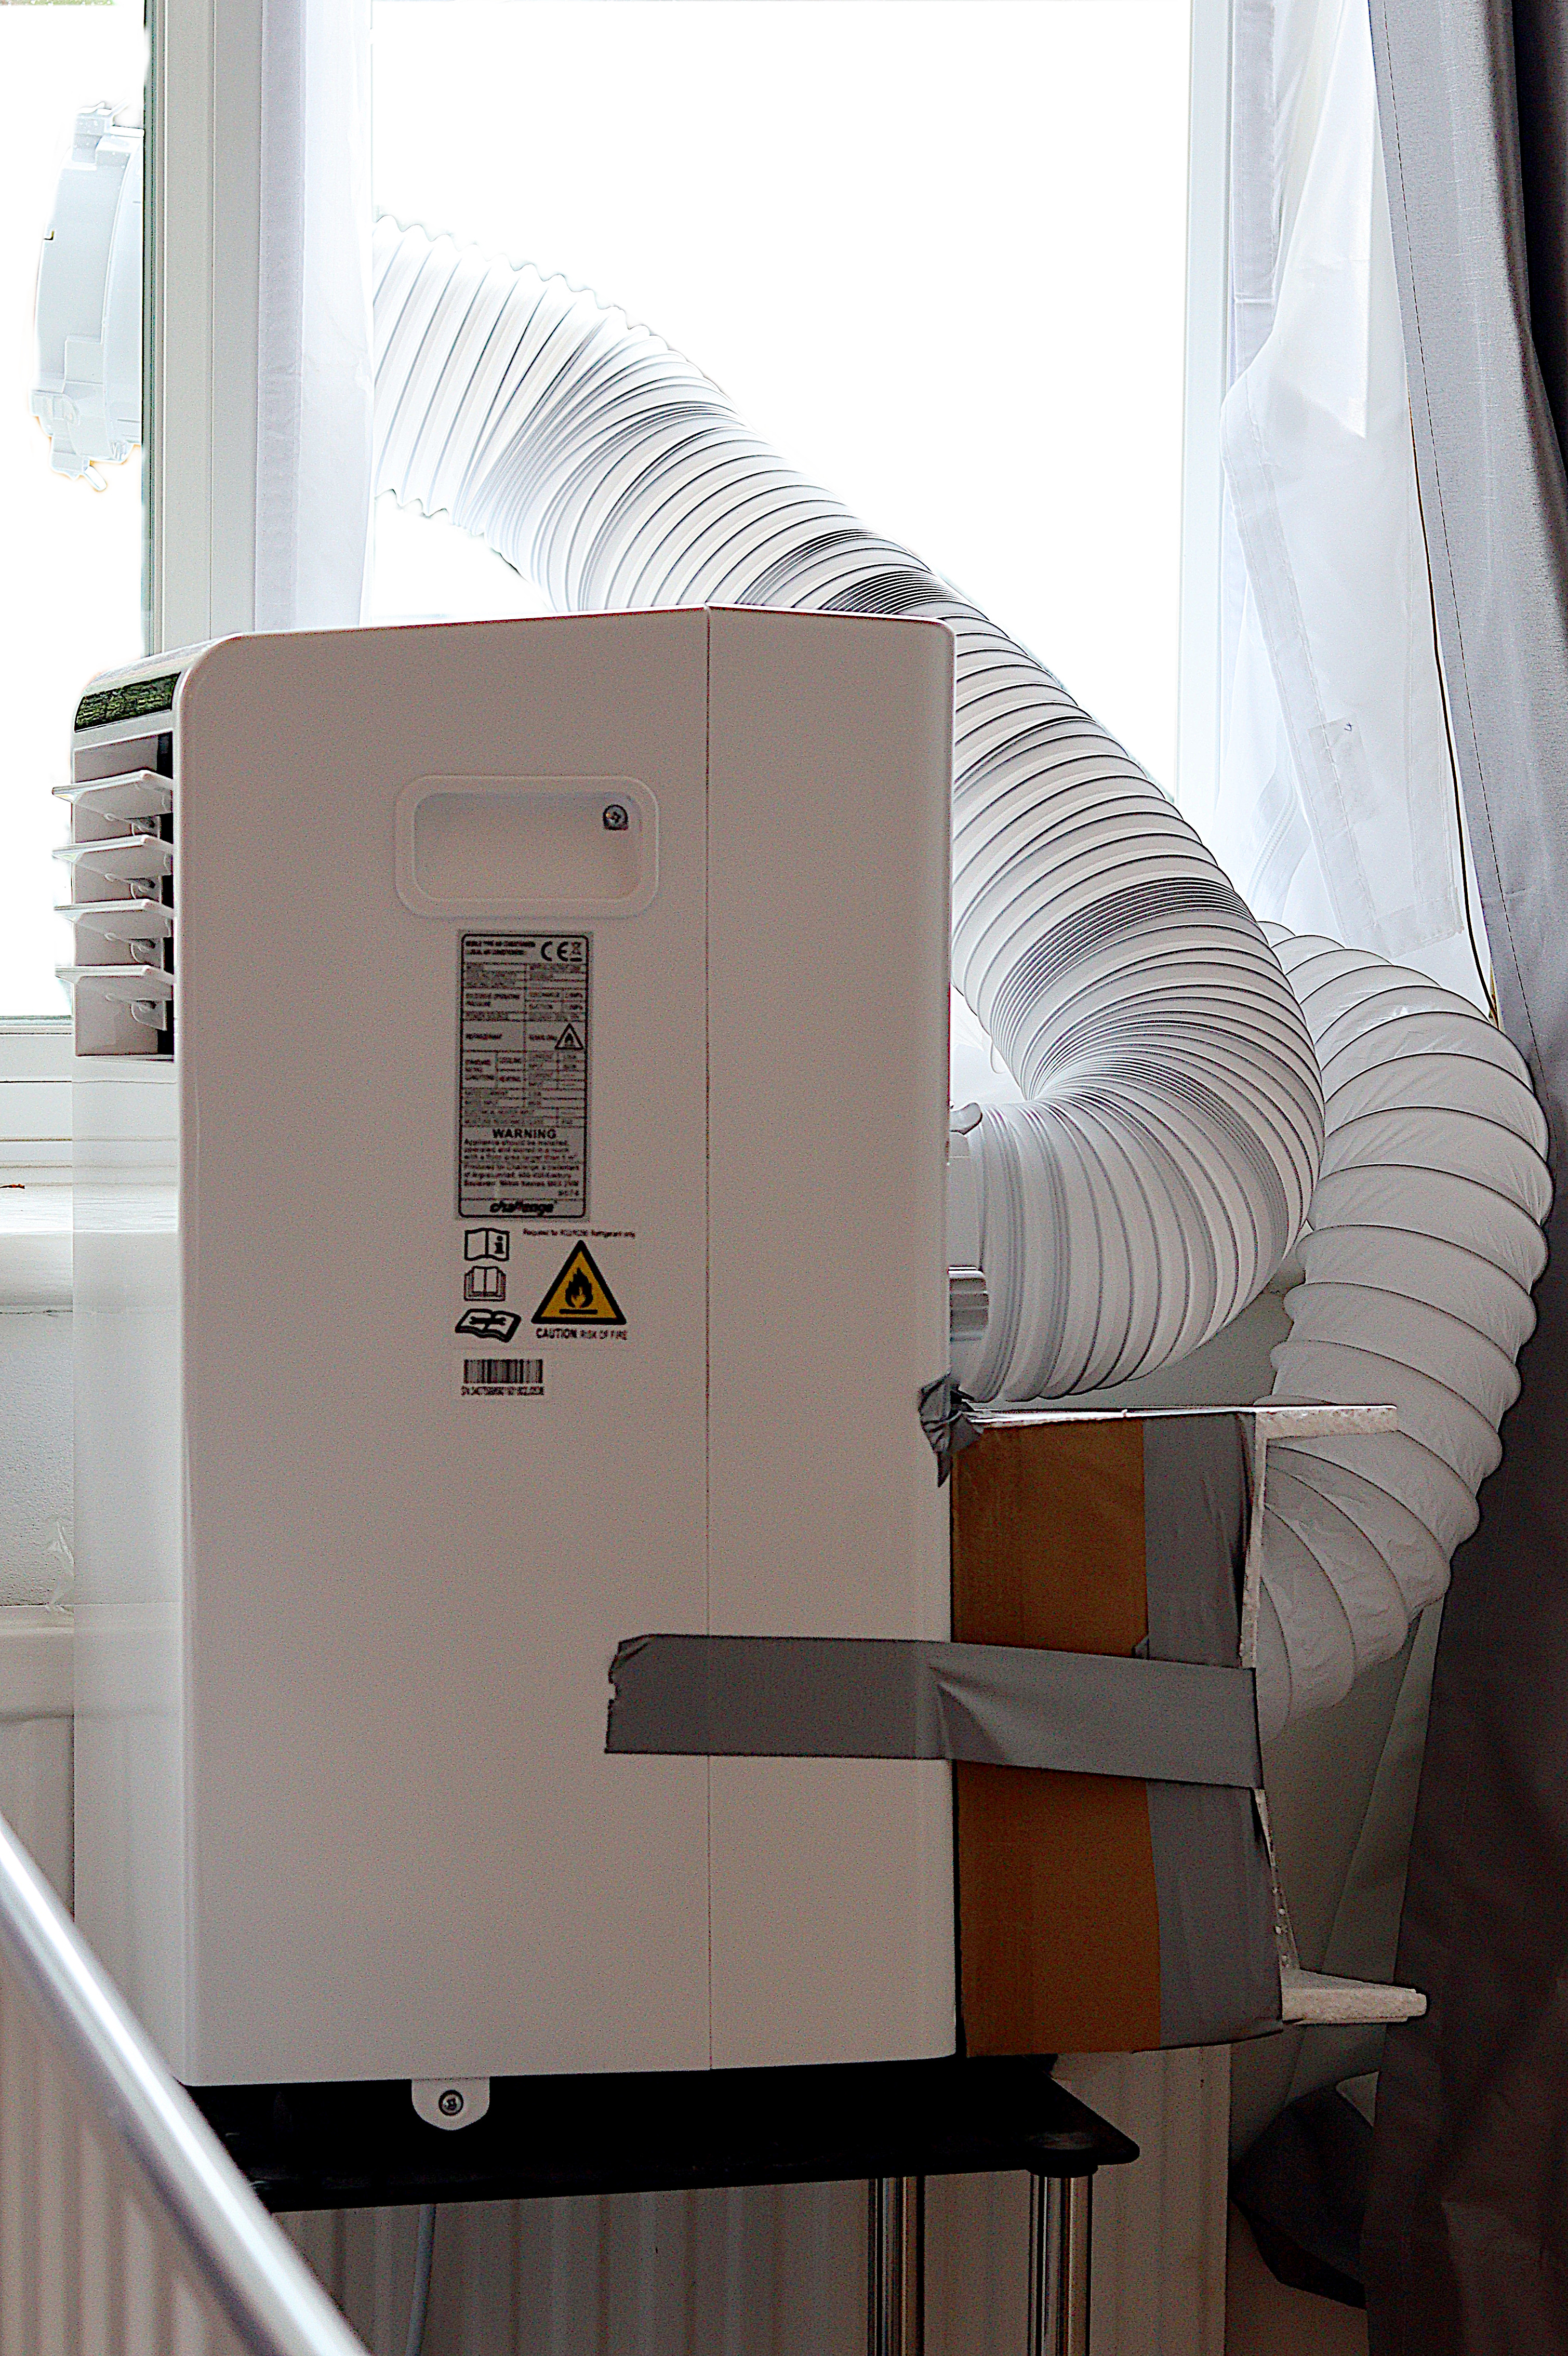
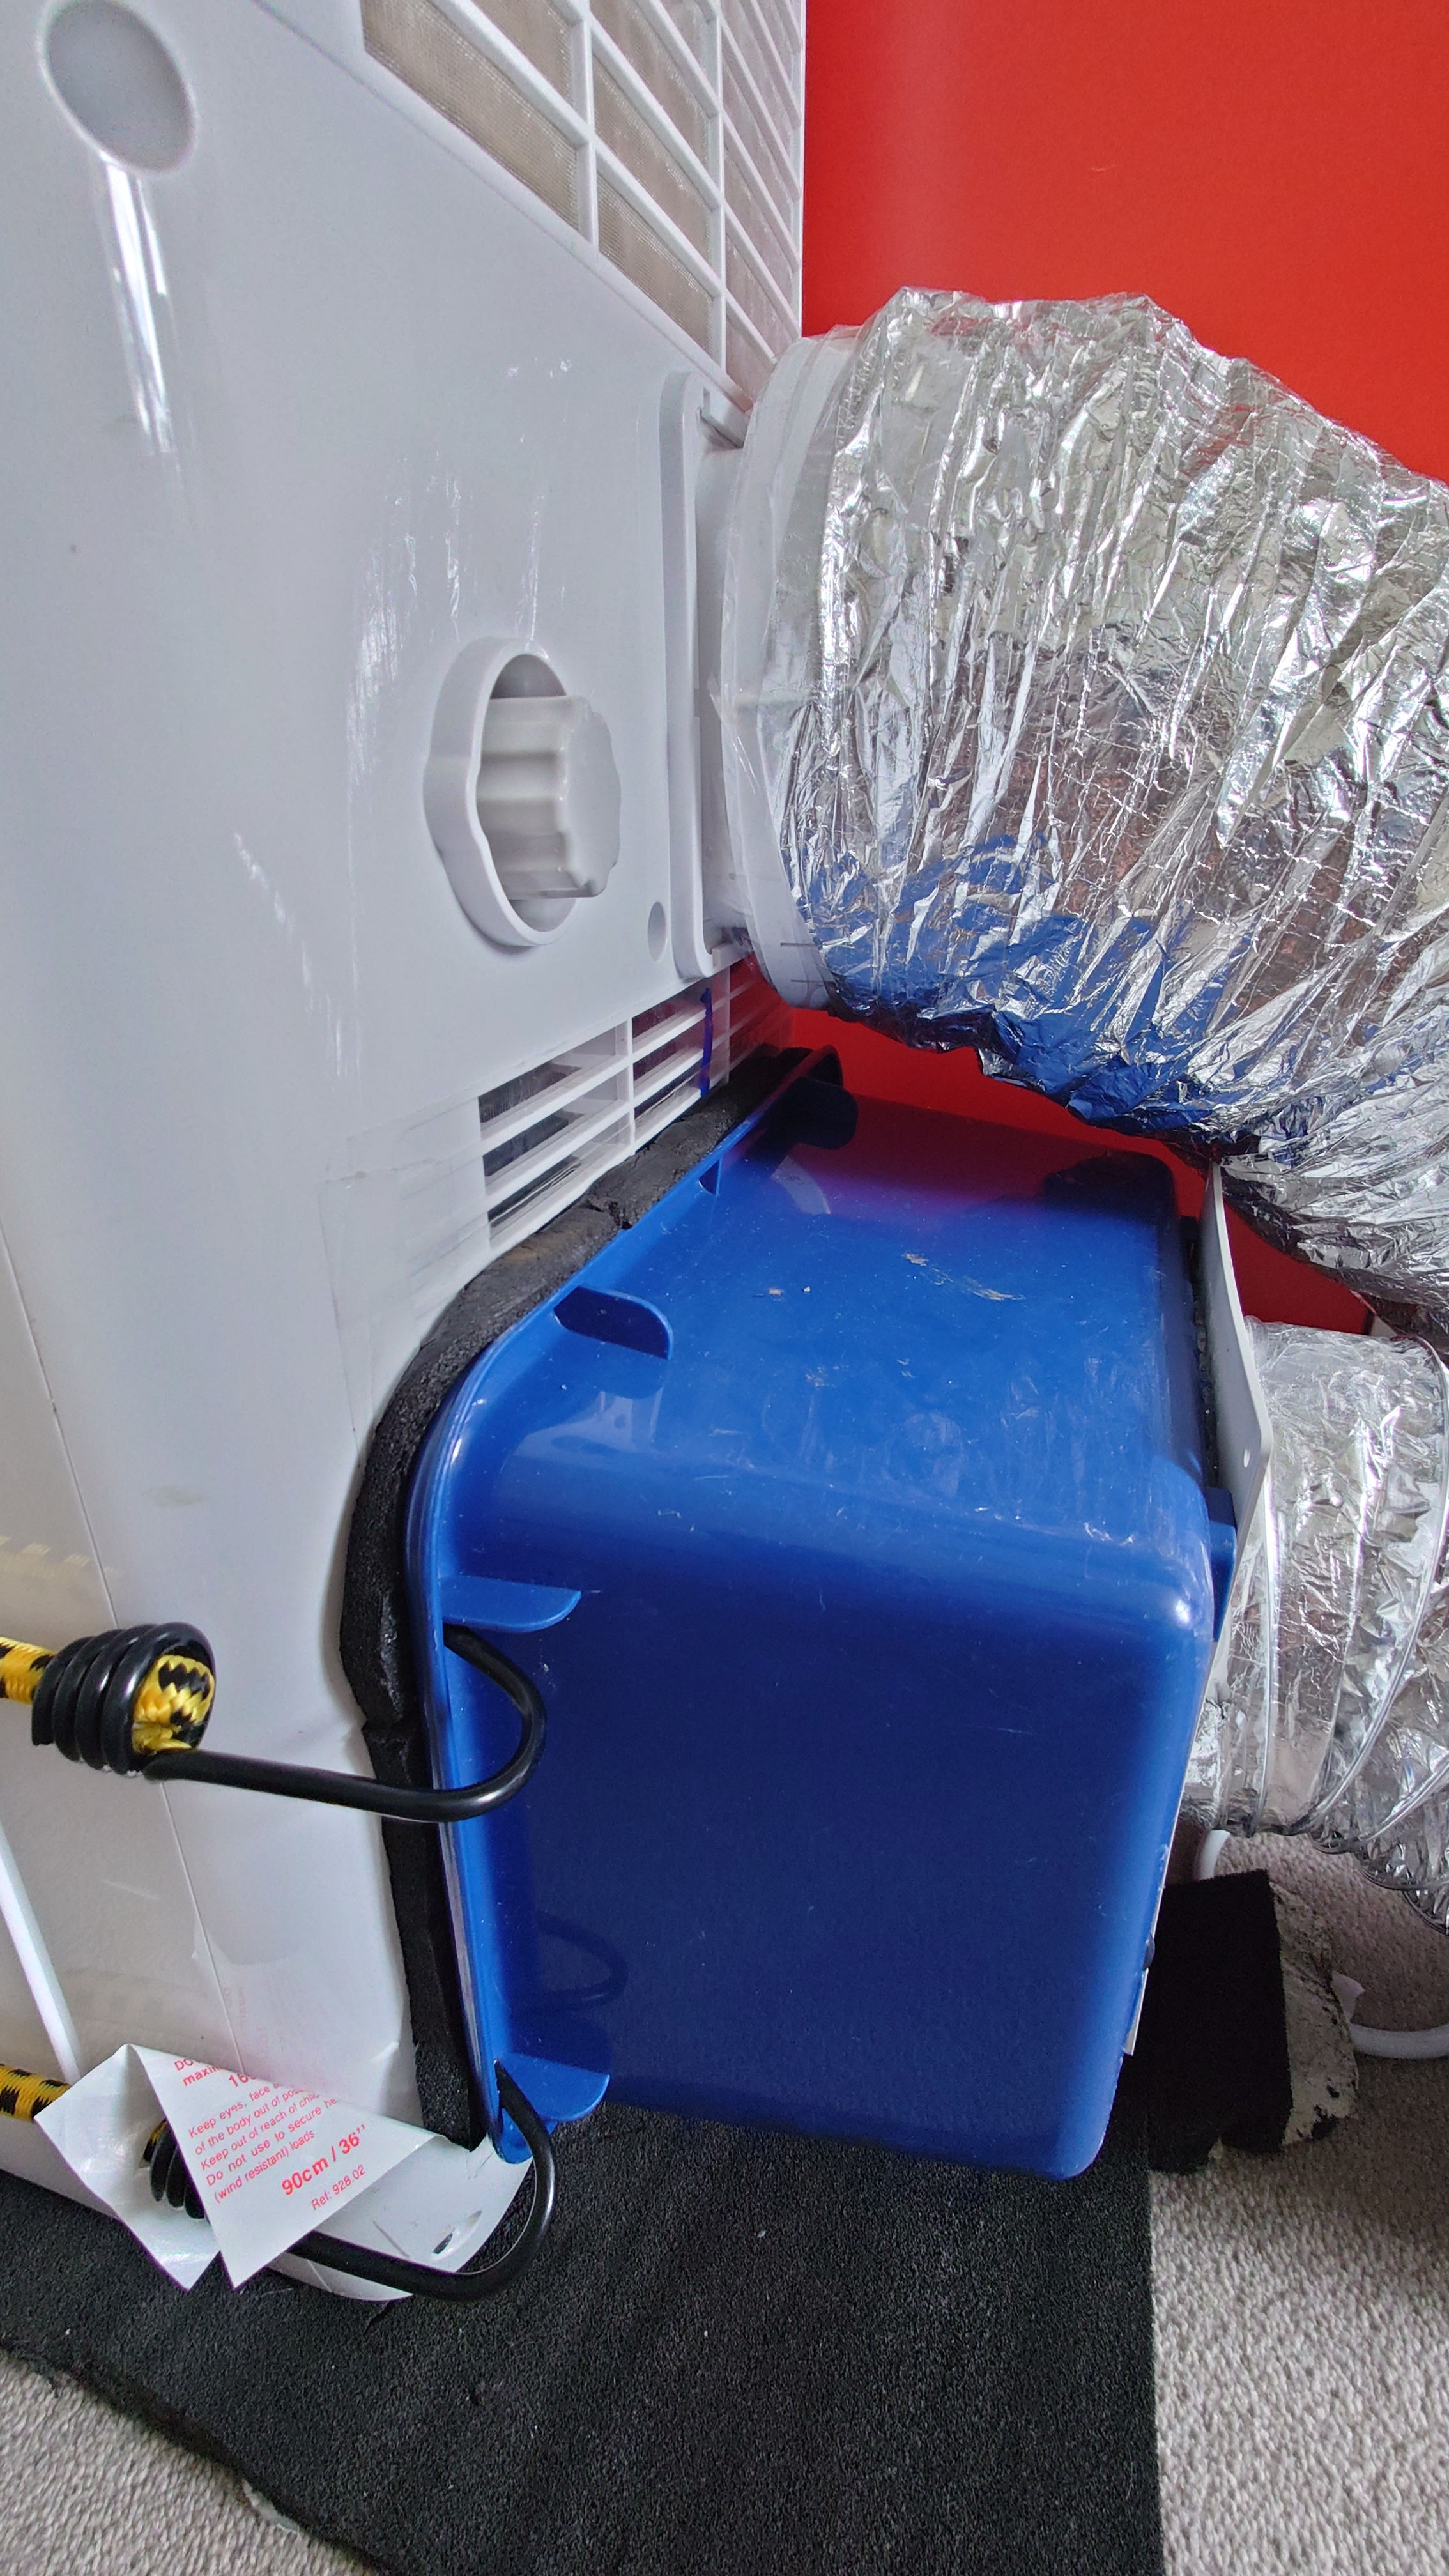
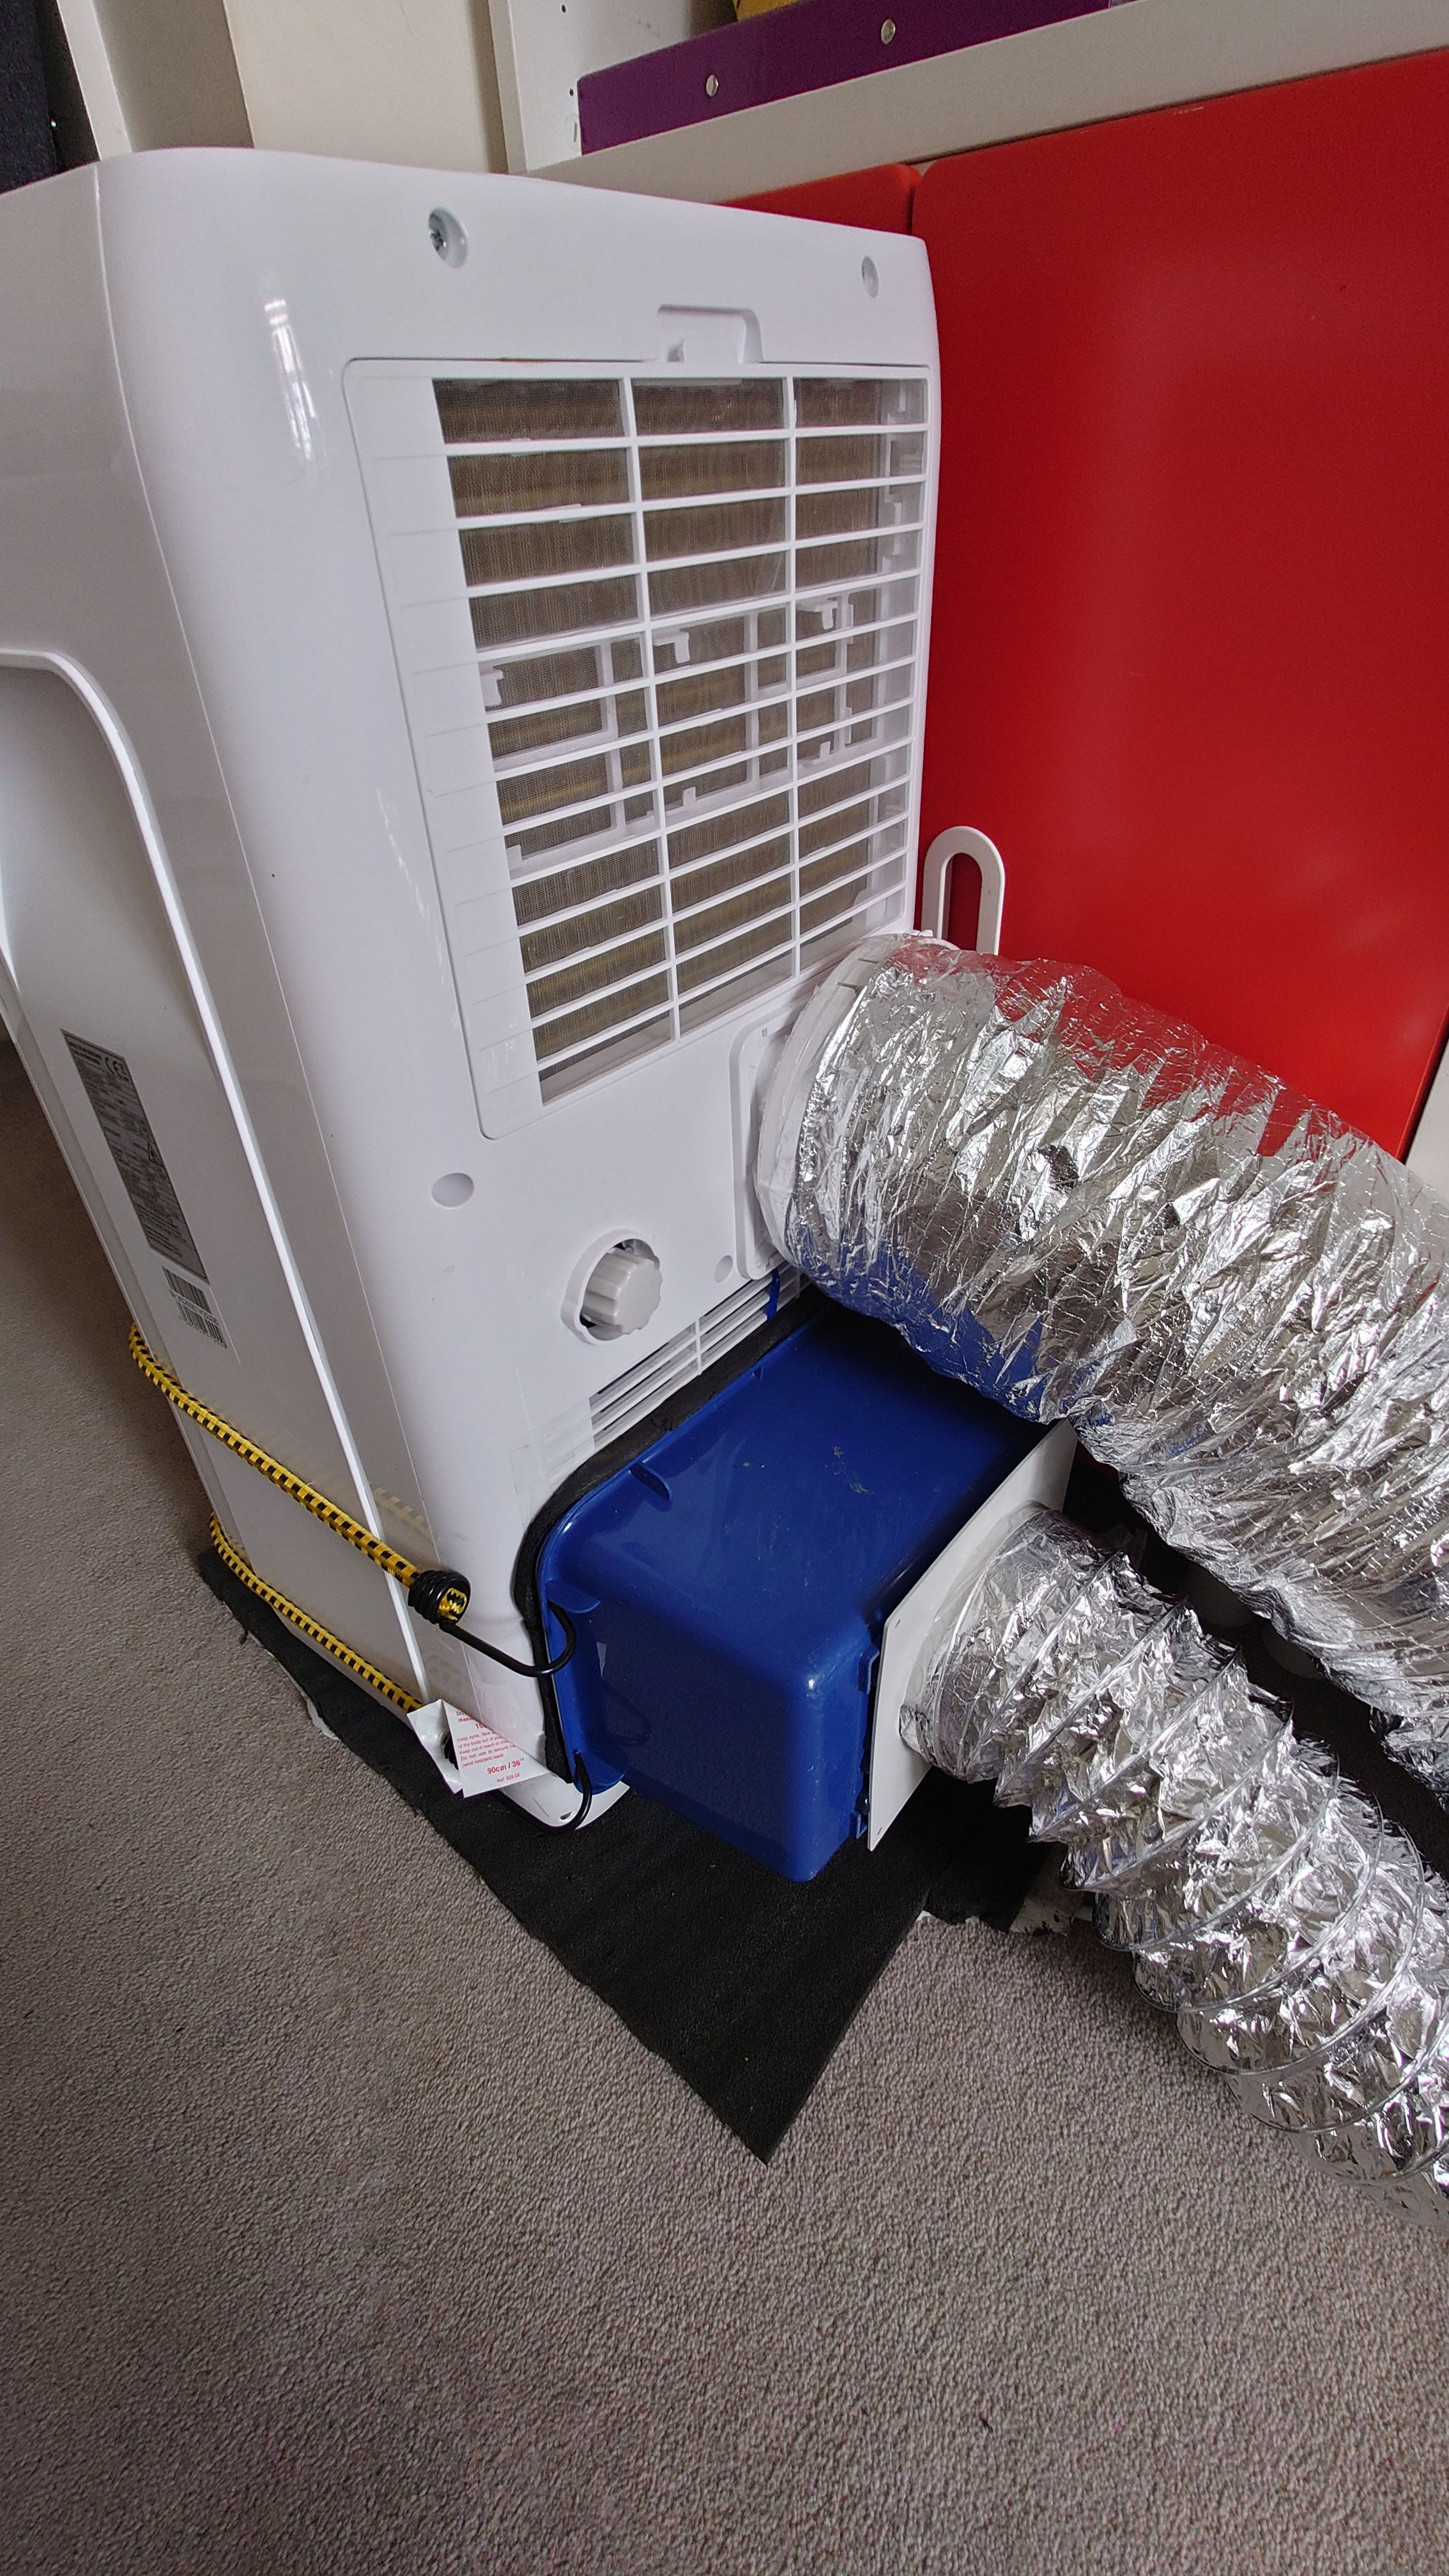
This is the first air conditioner I modified. The unit was purchased in 2019 for £289.99 from Argos. Despite only being 5000 BTU, after conversion to dual hose it was able to cool a medium sized room from 34 C outside temperatures down to 22 C in only a couple of hours.
The conversion was performed in minutes, using items easily purchased at a hardware shop or found around the house:
- An additional air conditioner hose bought from Amazon.
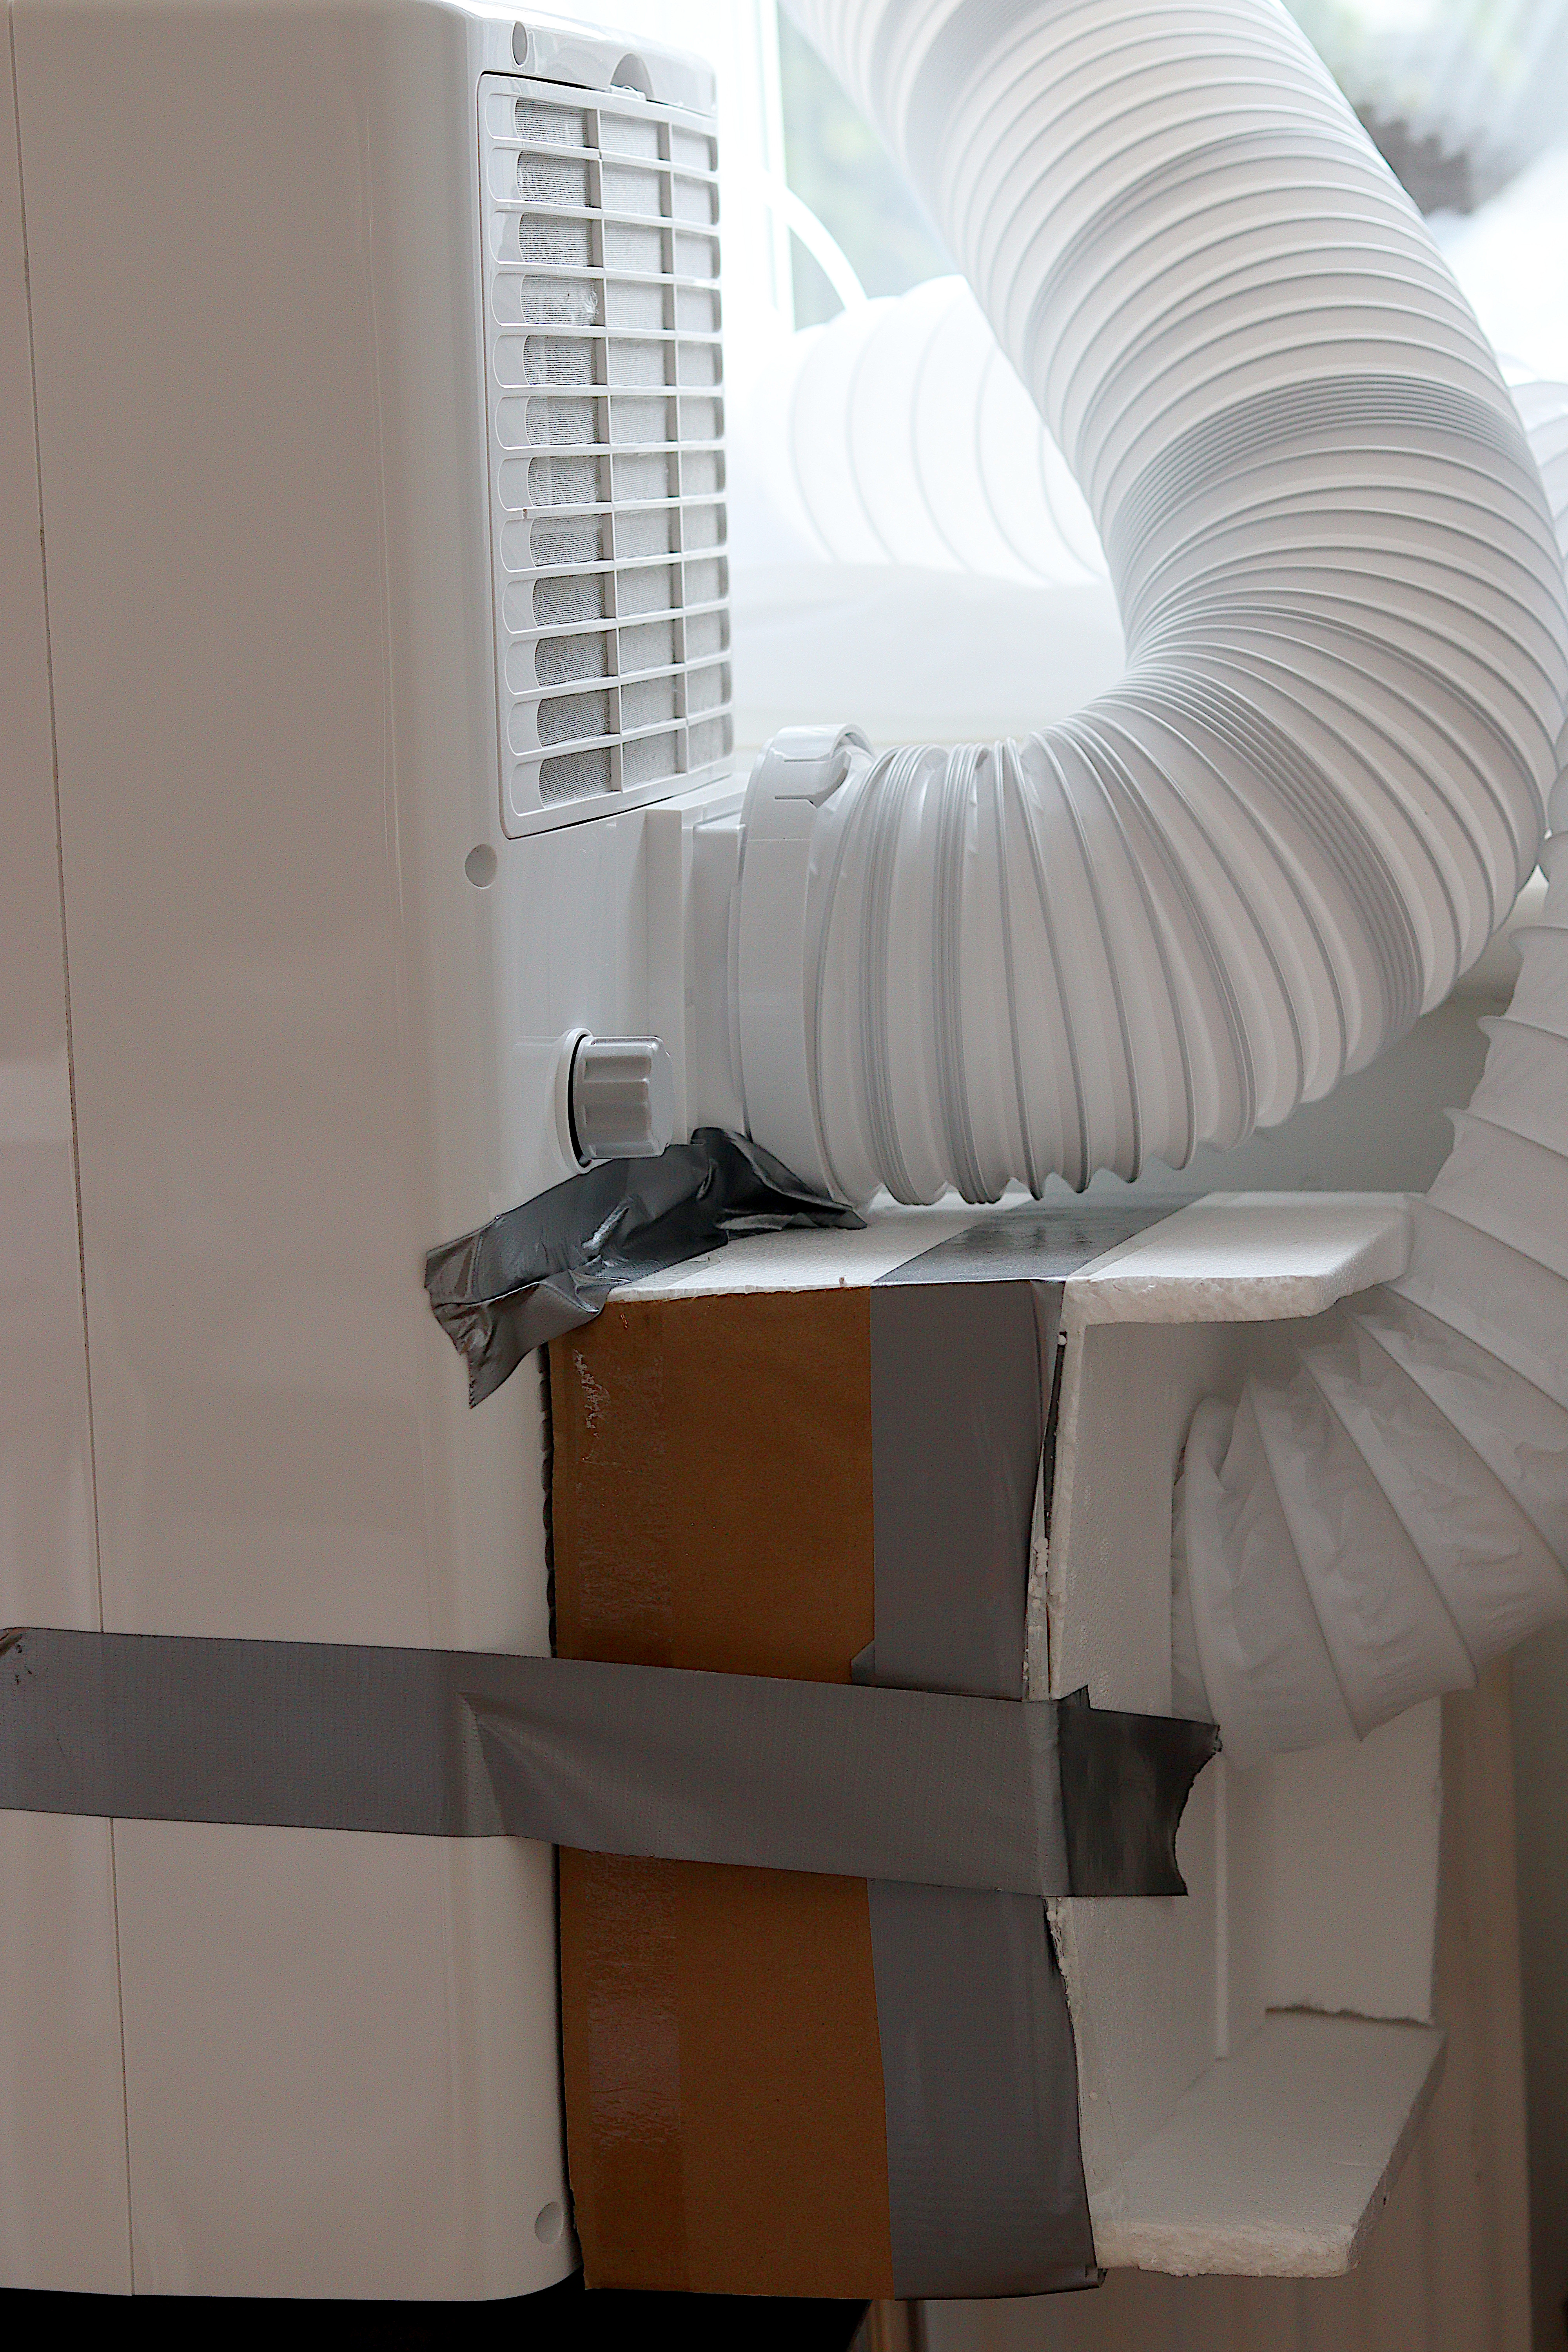
- An old clear tupperware box that was about the same size as the condenser intake port.
- Spare foam strips that came along with the air conditioner to provide a better seal between the box and the unit.
- Plenty of duck tape.
On the Challenge unit, the condenser air intake is the lower grille underneath the exhaust hose port. After ducting this grille into the tumble drier hose, this is the result. Not aesthetically pleasing, but very effective for the three days of summer that the UK gets every year:
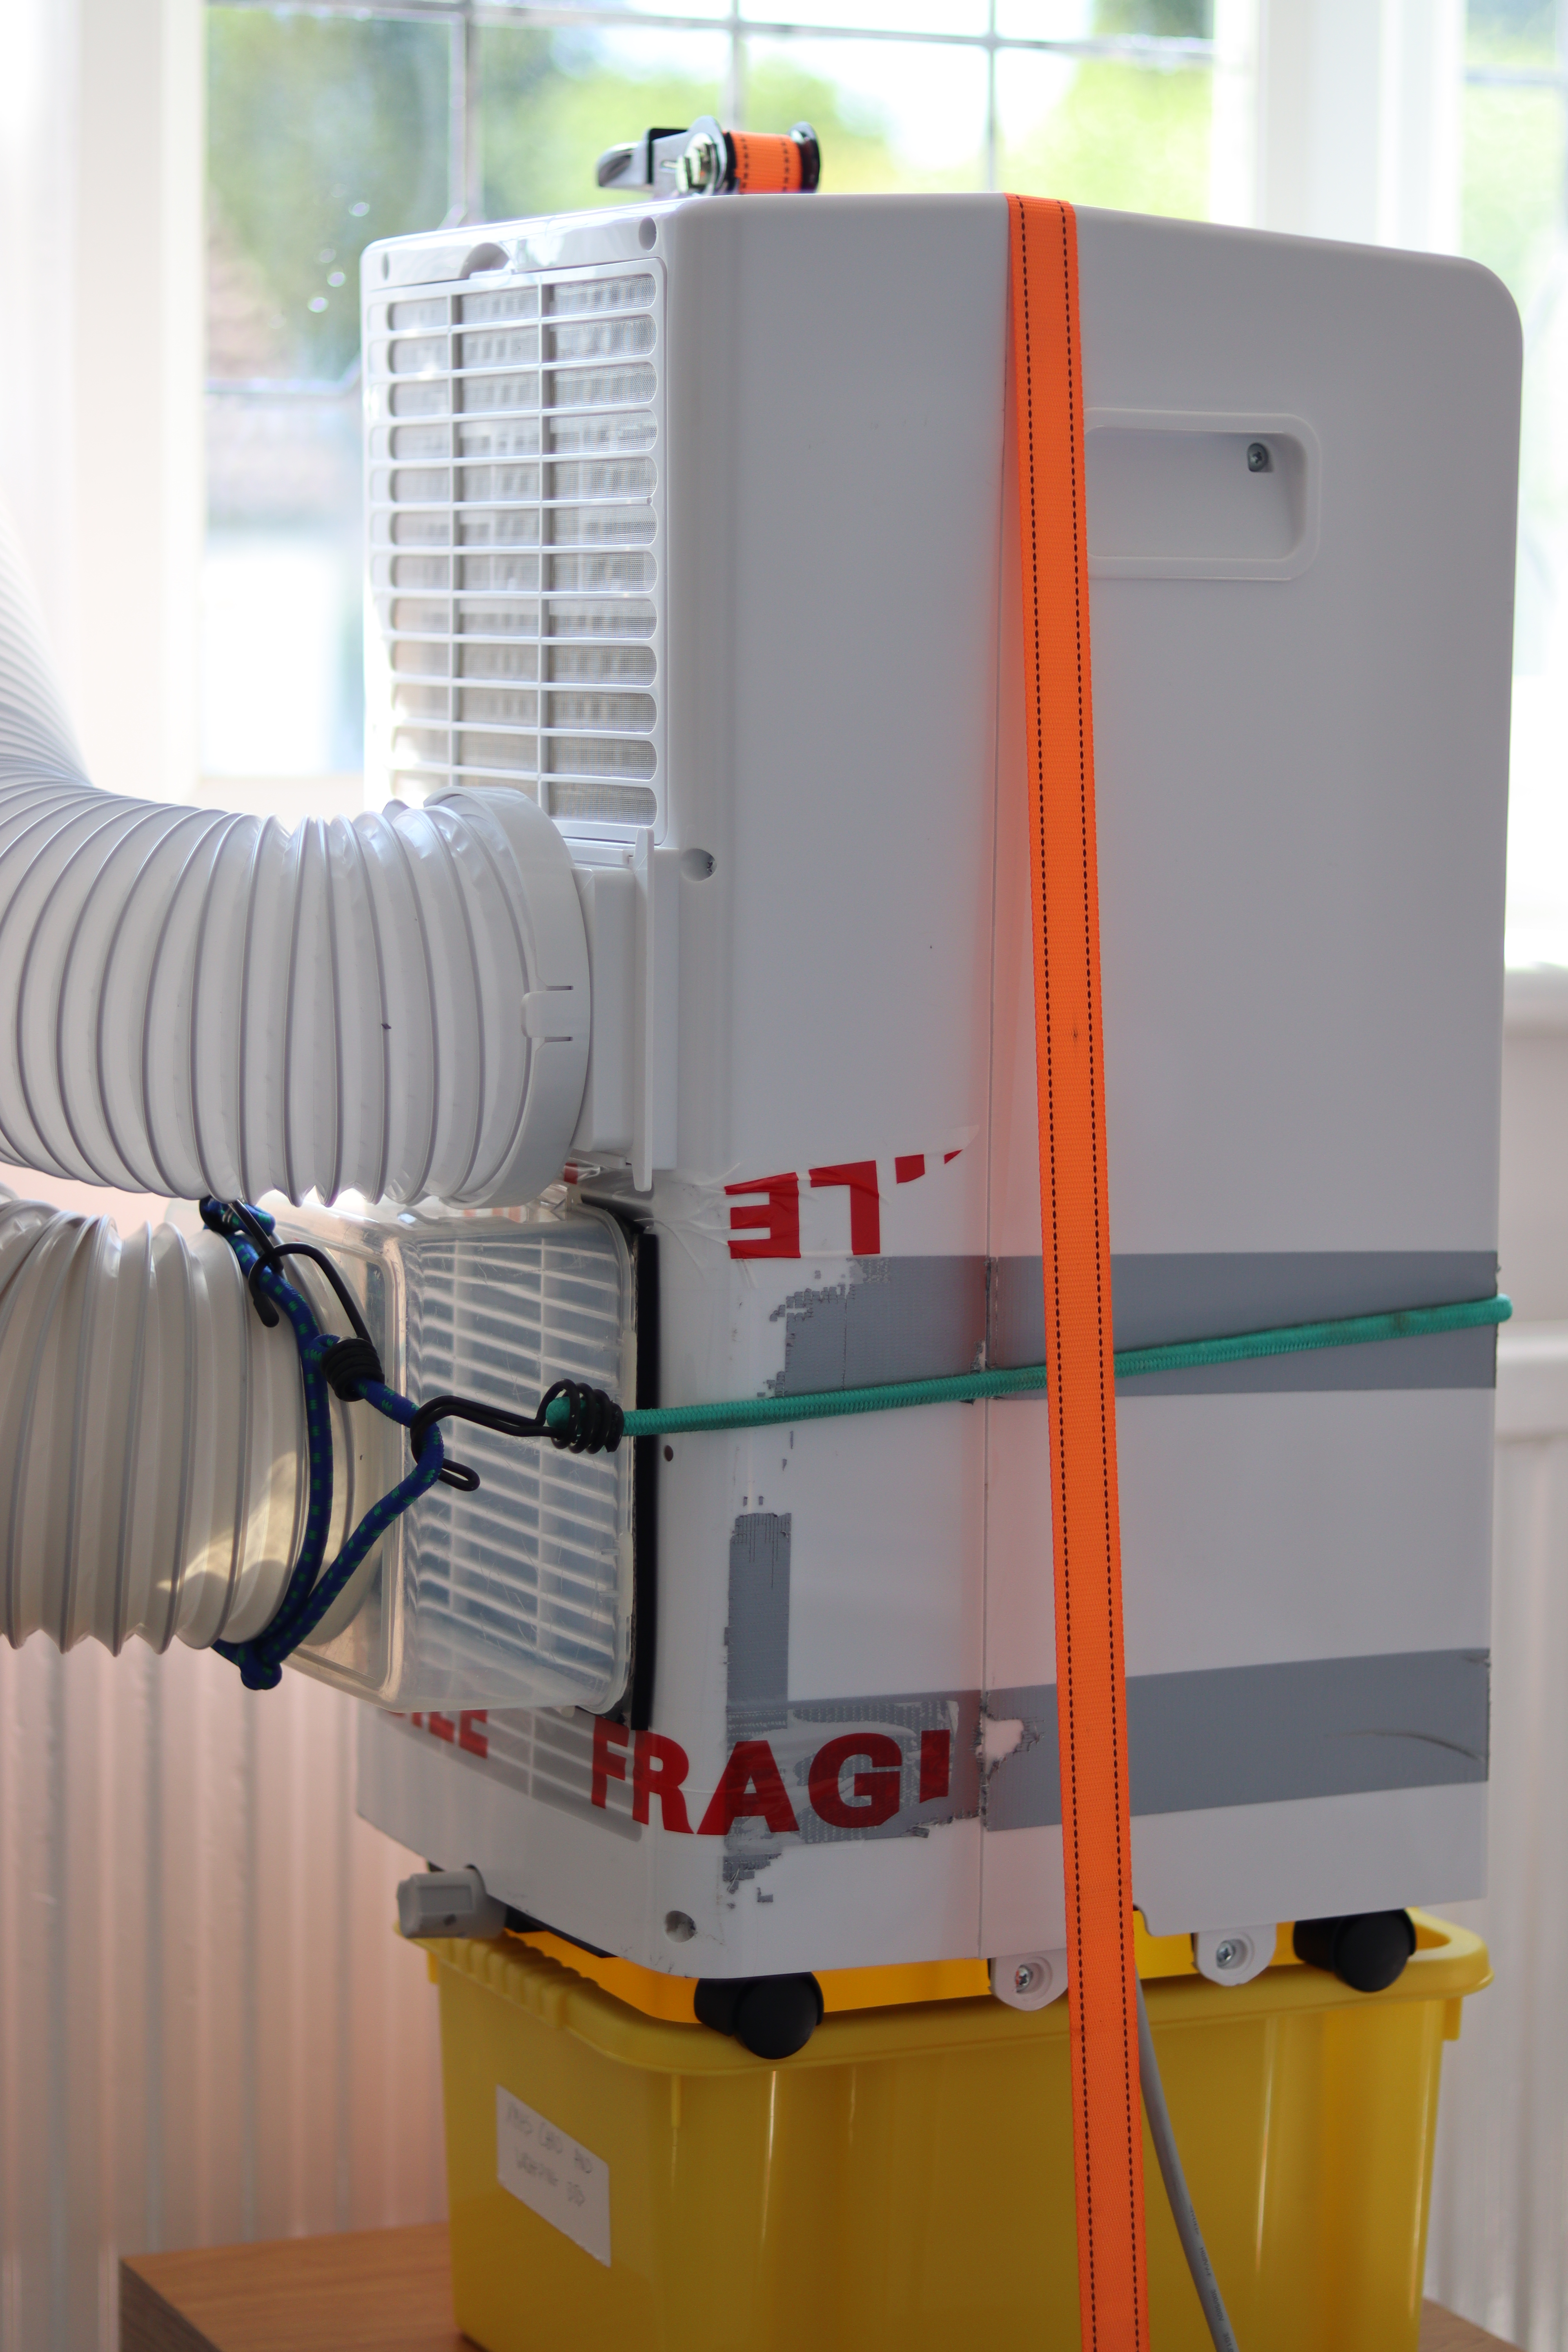
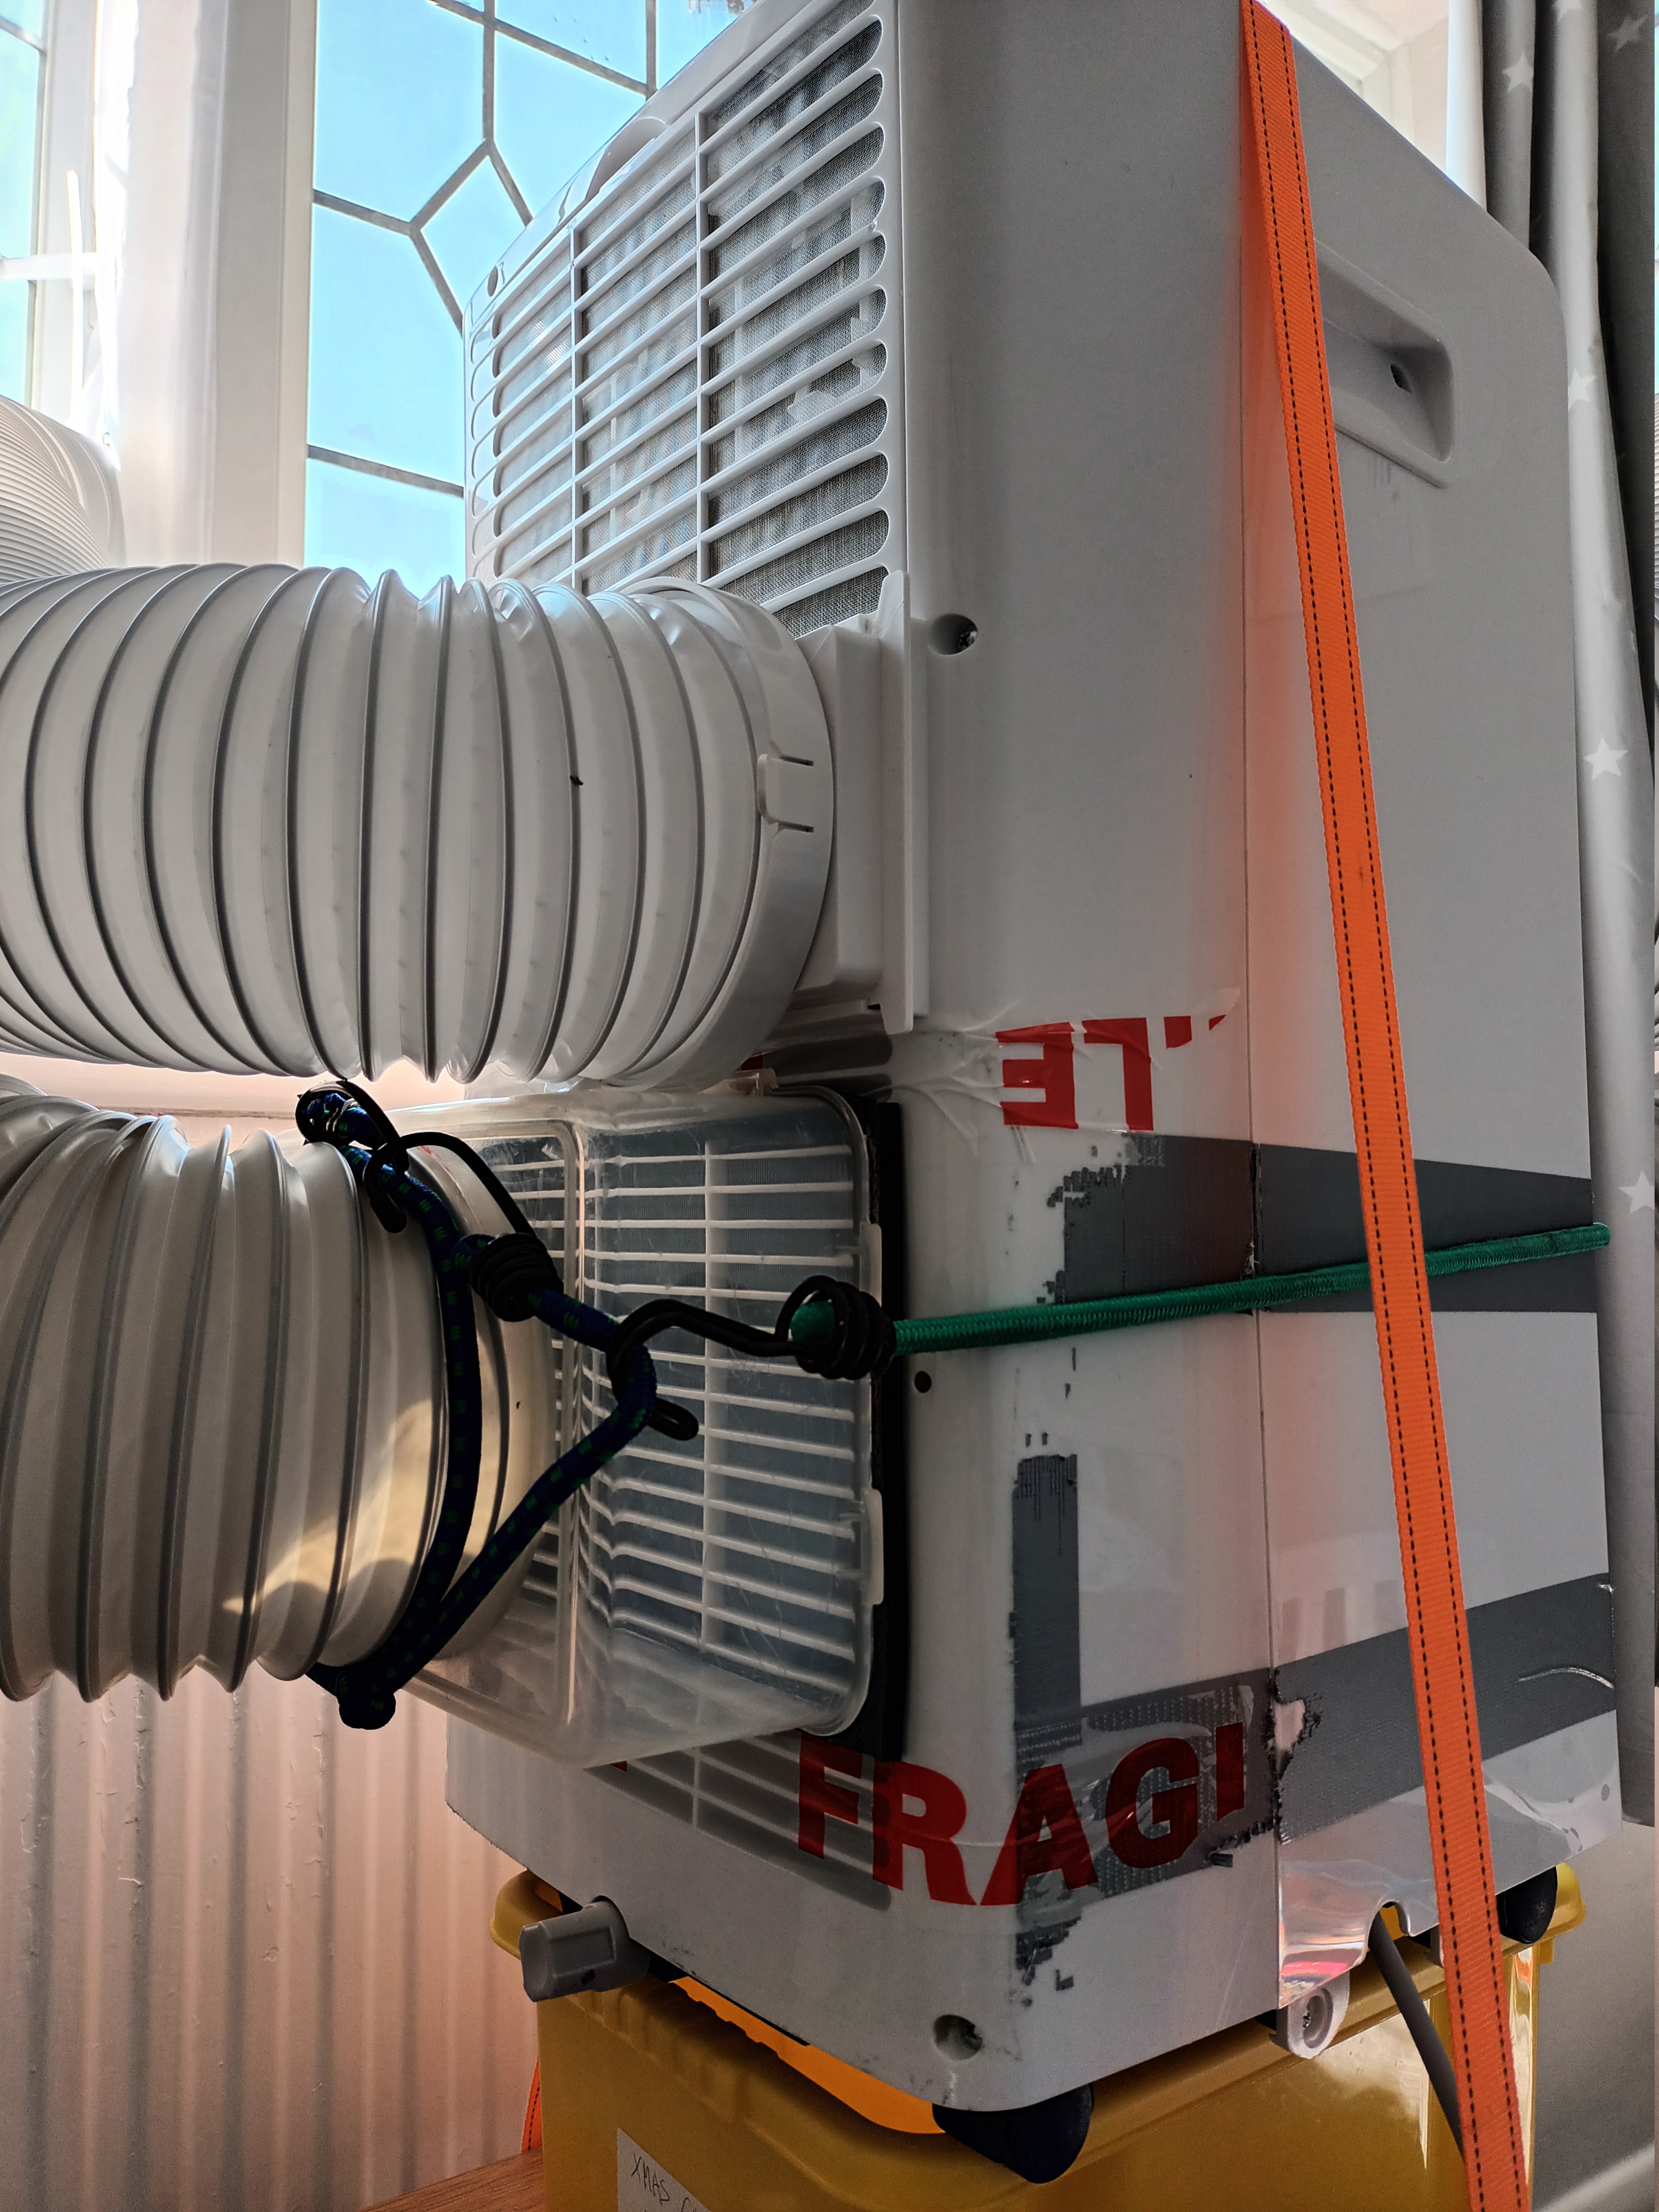
Originally, I acheived this using a polystyrene box, carboard and a tumble drier hose. Whilst it worked fine, this wasn’t the safest approach so next time I used a proper air conditioning hose and a sturdy tupperware box:
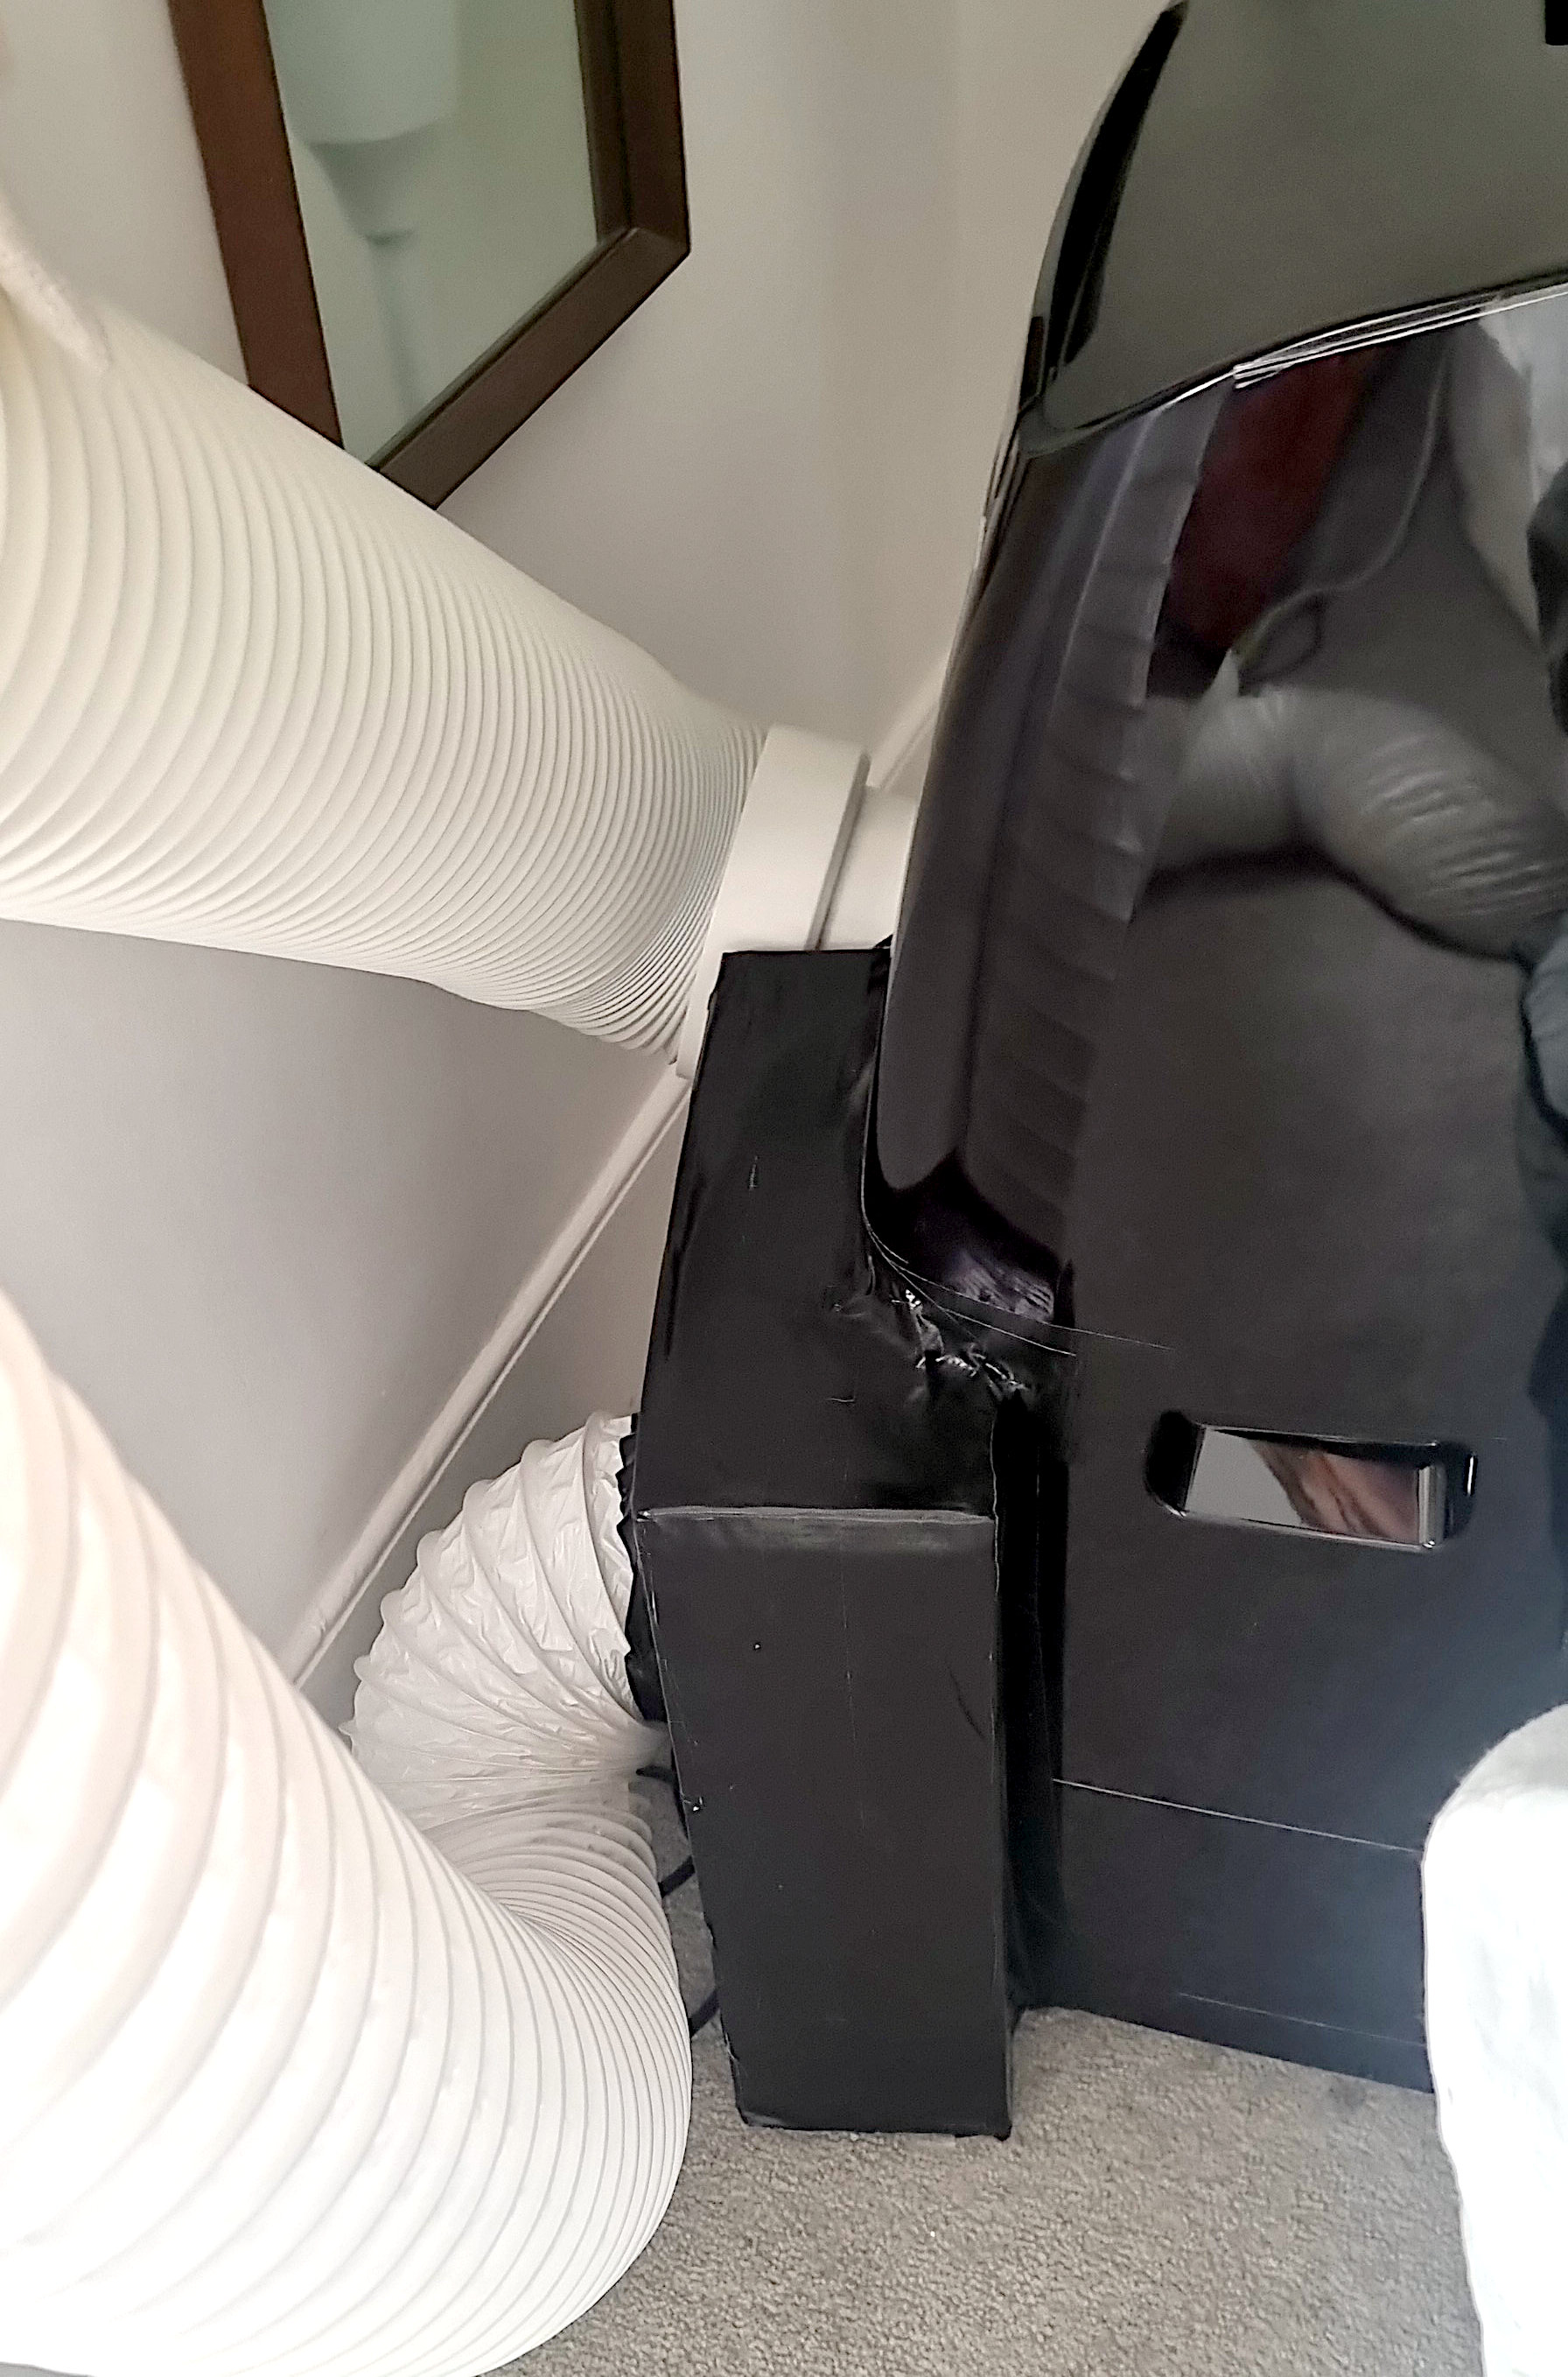
Delonghi Pinguino EX120
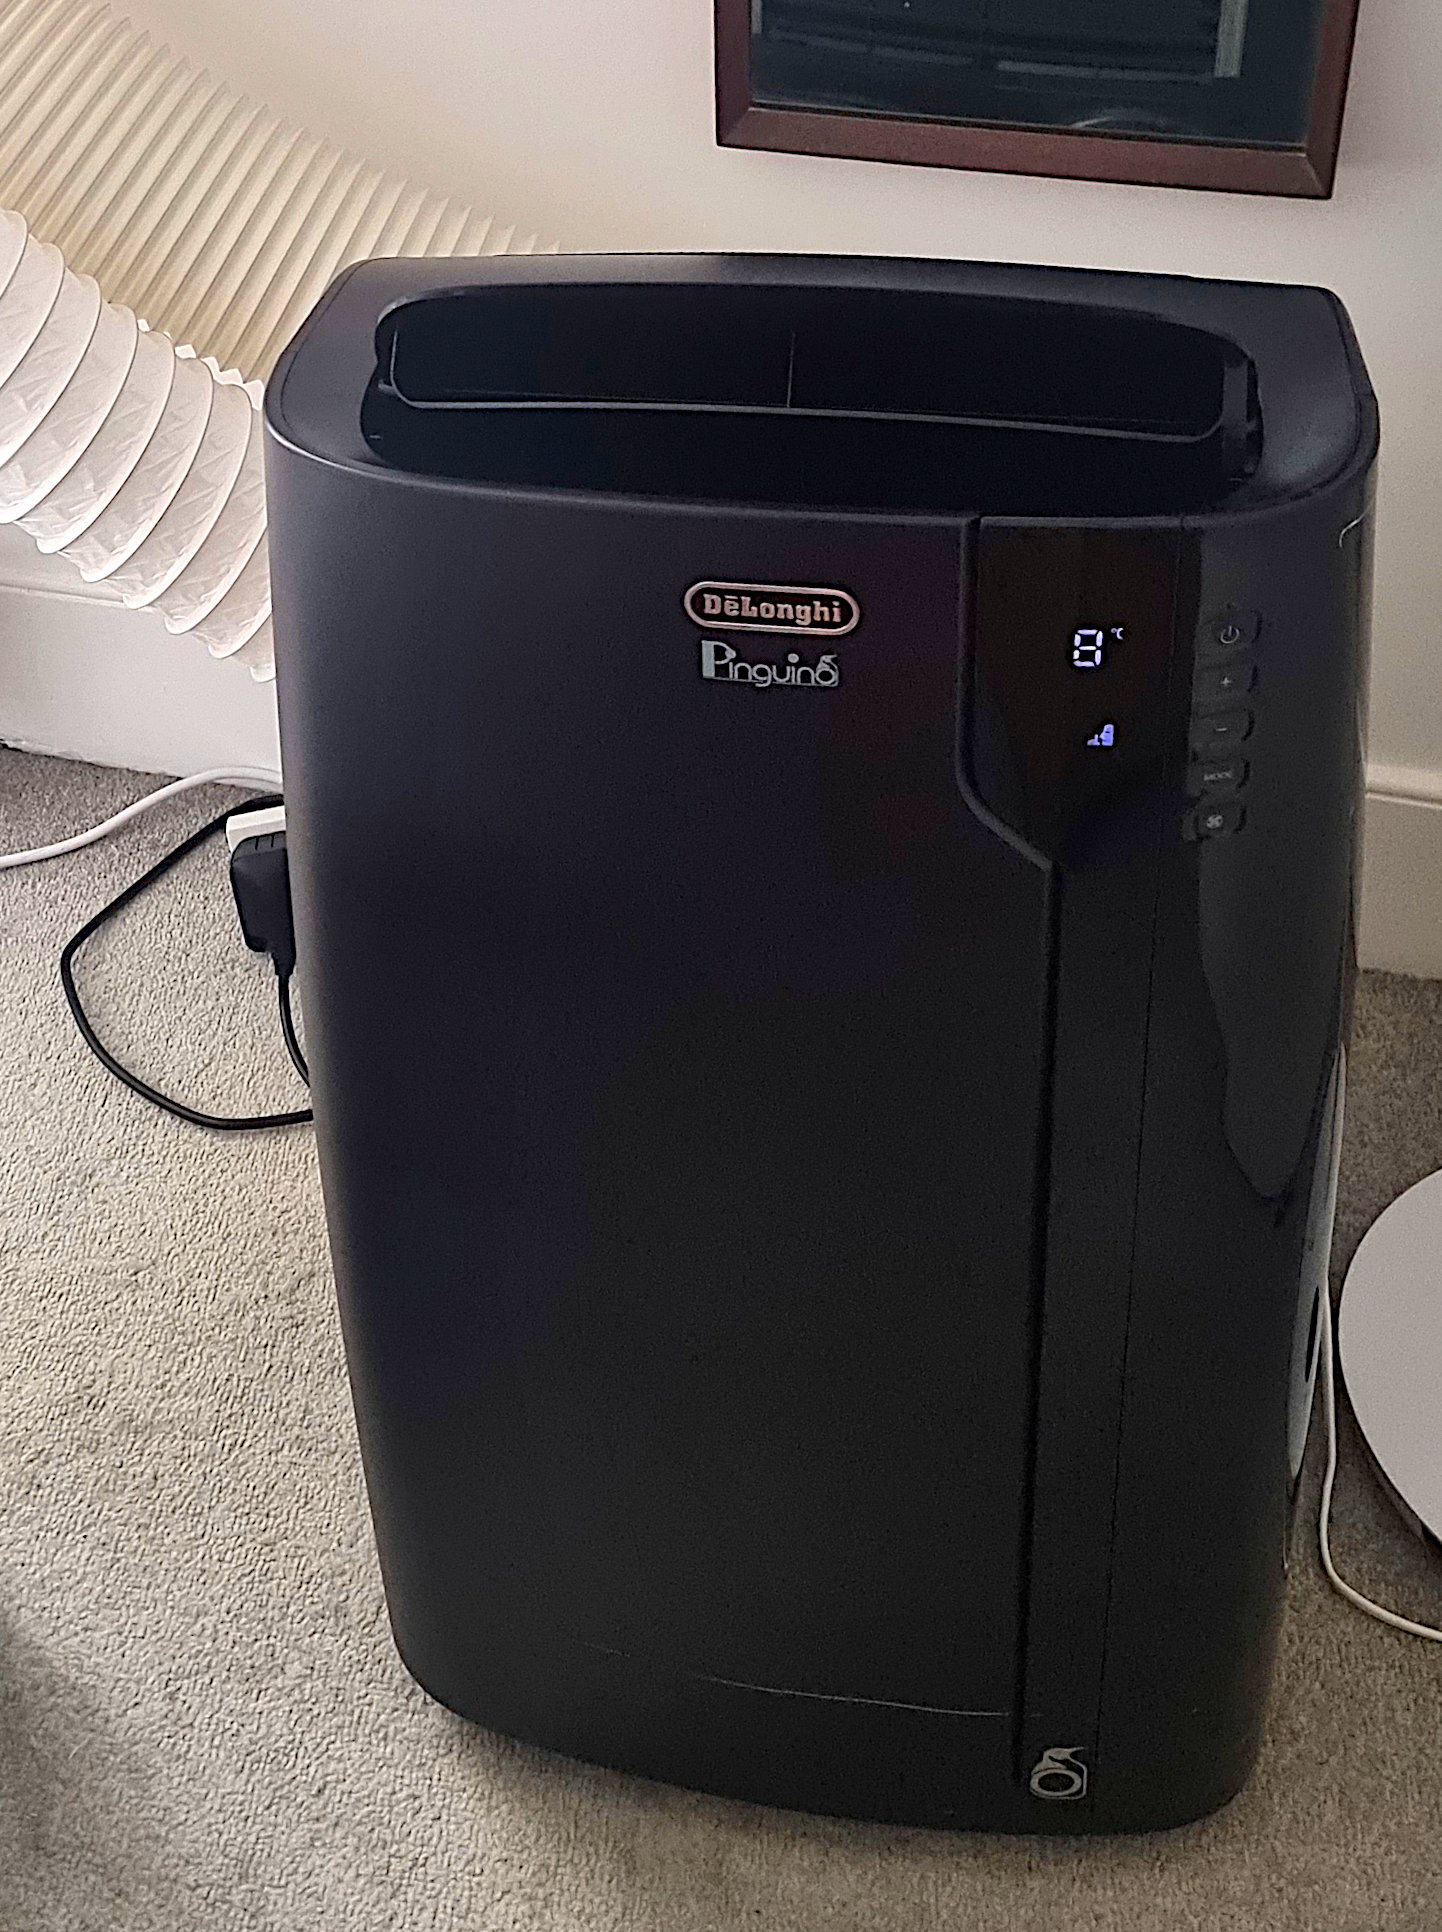
Robbie has successfully converted the Delonghi Pinguino EX120 Silent 11500 BTU Portable Air Conditioner. The lower rear grille was ducted to acheive this:
Matsui MAT-7KACW
Matthew has sent in a guide to their successful modification of a Matsui MAT-7KACW:
Dual Hose Adapter
I tested the vents to confirm that the bottom vent under the existing hose was the correct one to attach to.
I measured the dimensions of the vent and screwed together a frame out of wood that size. I drew around the frame onto some plywood and cut it out with a handsaw.
I attached the plywood to the frame with a hammer and some pins and some no more nails. I then drew around the hose adapter for the vent side onto the ply and cut it out by drilling holes and using a jigsaw. I screwed then hose adapter to the wood.
I lined up the rear plastic vent with the wooden frame and marked the screw holes. I used longer screws of the some size and thread to attach the wooden frame to the air conditioning unit through the plastic vent and existing mounting holes.
I attached the pipes to connect the new wooden frame 2nd hose adapter to the window kit. And the existing hose point to the window kit.
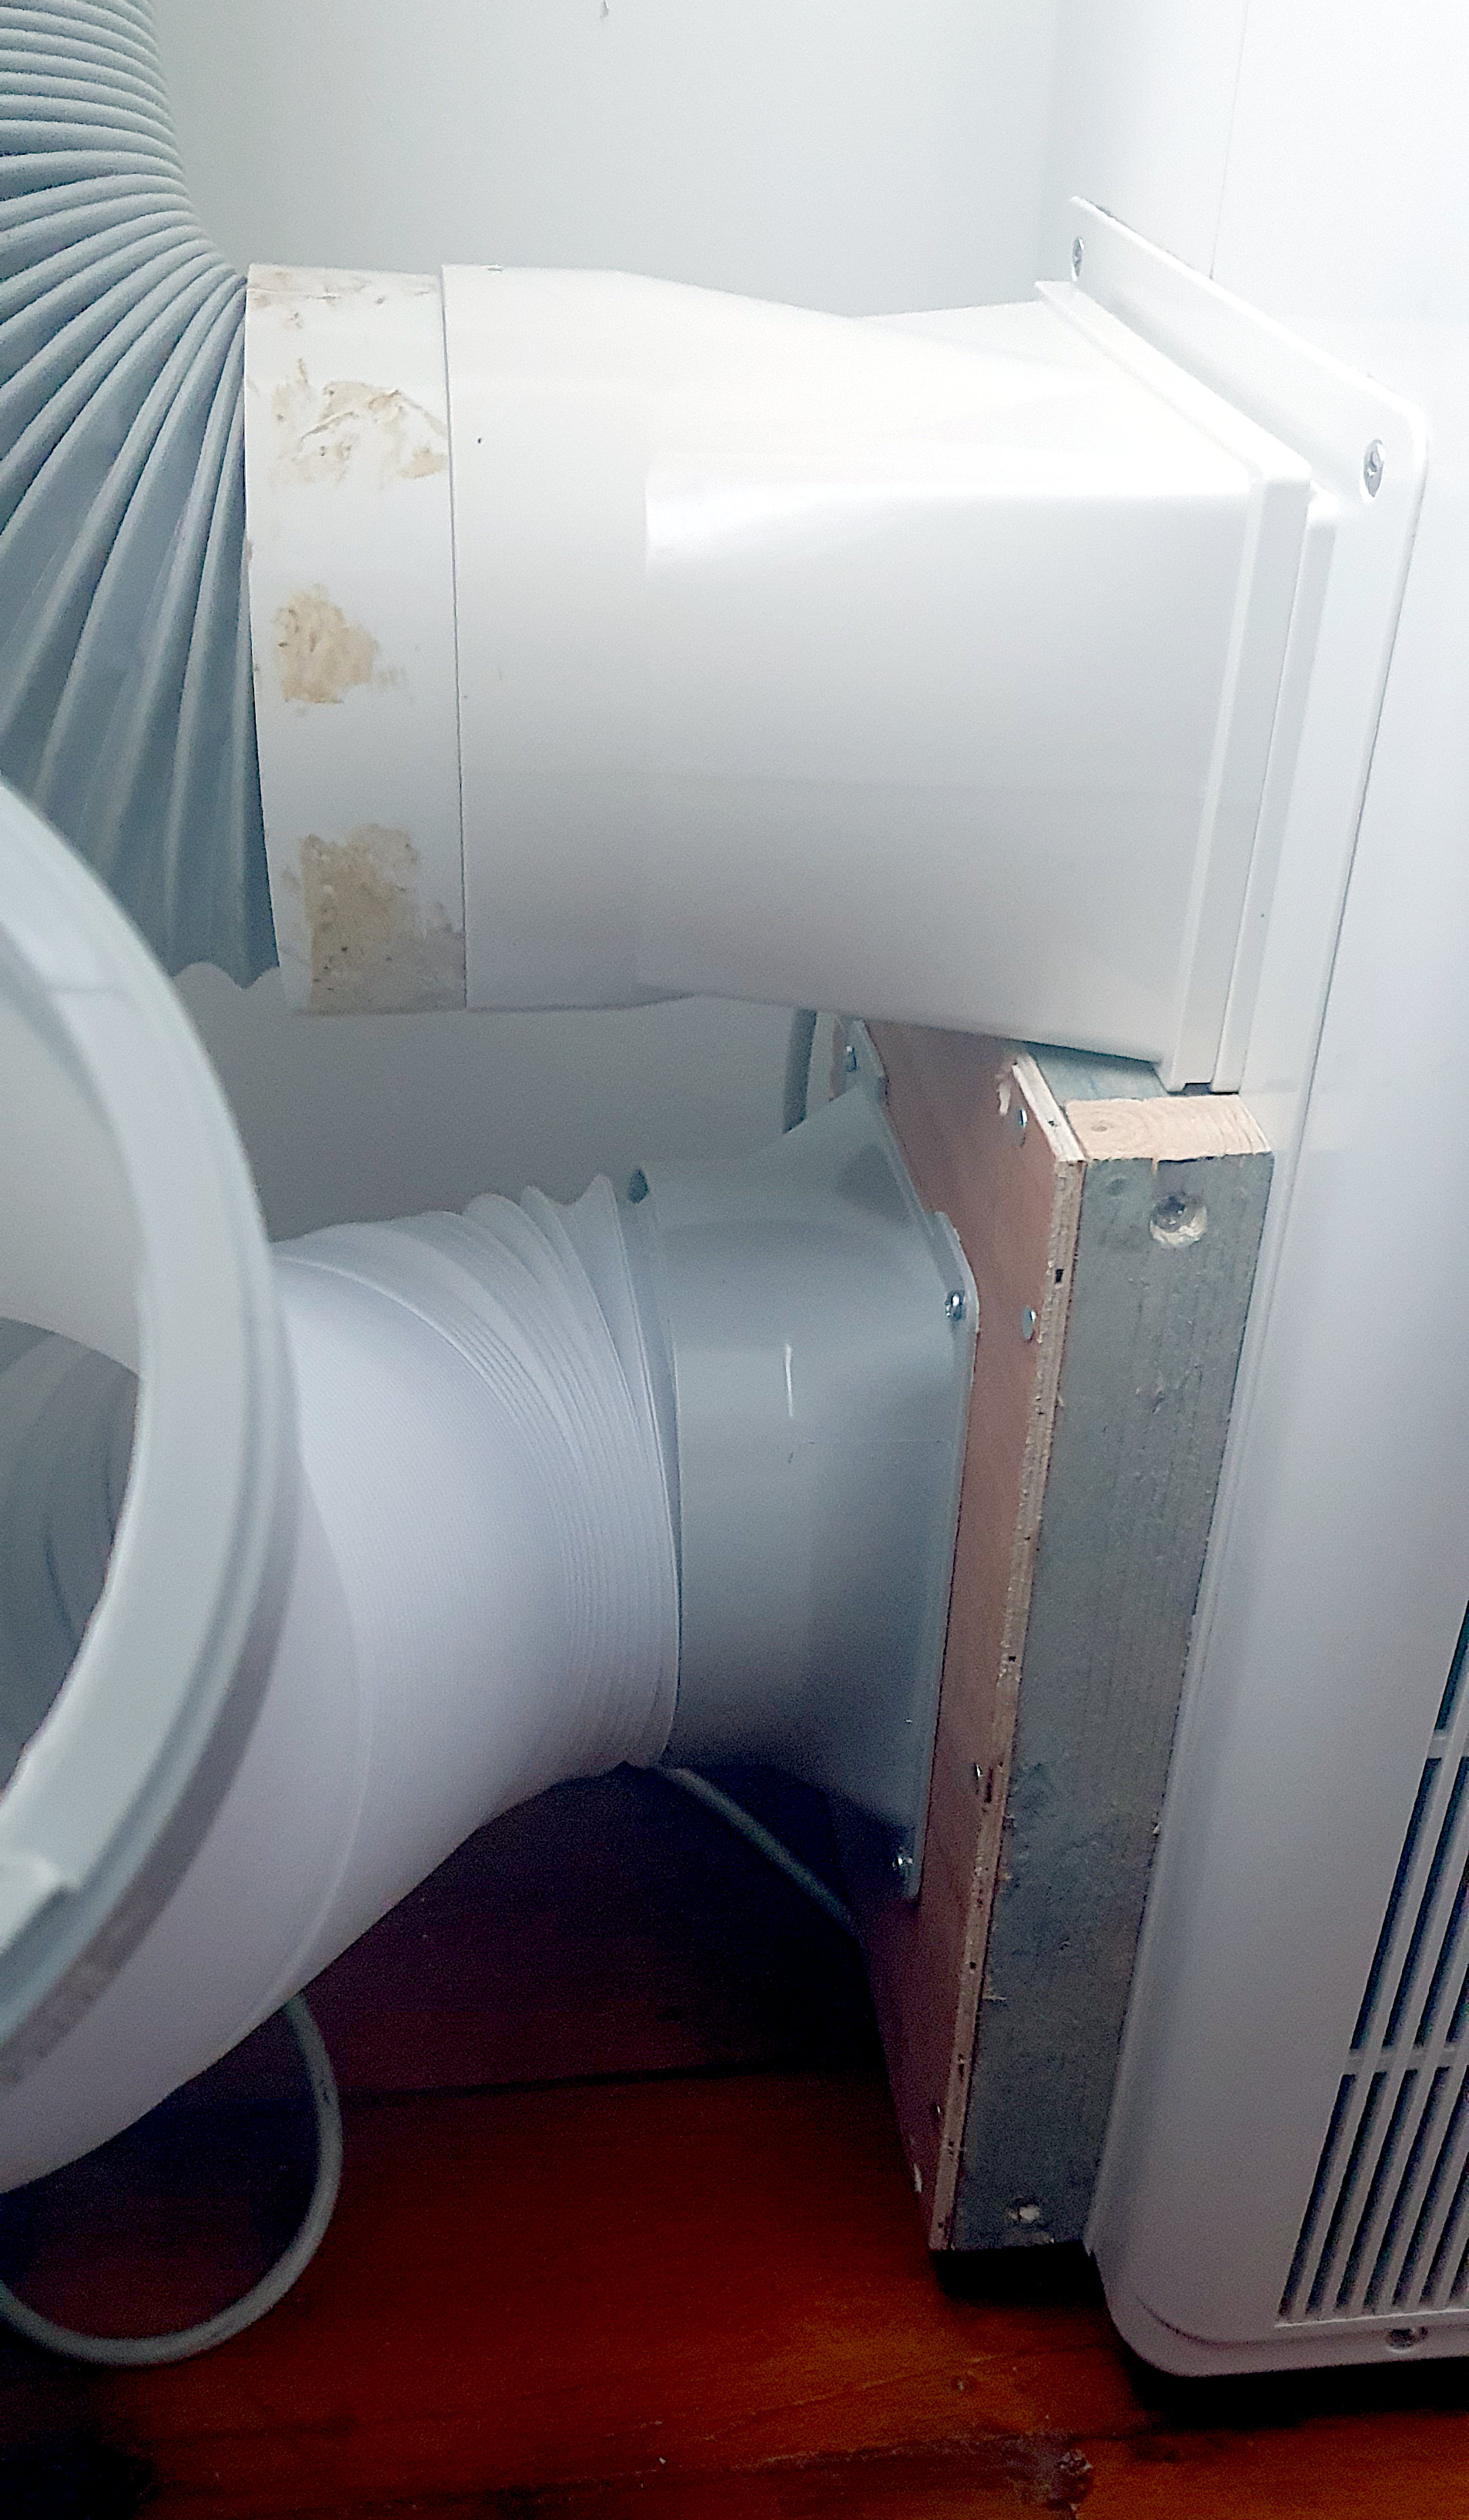
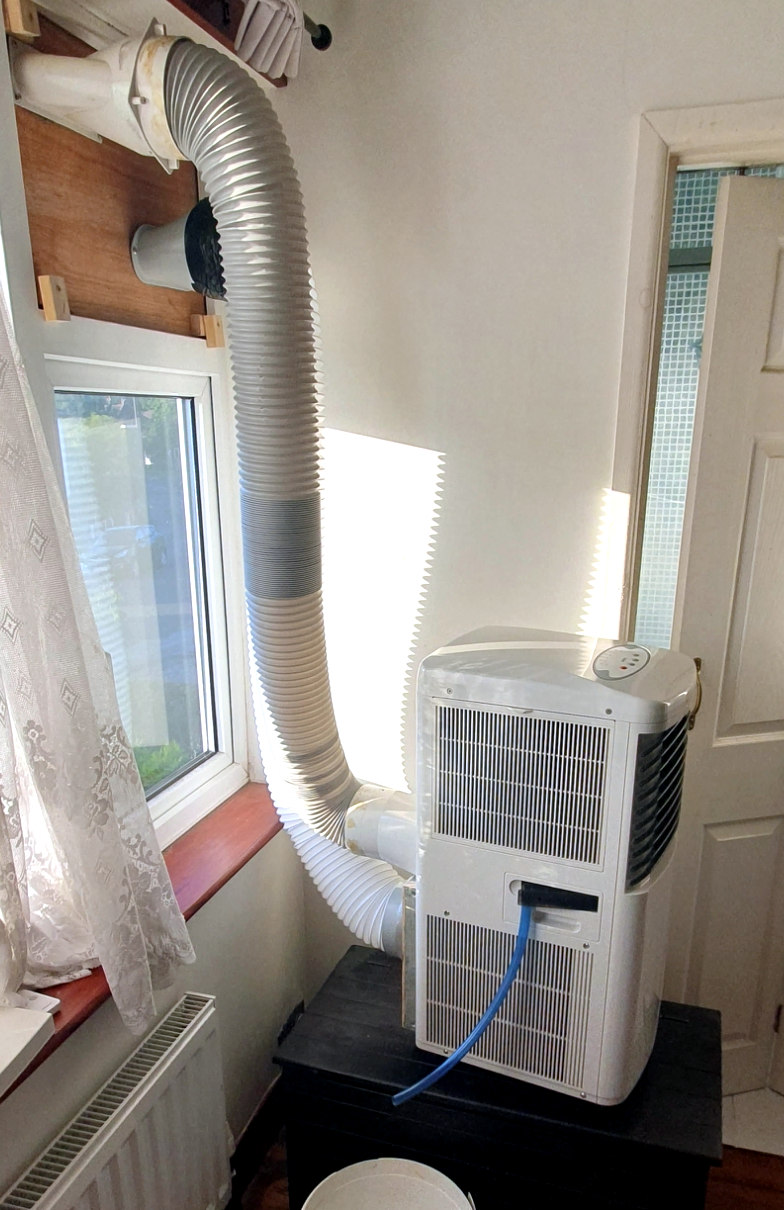
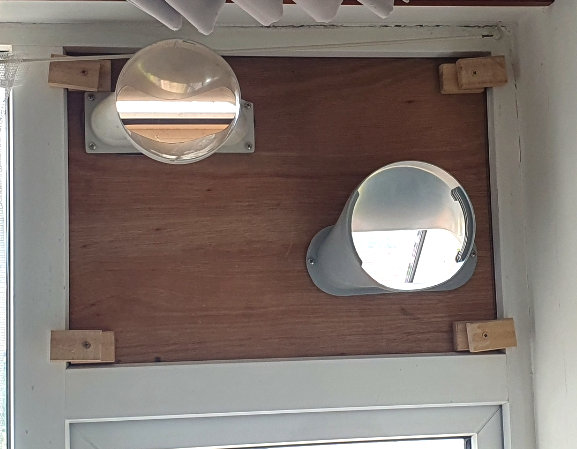
Including a custom made window kit, which looks very sturdy!
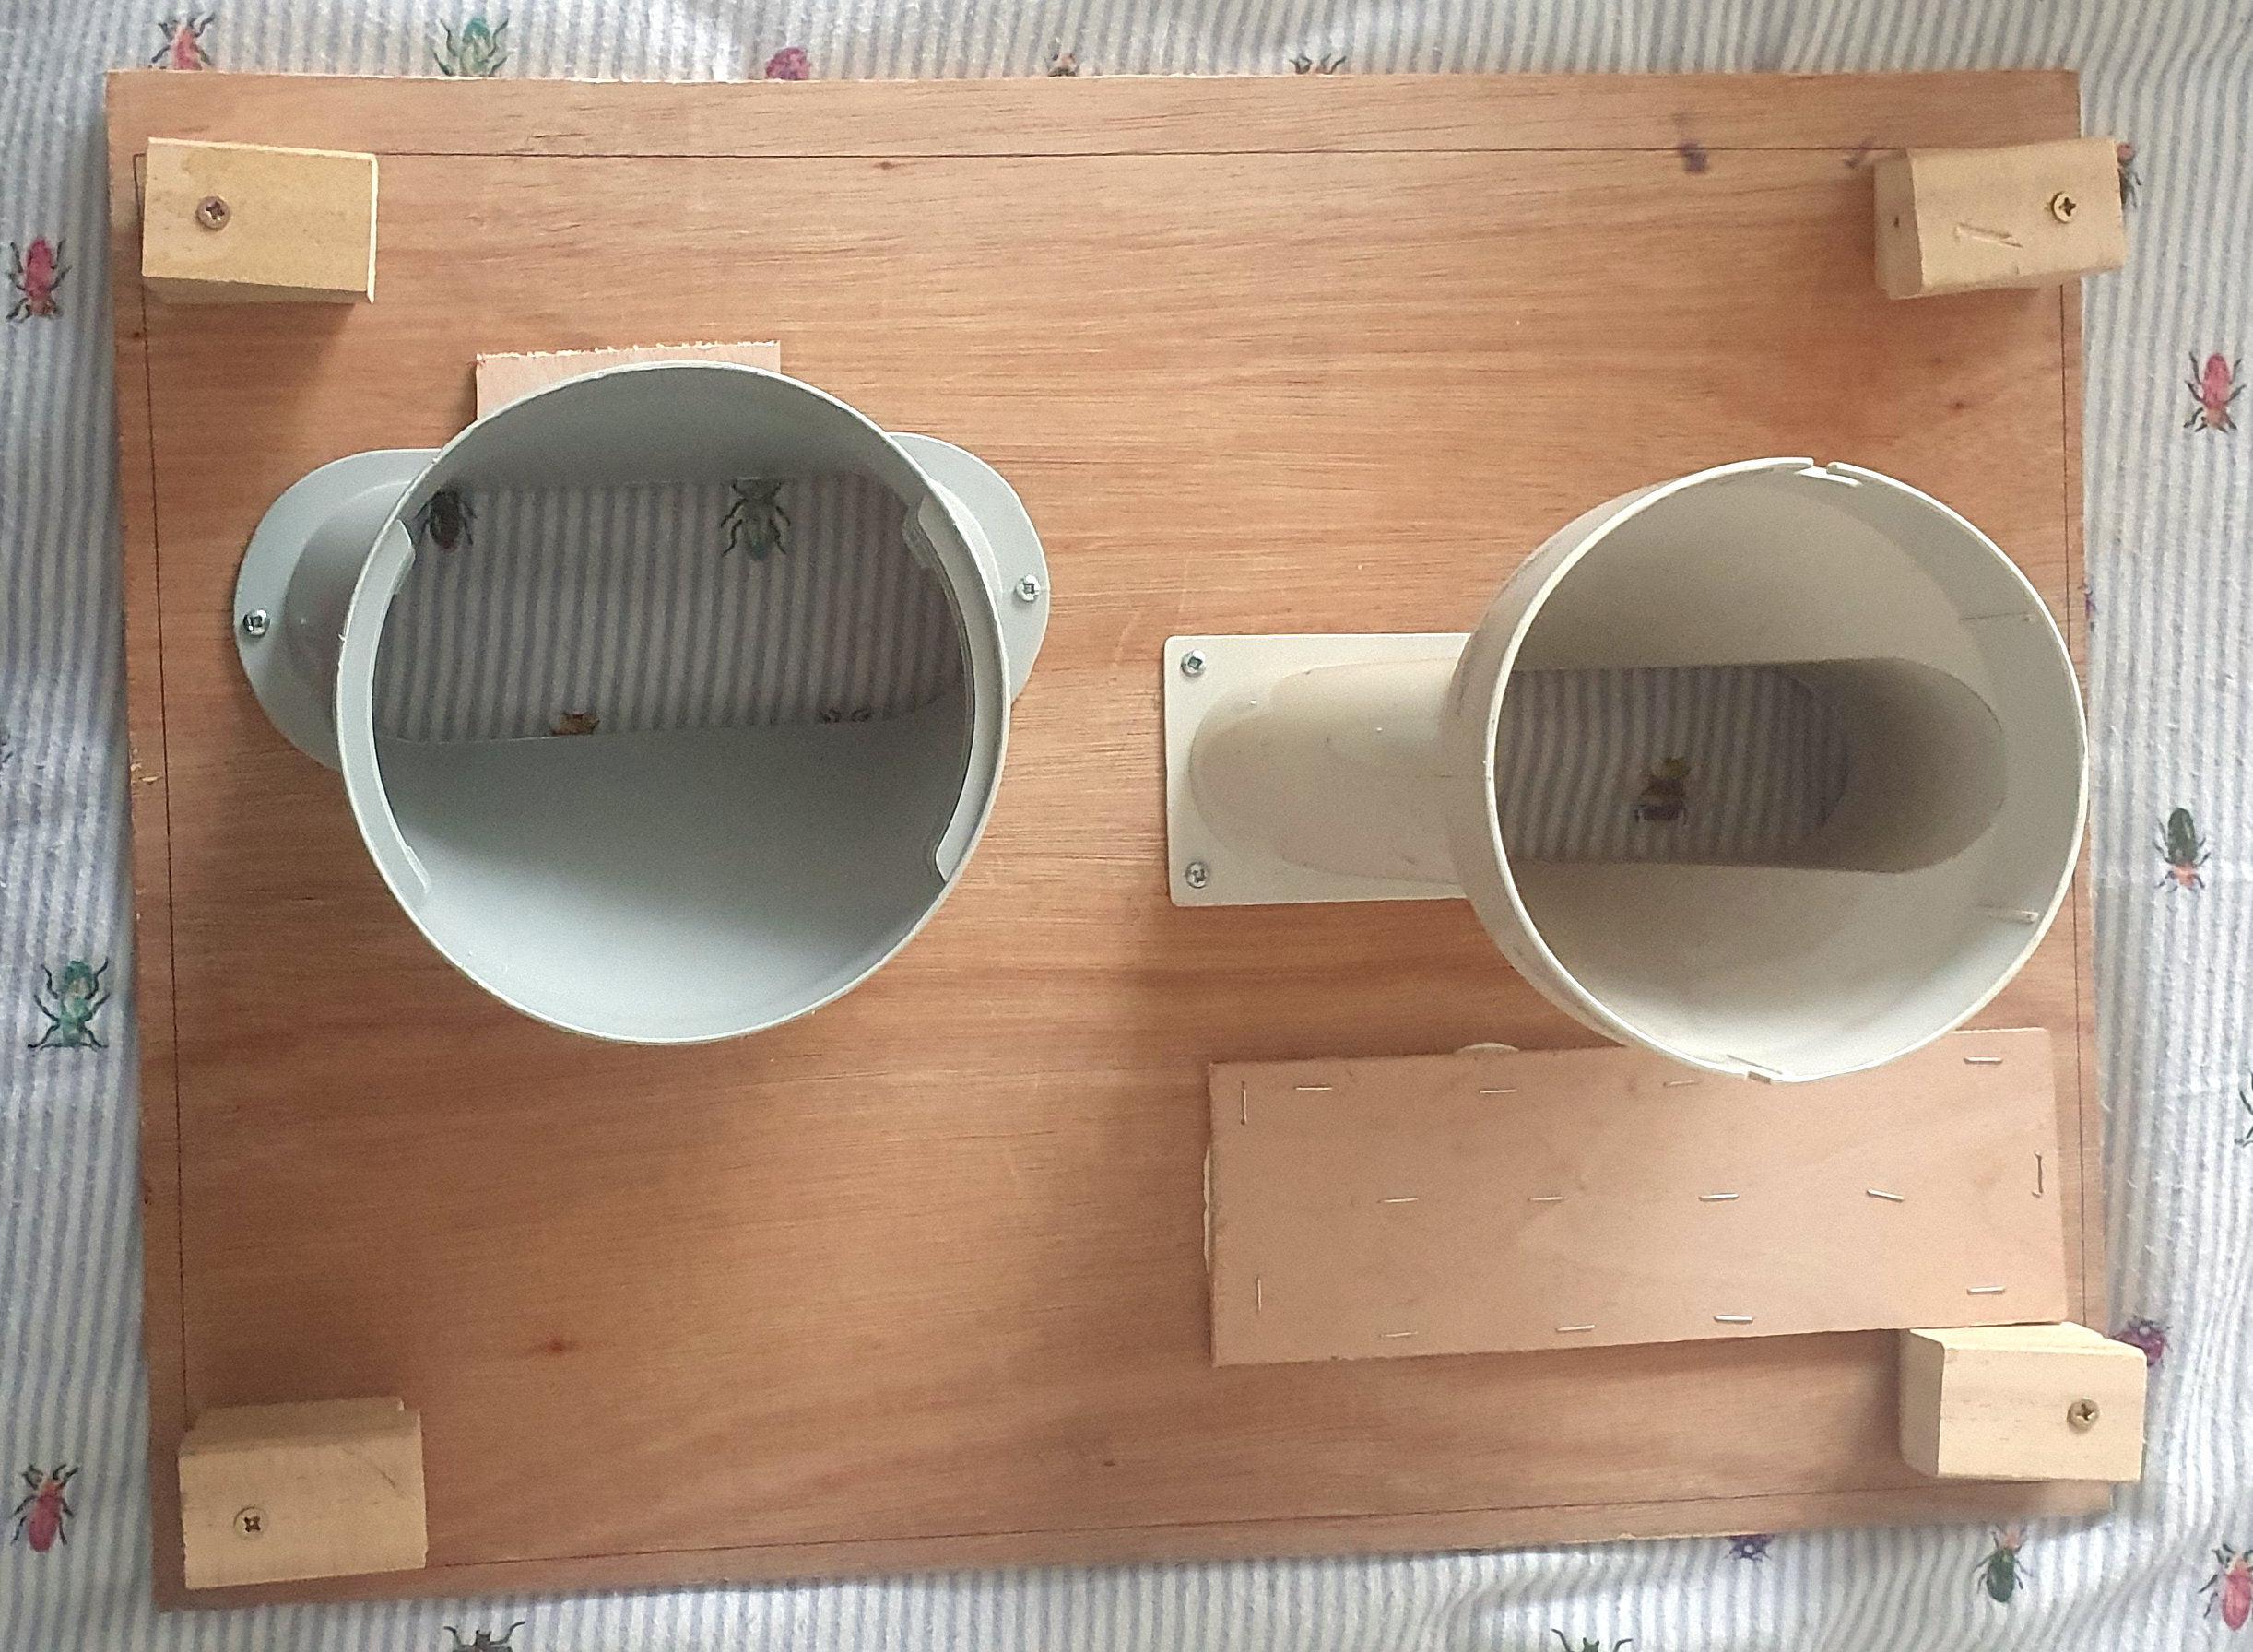
Window Kit
I measured the dimensions of my window and cut a piece of plywood with a handsaw such that it would block my window.
I then drew around the end of the 2 hose adapters, drilled holes then used a jigsaw to cut them out.
I then measured the depth of my window and cut blocks of wood of approx that depth. I drilled a hole through another pieces of wood and then drilled them together to create the locking mechanism to hold it in place.
It’s fitted with the blocks turned inwards, and our out of the window narrow side first, then rotated and brought up into the window slot, the blocks are then rotated to overlap with the window frame and secure it.
The hose adapters and screwed into the plywood and left attached. The hose is removed from this as and when needed.
Sharp CV-H9XR
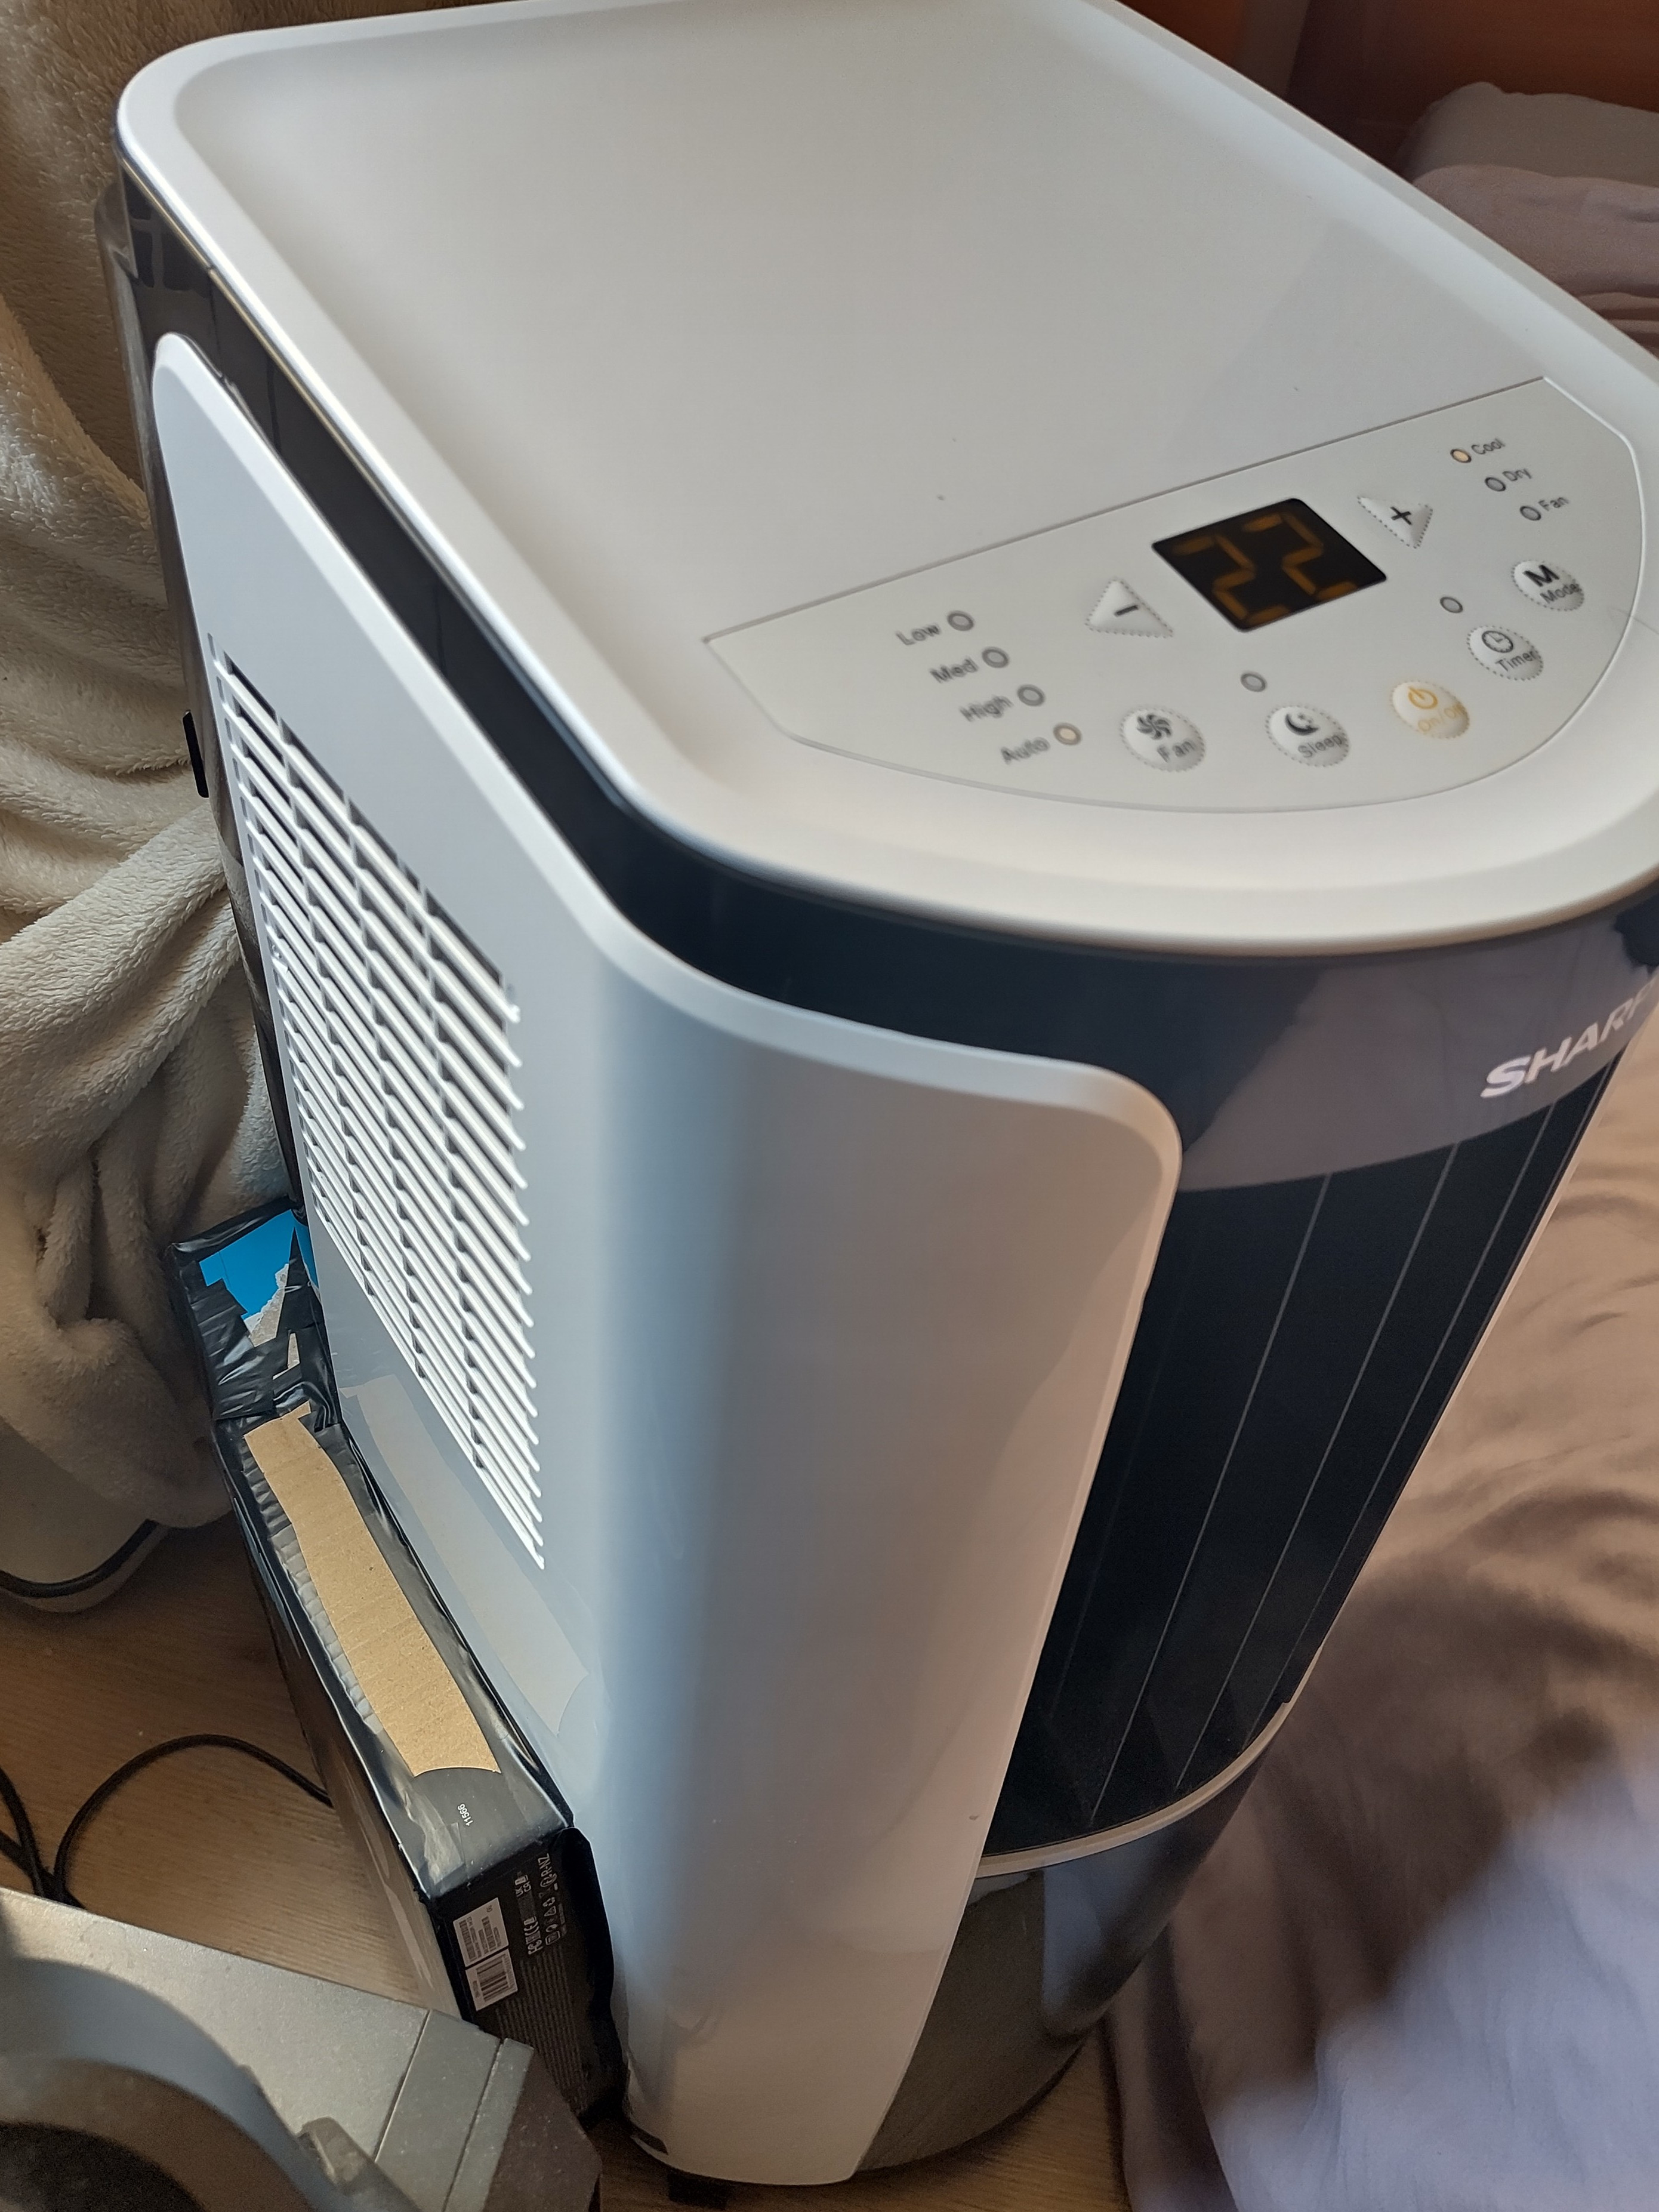
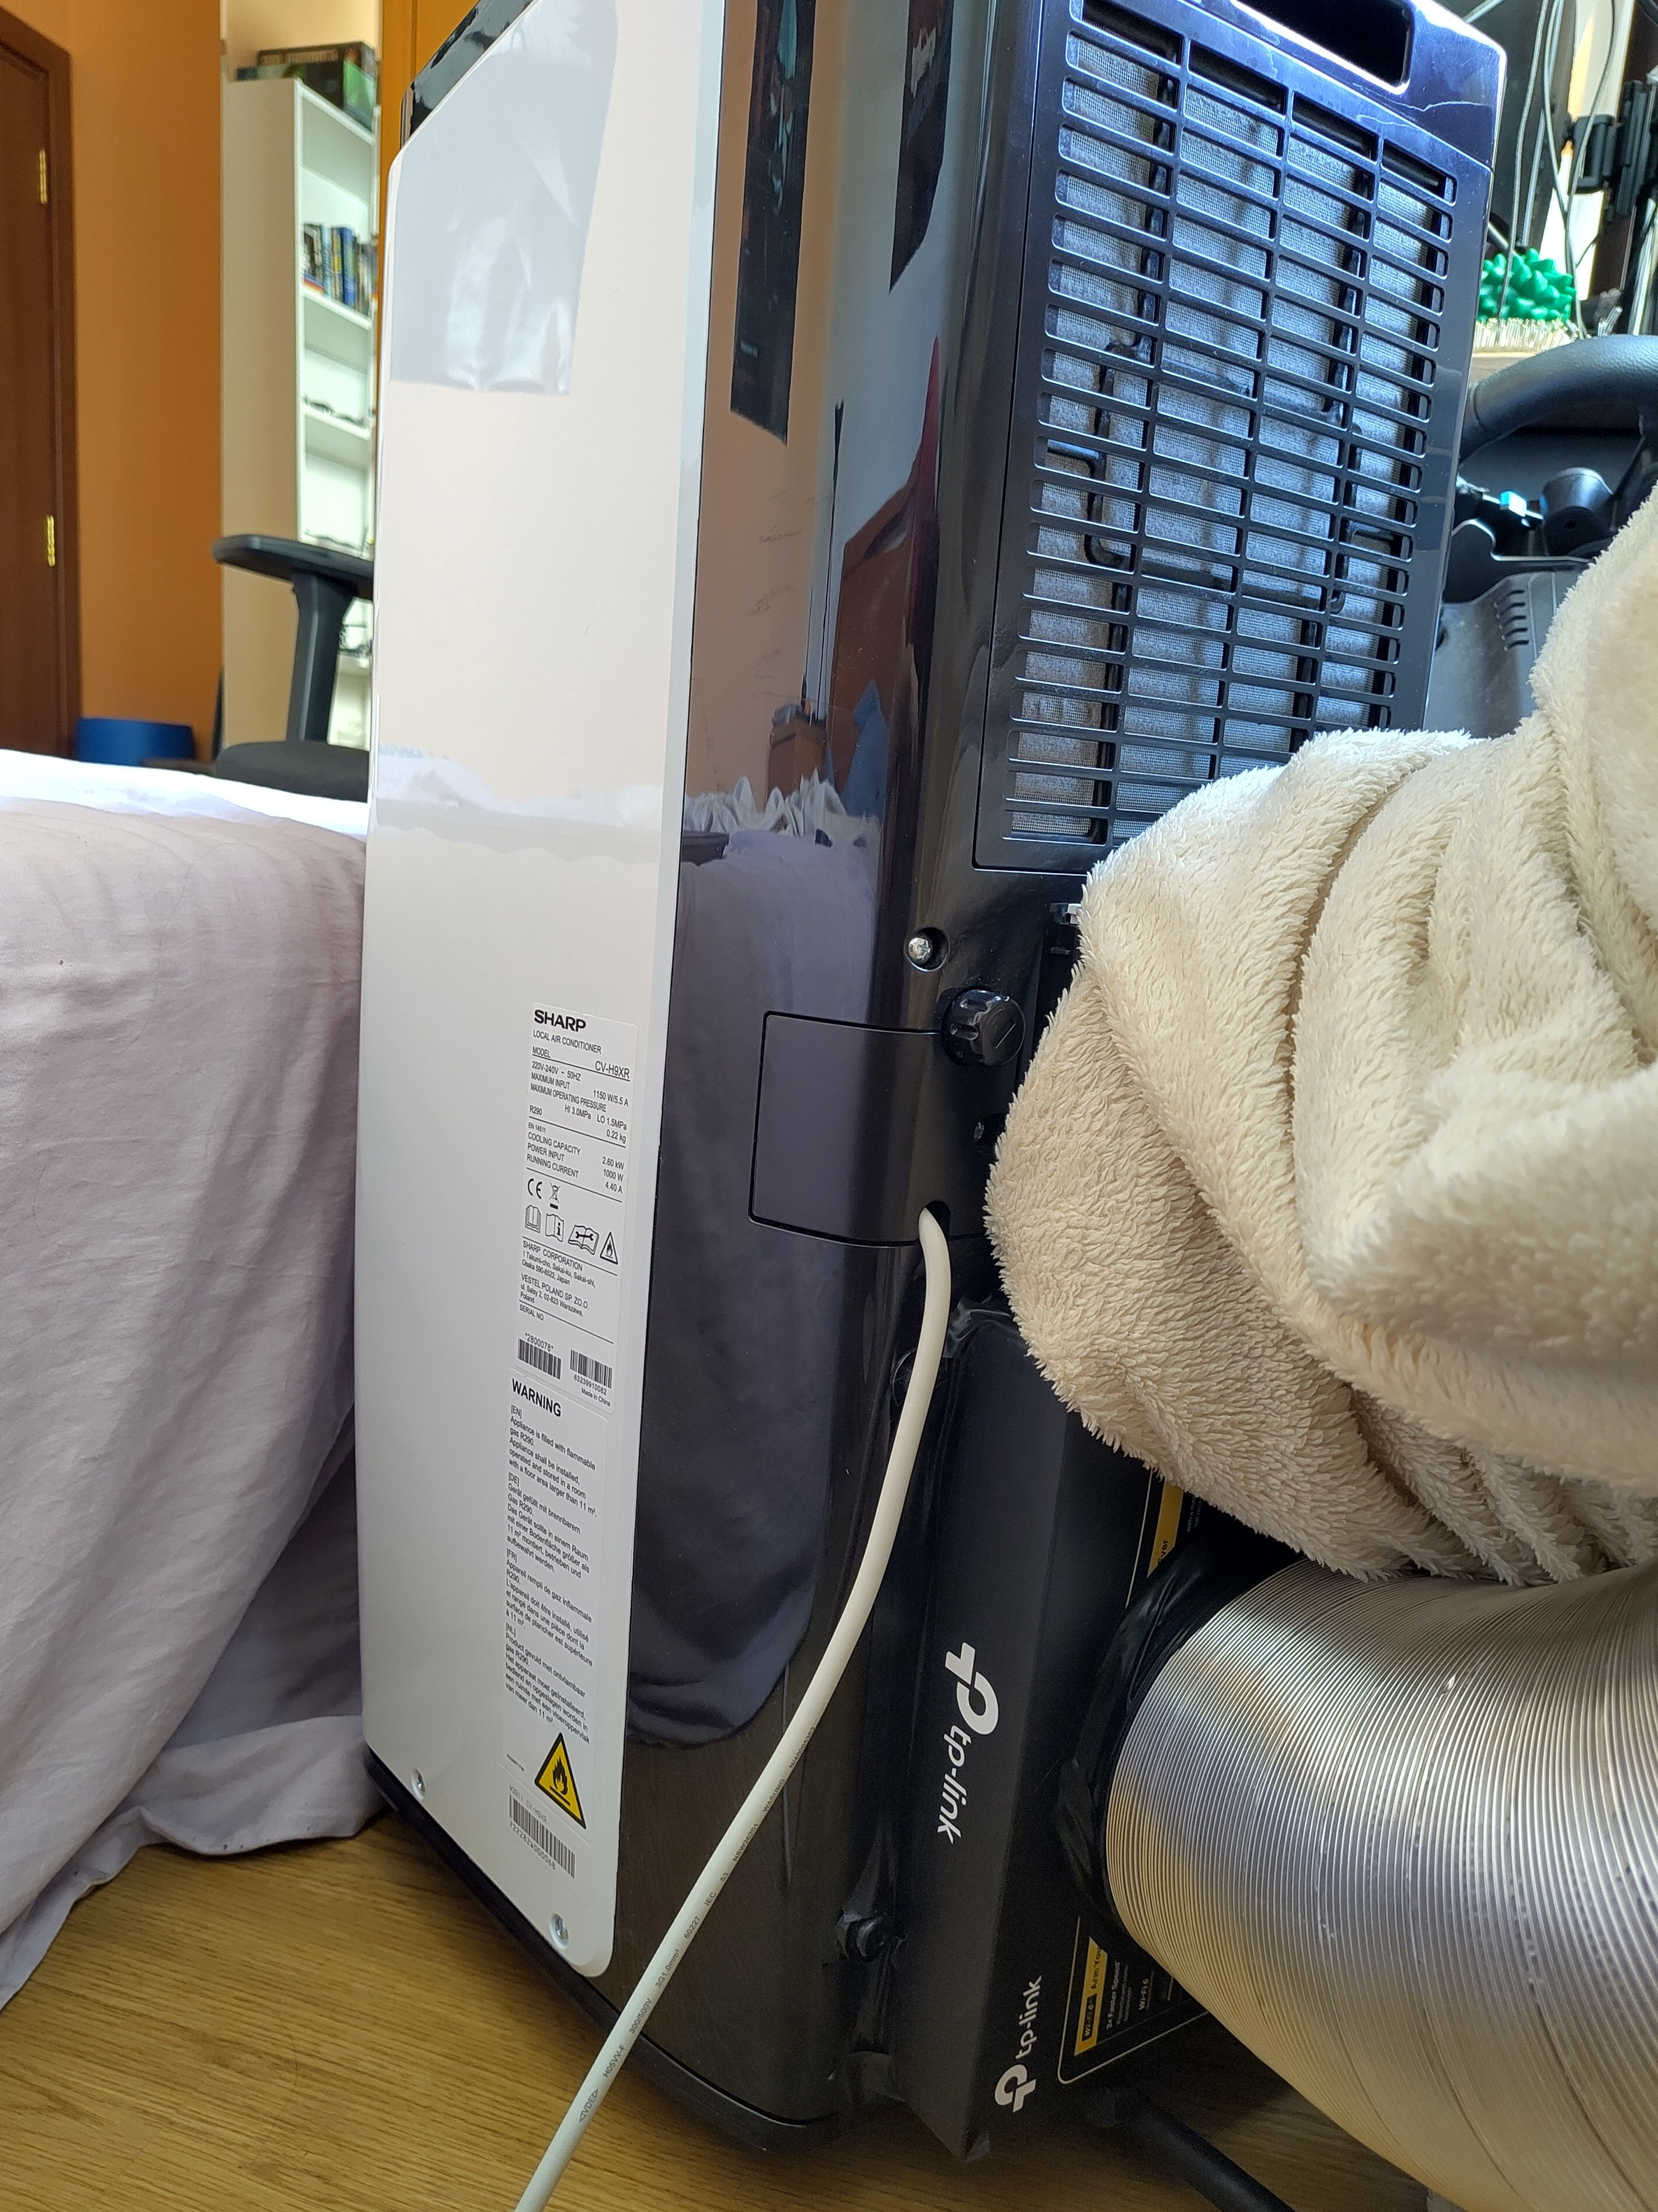
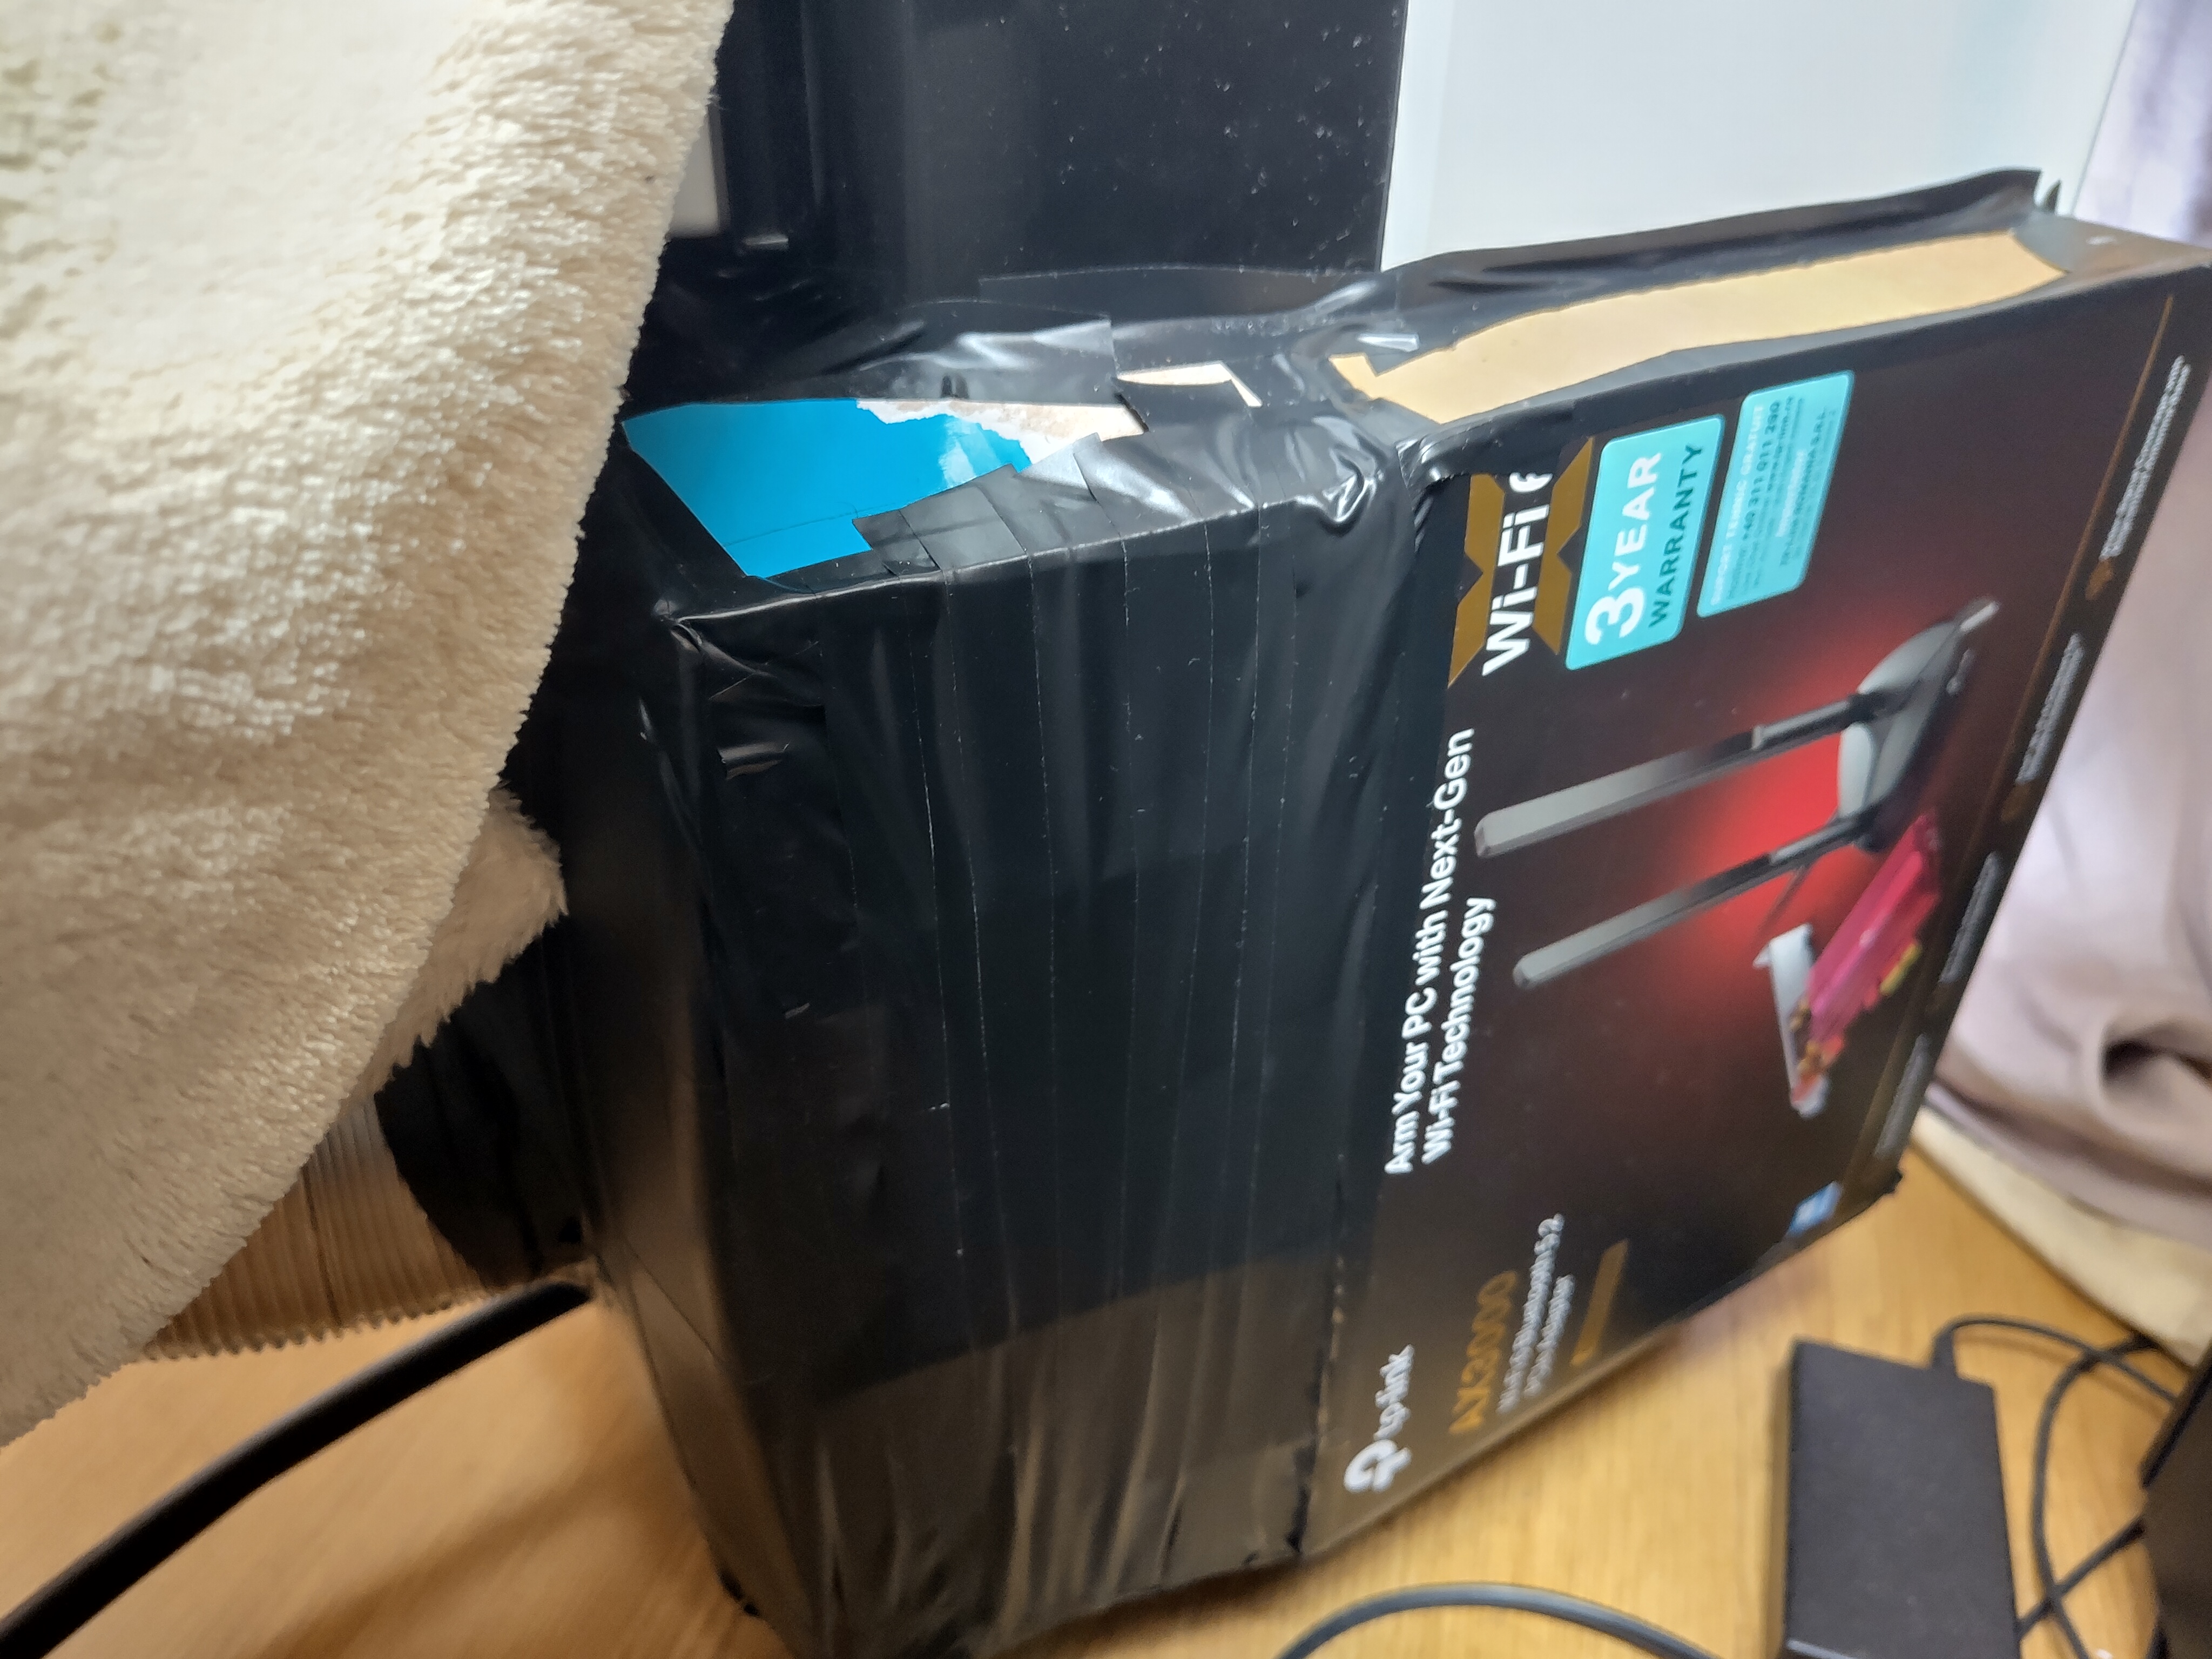
Klis has sent in this modification of a Sharp CV-H9XR:
I got a Sharp CV-H9XR, hoping to make the room habitable, but all it was doing was creating a slightly cool pocket in one corner of the room while making the rest of it even hotter. Also, since I have a casement window, I needed a sealing kit, but the pressure in the room was so low because of the AC, that it kept ripping the seal away from the frame.
A few days ago I looked online for what I can do about it and found your article. I decided to try it out and lo and behold, it actually worked! I had some issues, because the unit actually has two intakes, one on the back and one on the side, but with some cardboard and an ungodly amount of duct tape I bridged the two grills and connected them to the outside with an aluminium pipe from the local home improvement store.
Dimplex DCP9
Ashley sent in this successful modification of a Dimplex DCP9:
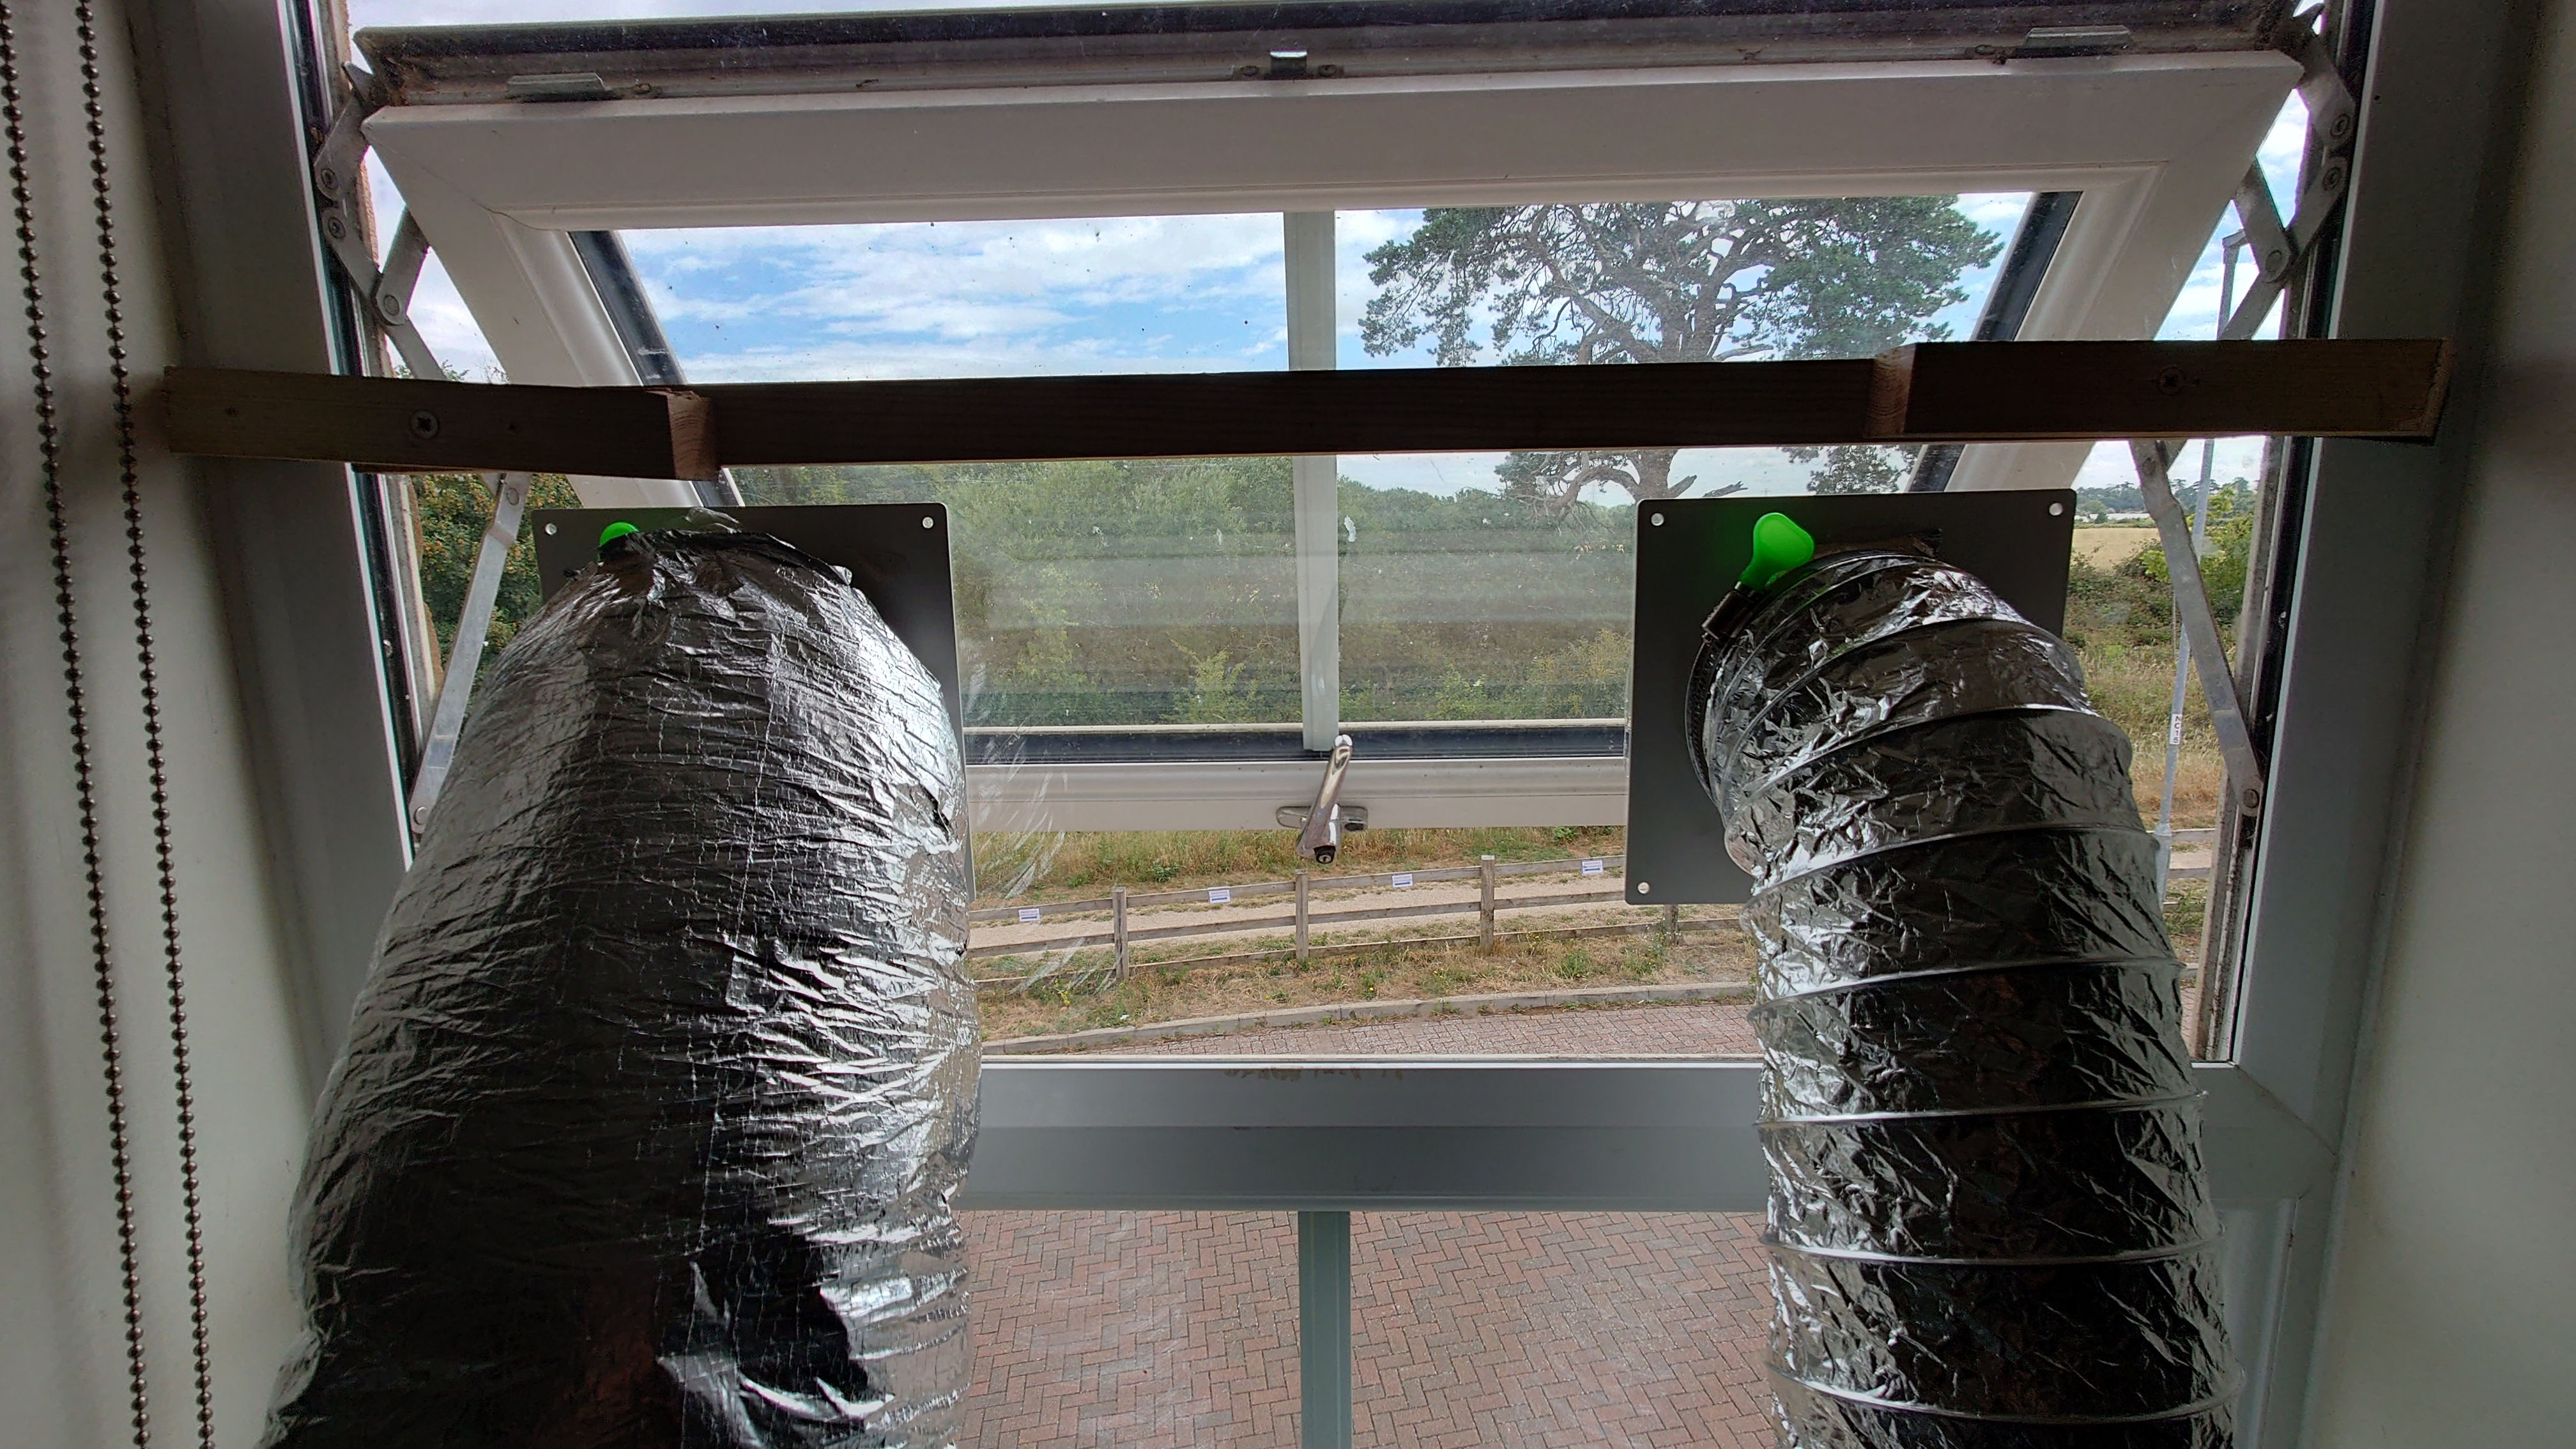
I used insulated ducting for the heat outlet which reduces the heat emission from the 5m run and only adds £5 to the cost. It also quietens the unit significantly as the air rush is quite a large contributor to the overall noise output. I’ve limited the opening of the external air input using clear tape so that it better matches the plastic air inlet “manifold”.
After this modification the unit can reach the hallway and effectively keep the whole upstairs cool during a heat wave.
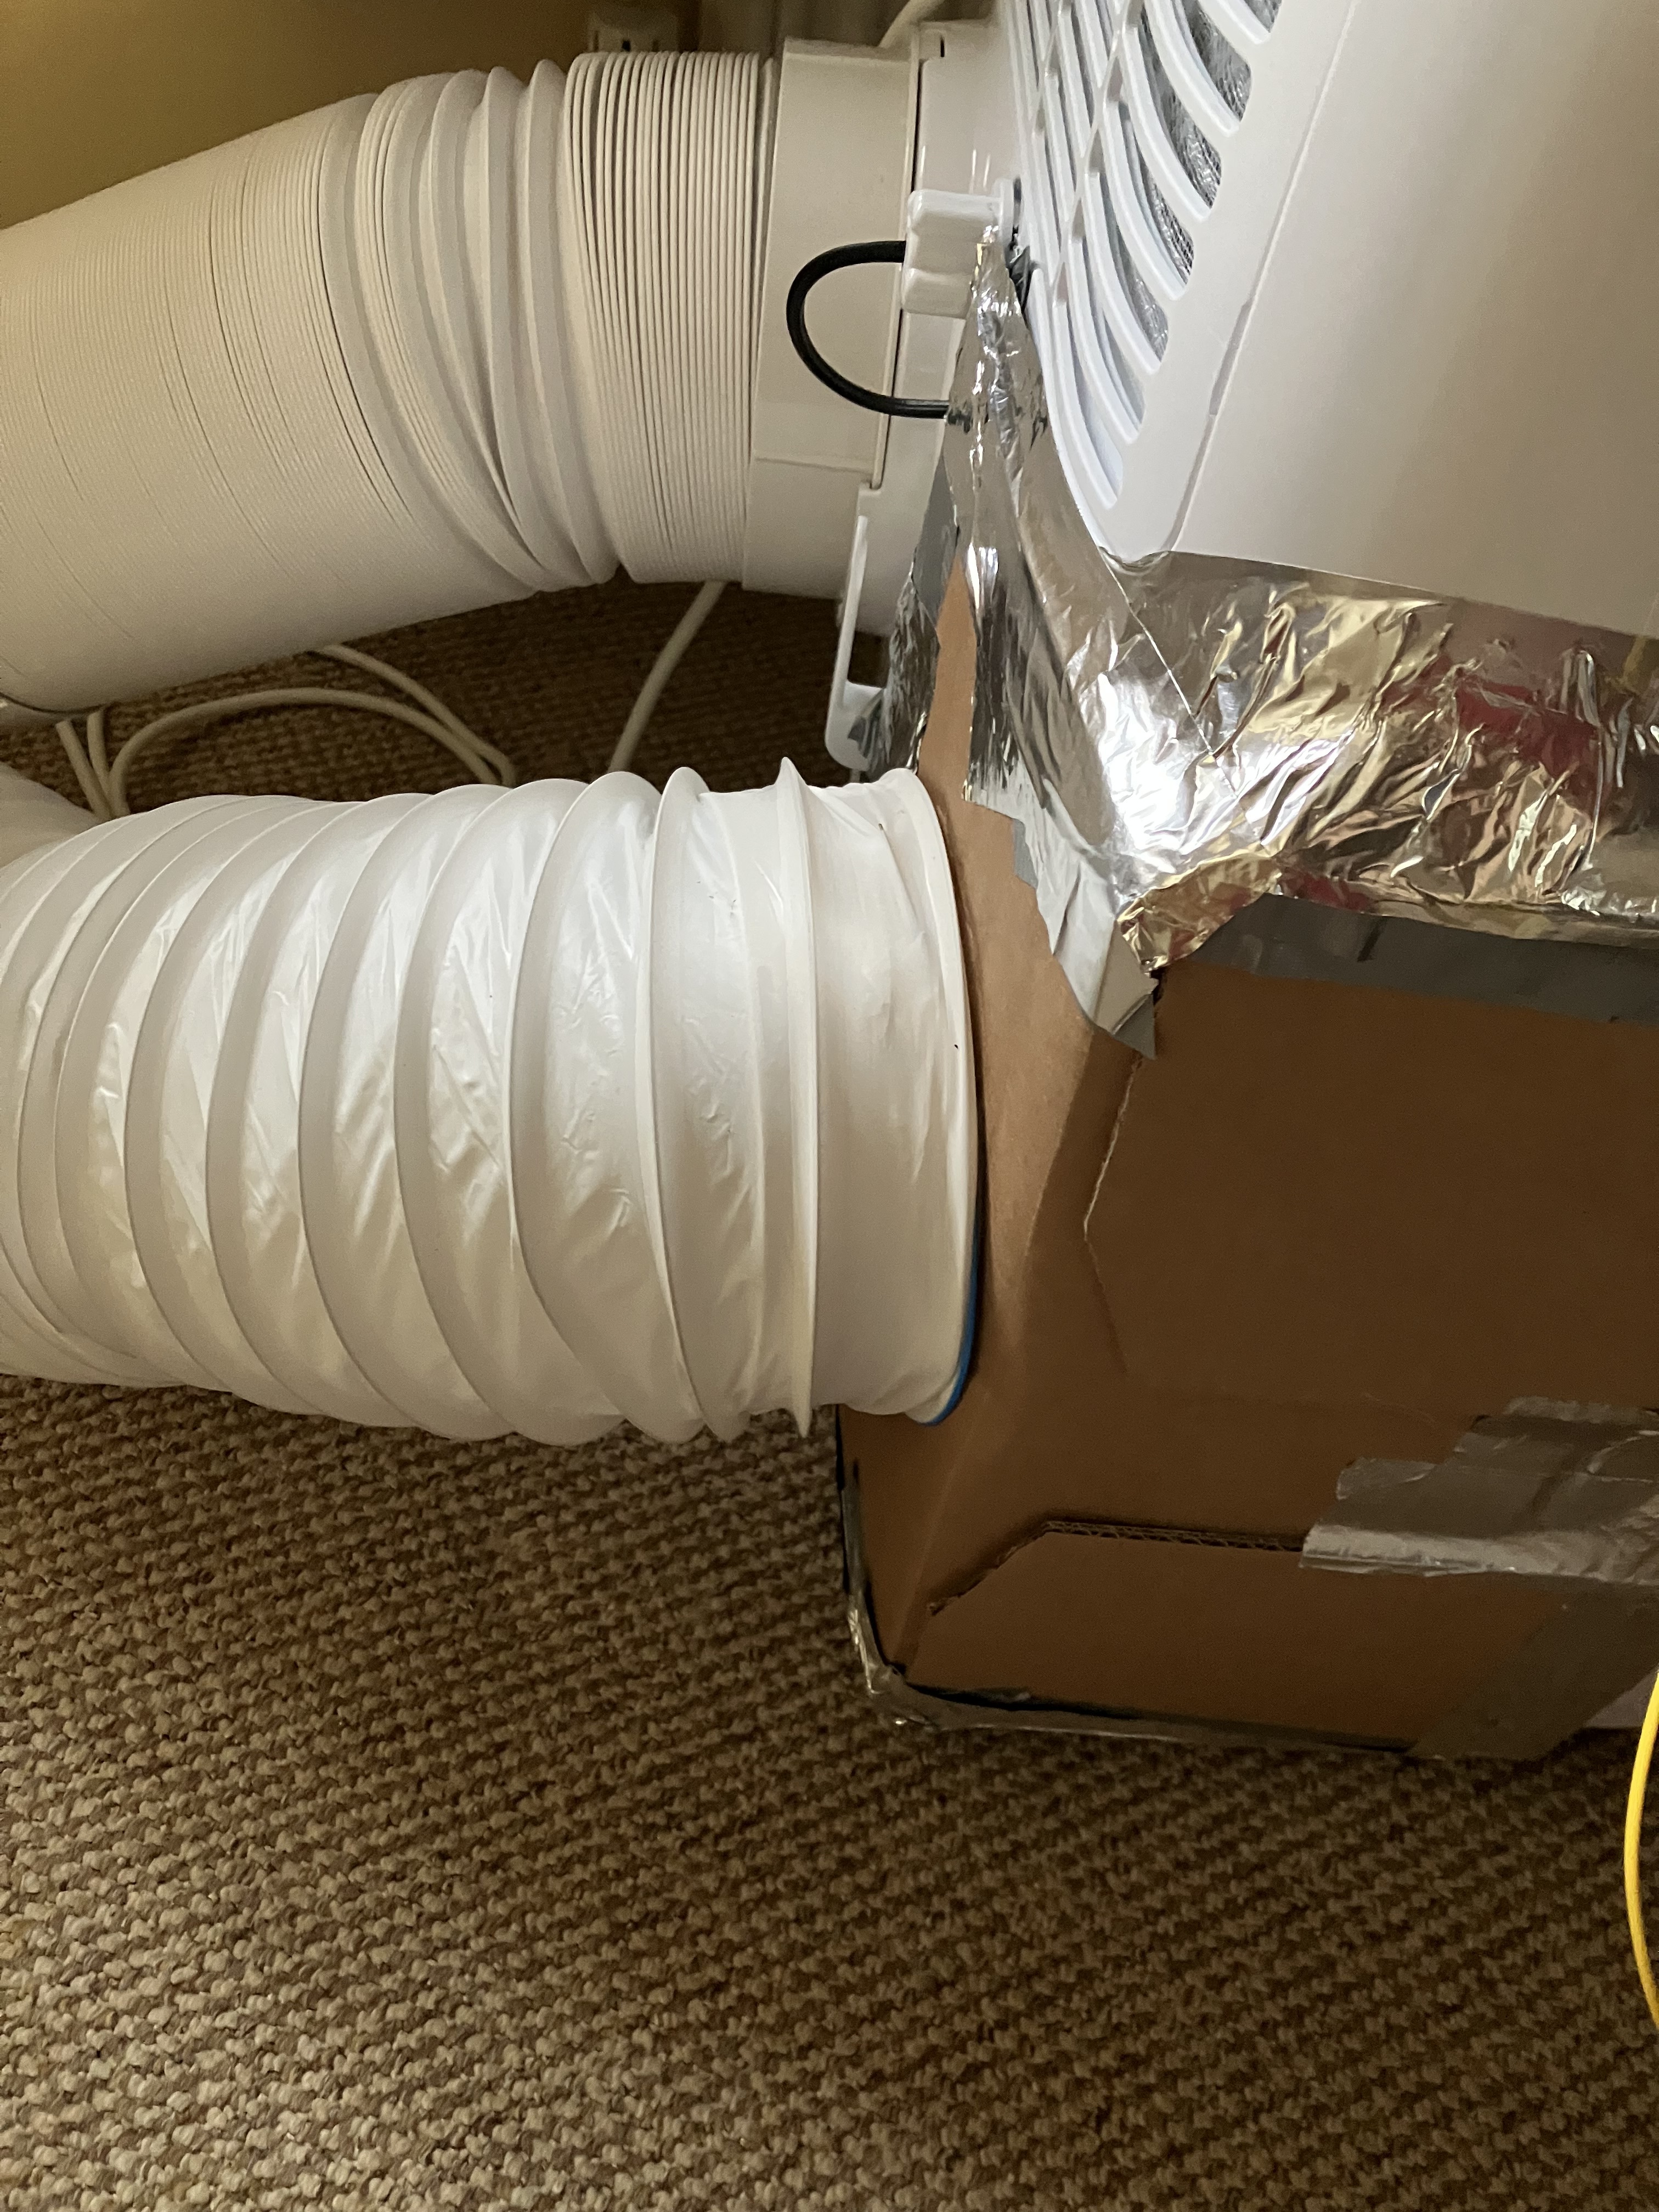
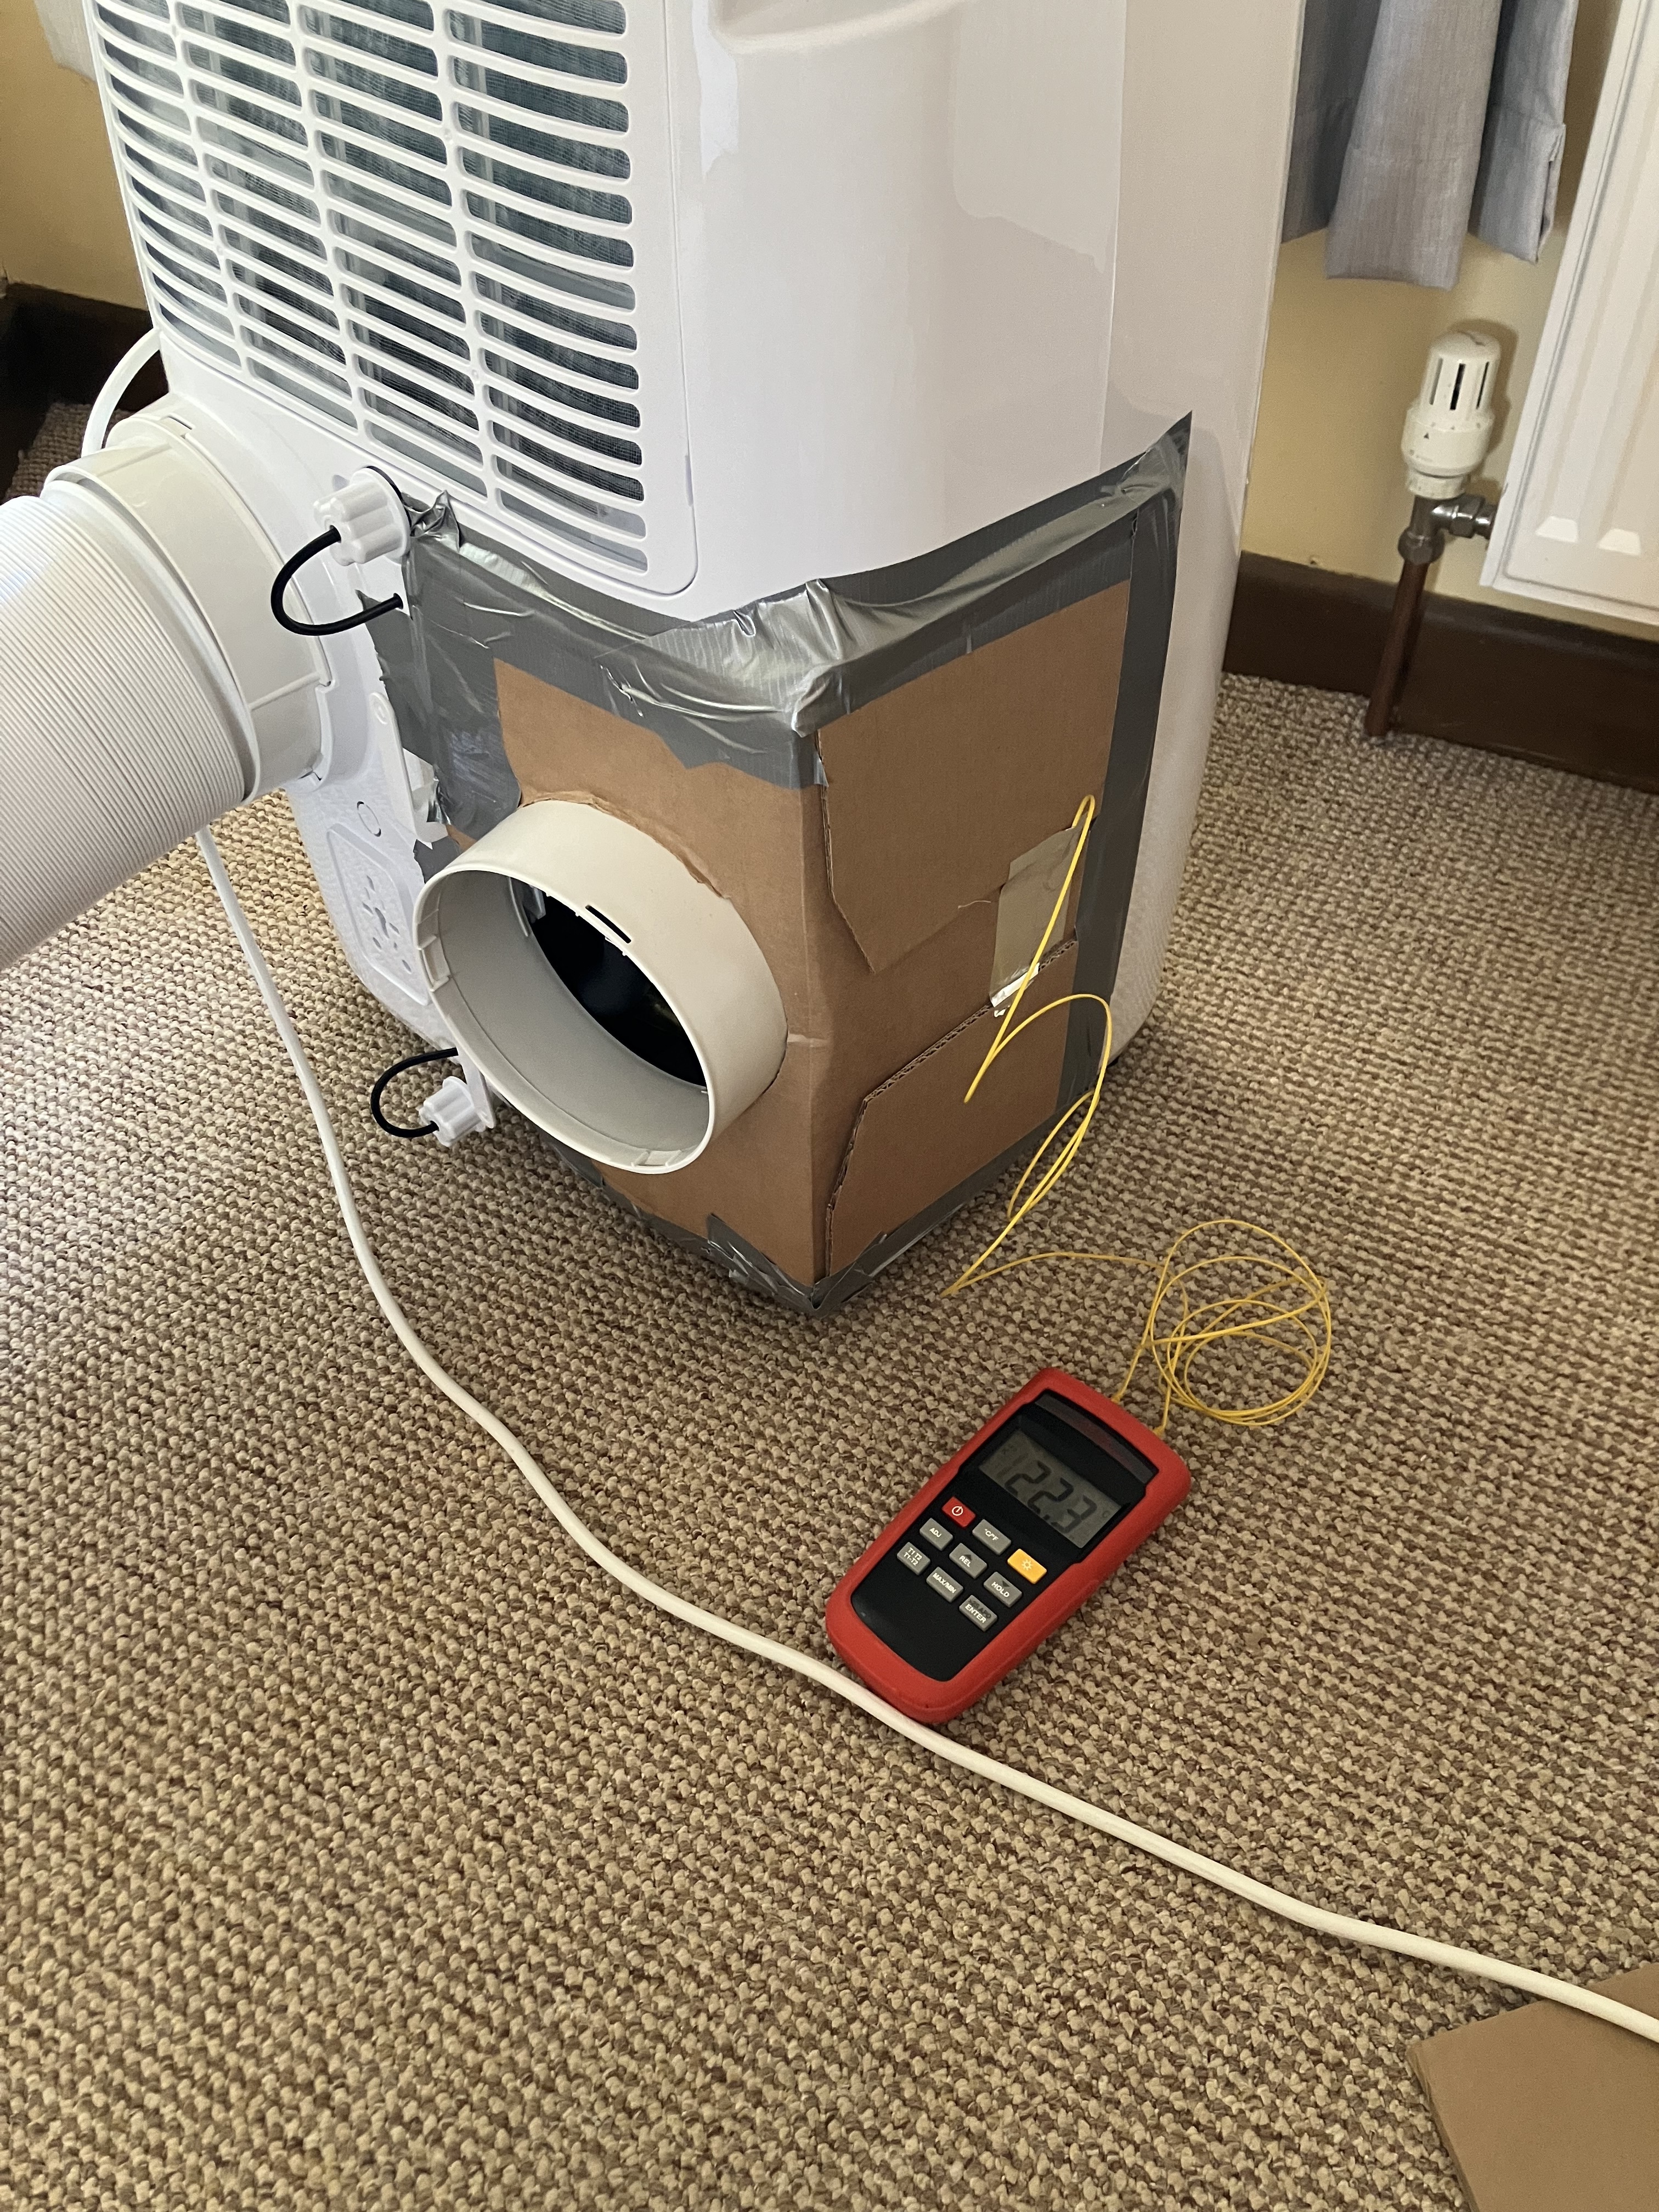
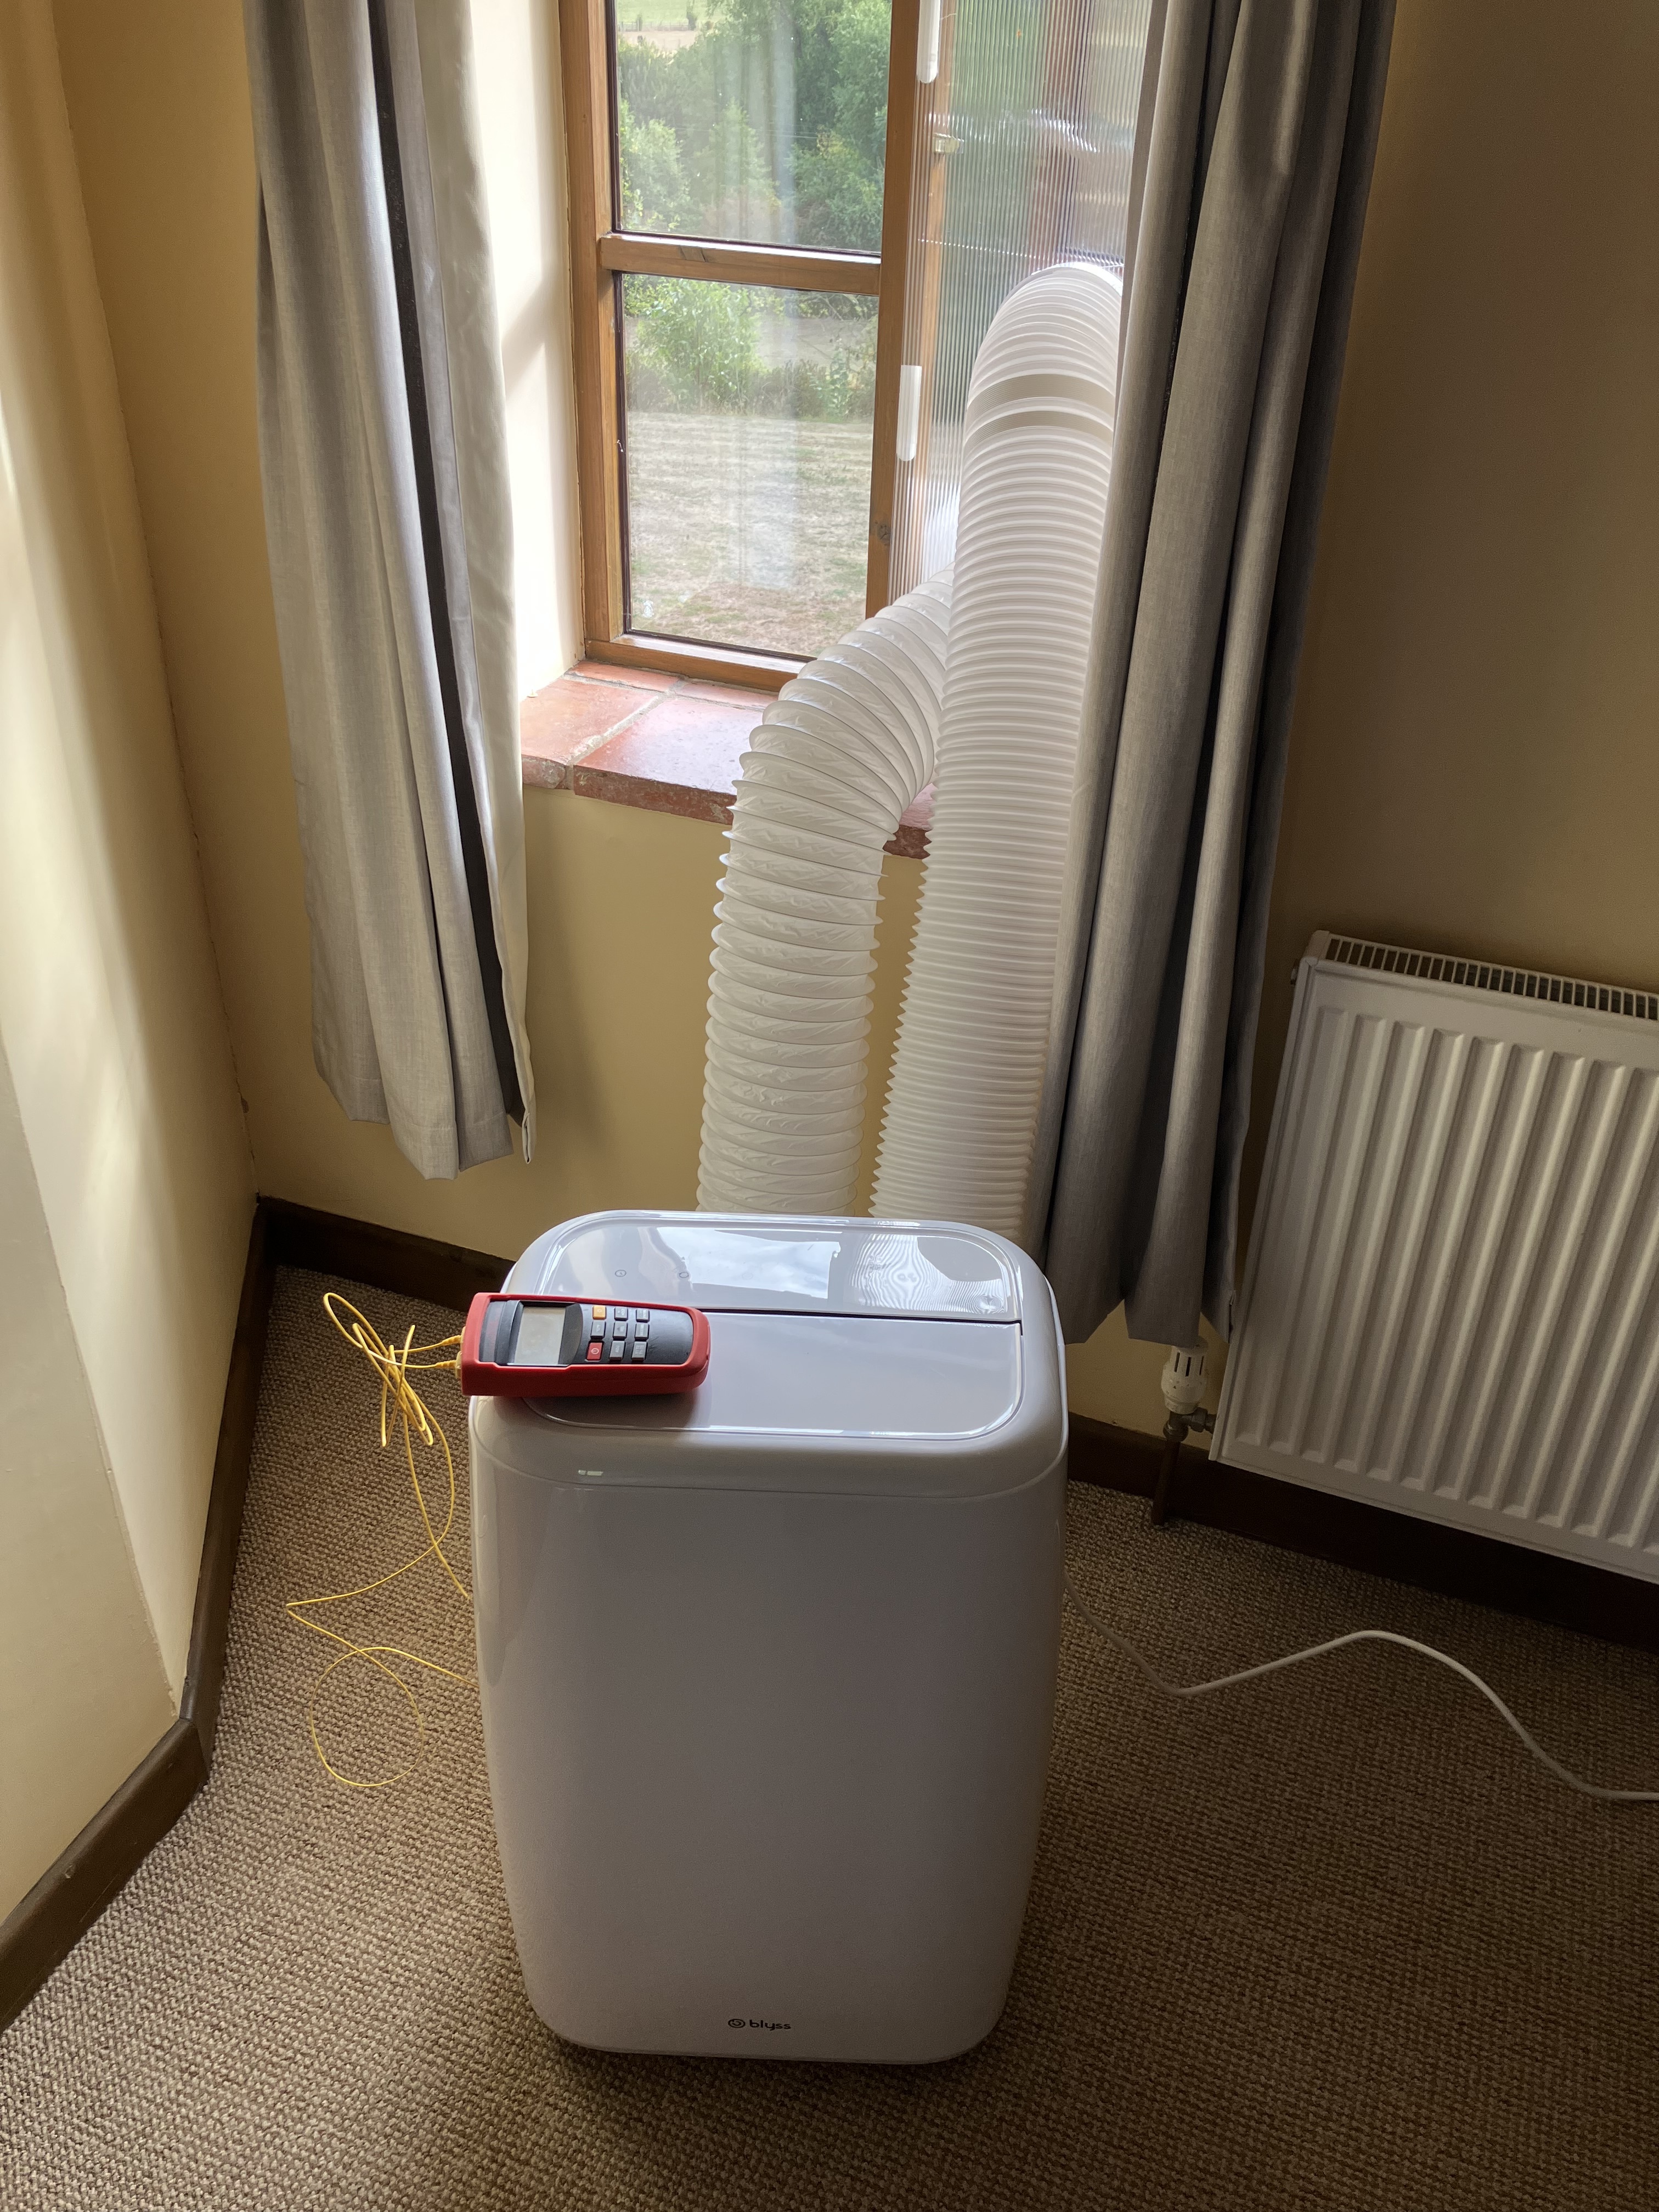
Blyss A018I-12CH
Dawood sent in this successful modification of a Blyss A018I-12CH:
Inspired by your article on the shortcomings of single hose portable air conditioning units, I thought I’d share my findings with a Blyss portable AC unit from Screwfix.
Having used one many years ago, I was well aware of the issues with single hose units, but I’d forgotten just how bad they were. I thought I’d be able to live with it for a new warm nights, but I was staggered at just how much warm air was being pulled in from the rest of the house and small gaps around the windows. Even with no solar gain and moderate nighttime temperatures, I found the unit had to run almost constantly in a relatively small room.
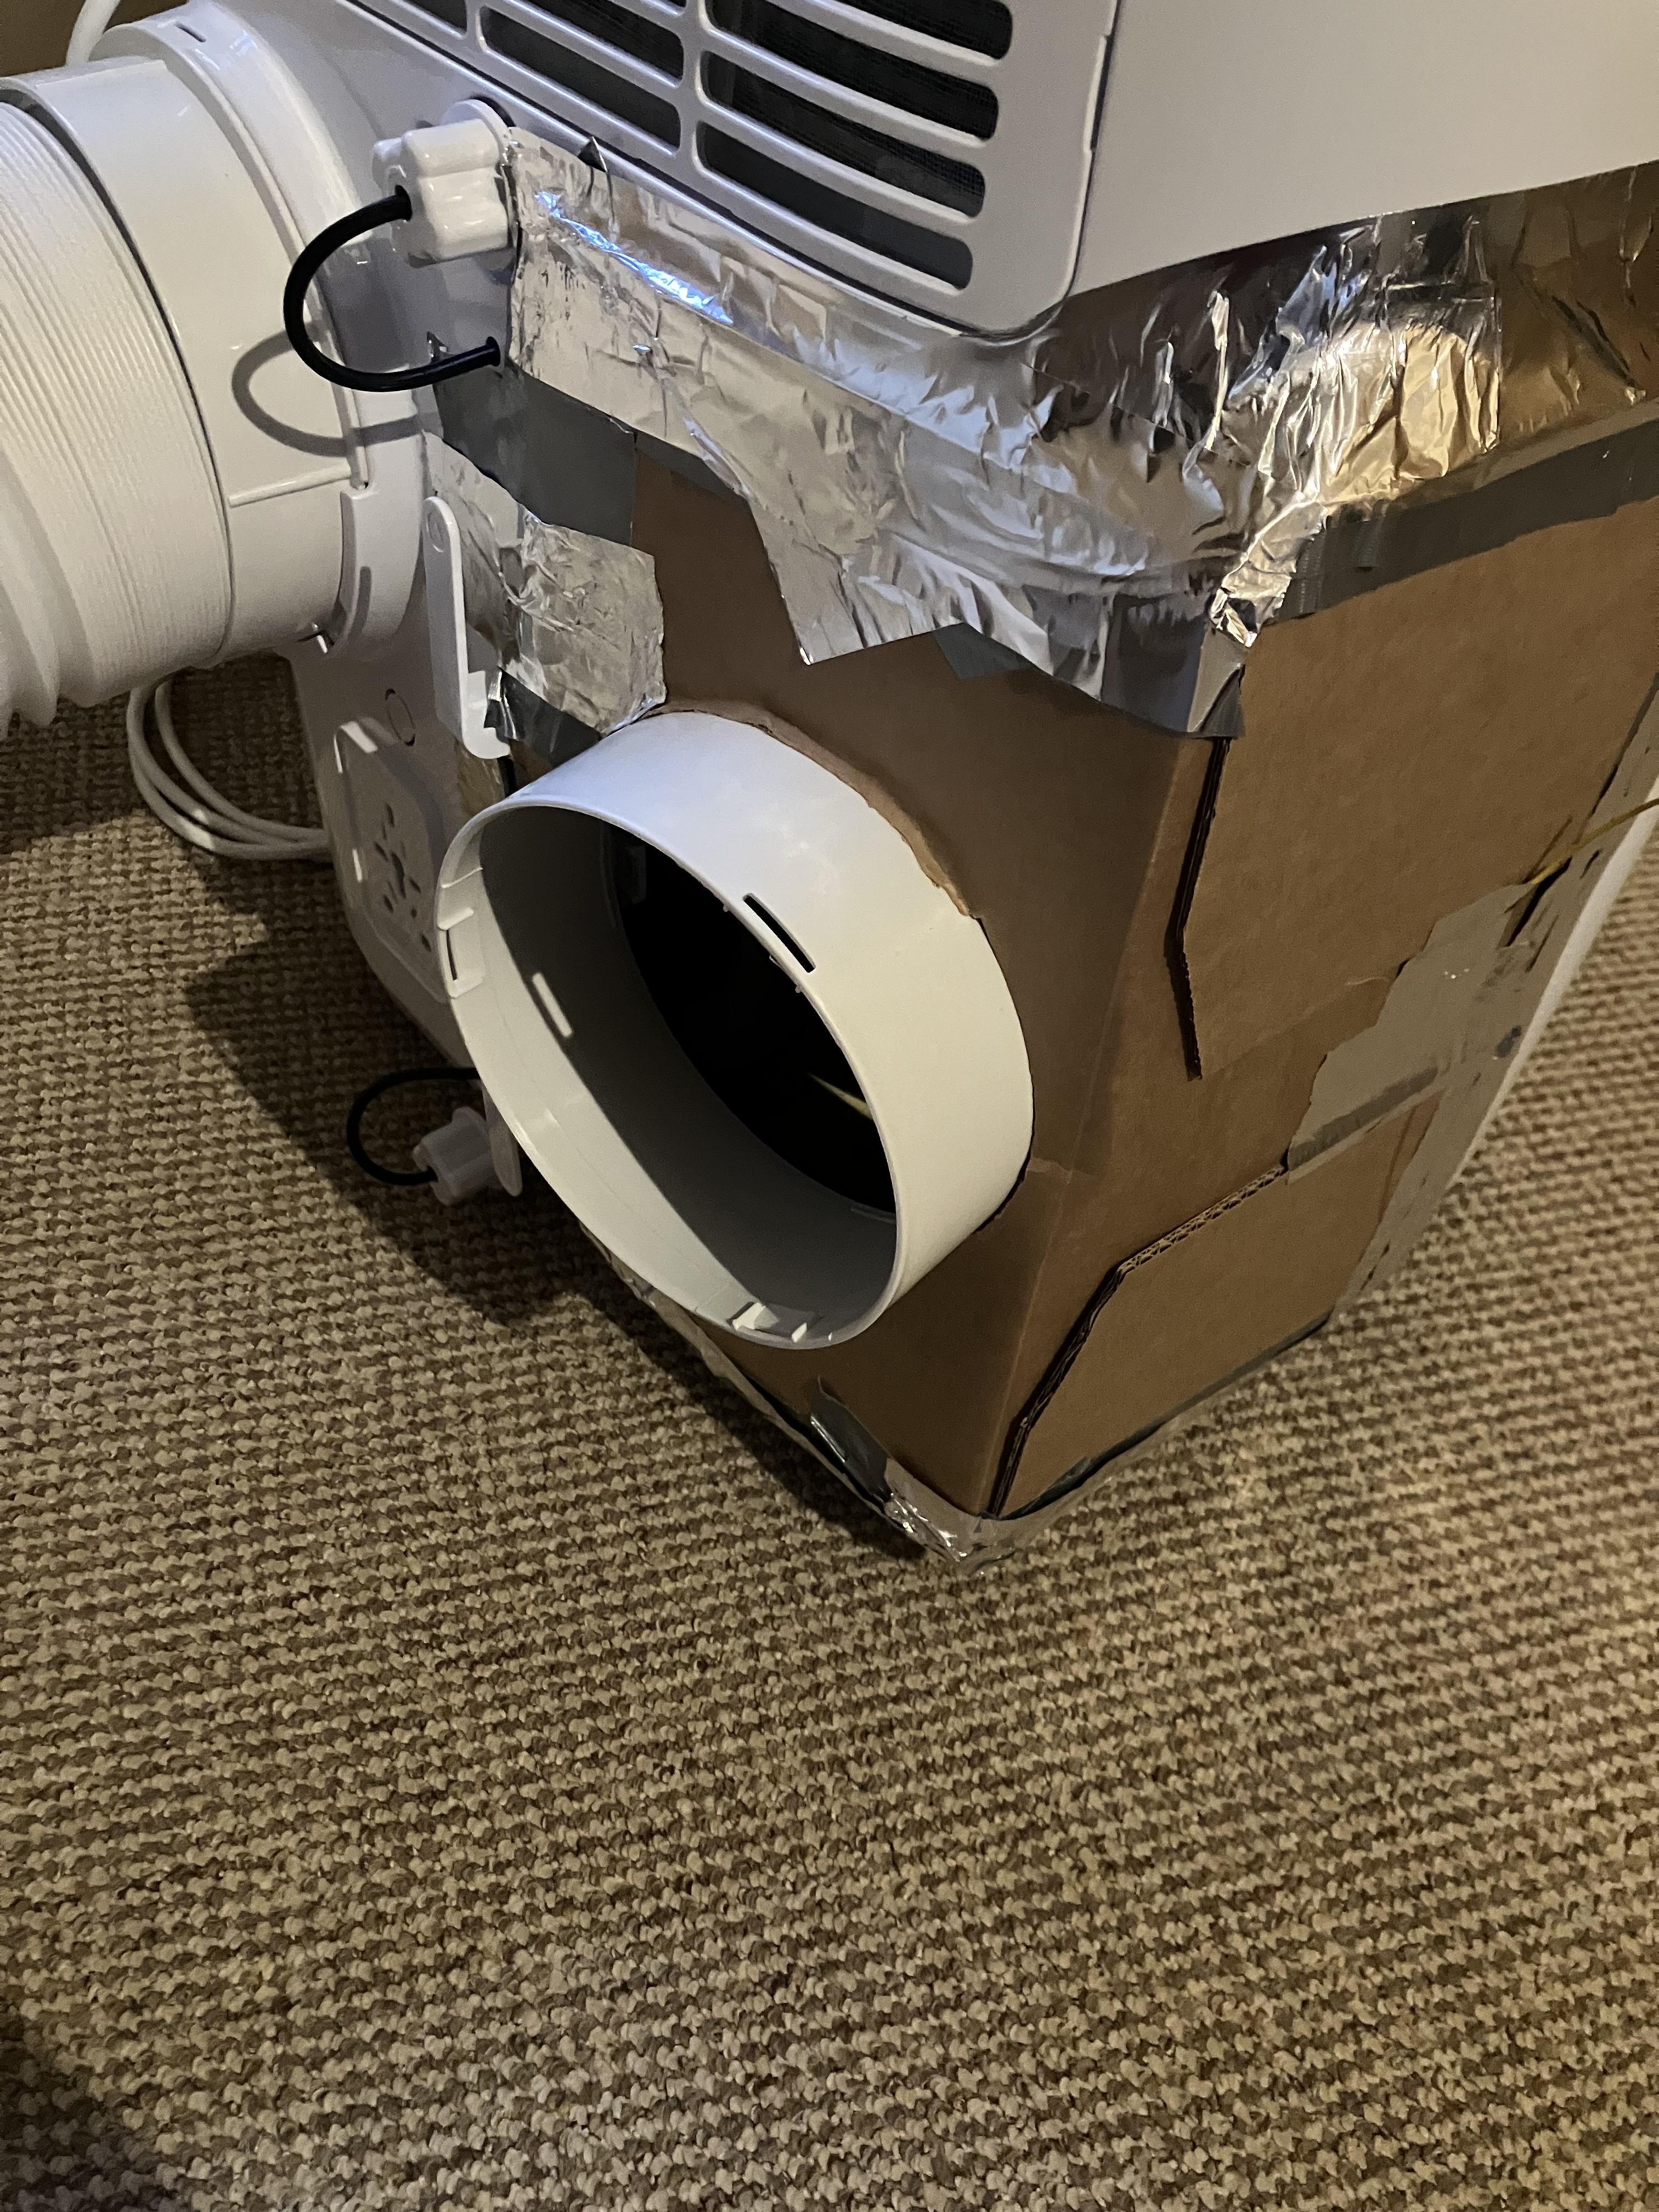
So, I set about modifying my unit. The condenser air intake grille is a curved L-shape, so it was hard to use a Tupperware box like some others have done. The easiest way was to remove the grille (interestingly, there is no filter on my machine) and replace it with cardboard. The unit came with a spigot intended for a through-the-wall installation; this turned out to be a perfect fit for 150mm flexible duct from Toolstation.
As a precaution, I rigged up a temperature sensor in the newly created “inlet plenum” and happily, the temperature in there only ever registered a couple of degrees above the outside ambient. I do hope to change the cardboard to something more permanent, when I have the motivation.
The result? The unit now only needs to be turned on half an hour before bedtime to cool our bedroom. And it’s much quieter too, thanks to the inlet hose providing some sound attenuation.
Silvercrest SMK 7000 B2
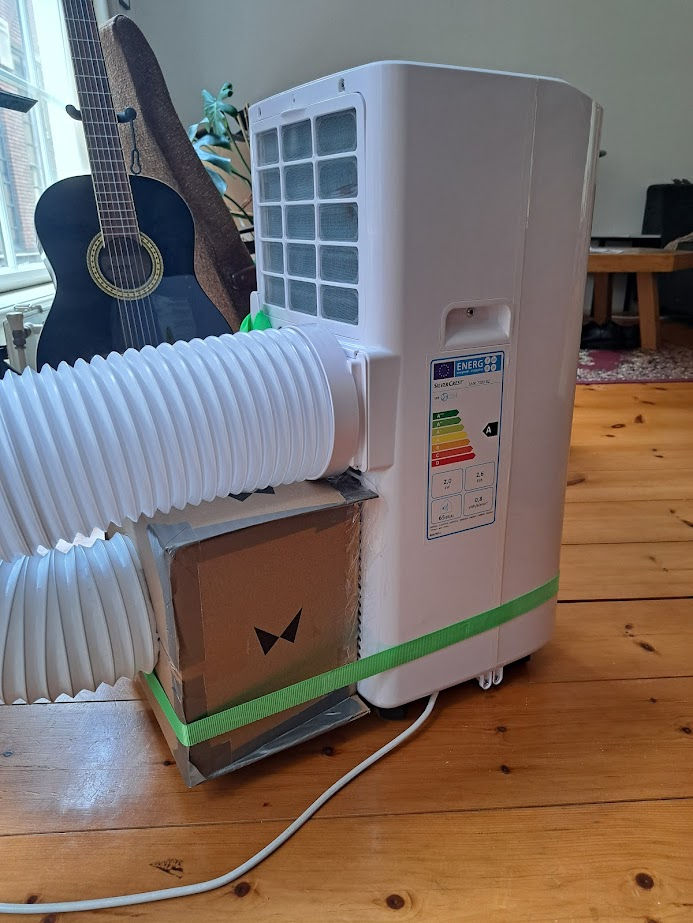
Teun sent in this successful modification of a Silvercrest SMK 7000 B2:
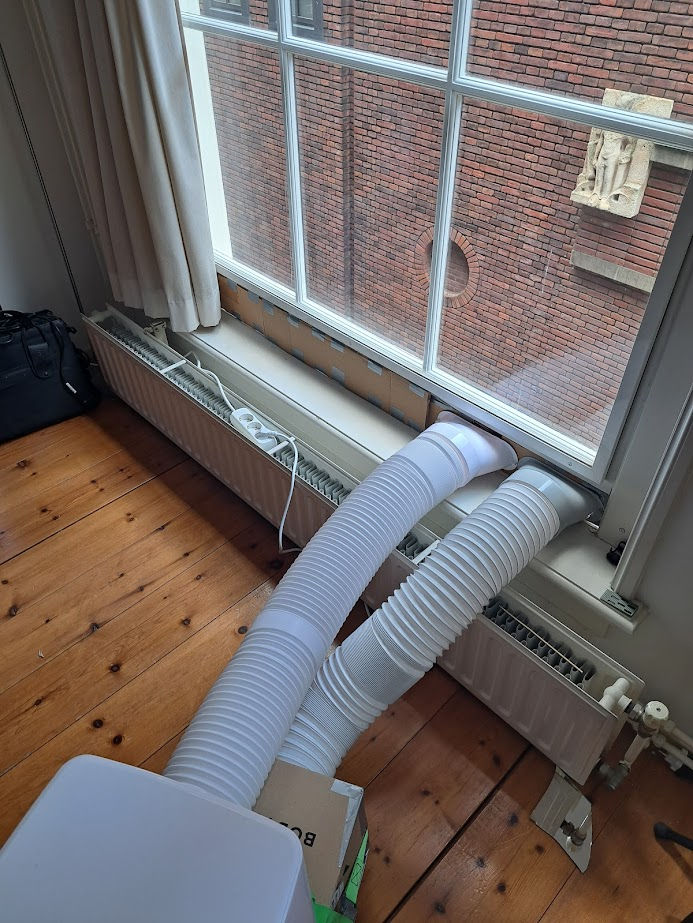
I recently bought a portable AC (a cheap Silvercrest 7000 BTU from Lidl) but noticed it didn’t work very well at all. A Technology Connections video put me on to the idea of a double hose, which eventually lead me to stumble upon your website. The visual diagrams of single vs double hose units were especially insightful. The photos of successful modifications gave me enough inspiration to make my own. I ordered an extra AC hose and exhaust from Temu for ~10 bucks and built my own adapter out of a sturdy cardboard box (approx the same size as the intake) with a hole cut in it and lots of tape. The AC works very well now! Before, it was basically a very loud and elaborate fan, only creating a pleasant draft in its vicinity. Now, the coldness really starts to spread throughout the room, as it should. I love it.
Silvercrest SMK 7000 B2 (with 3D printed cowl)
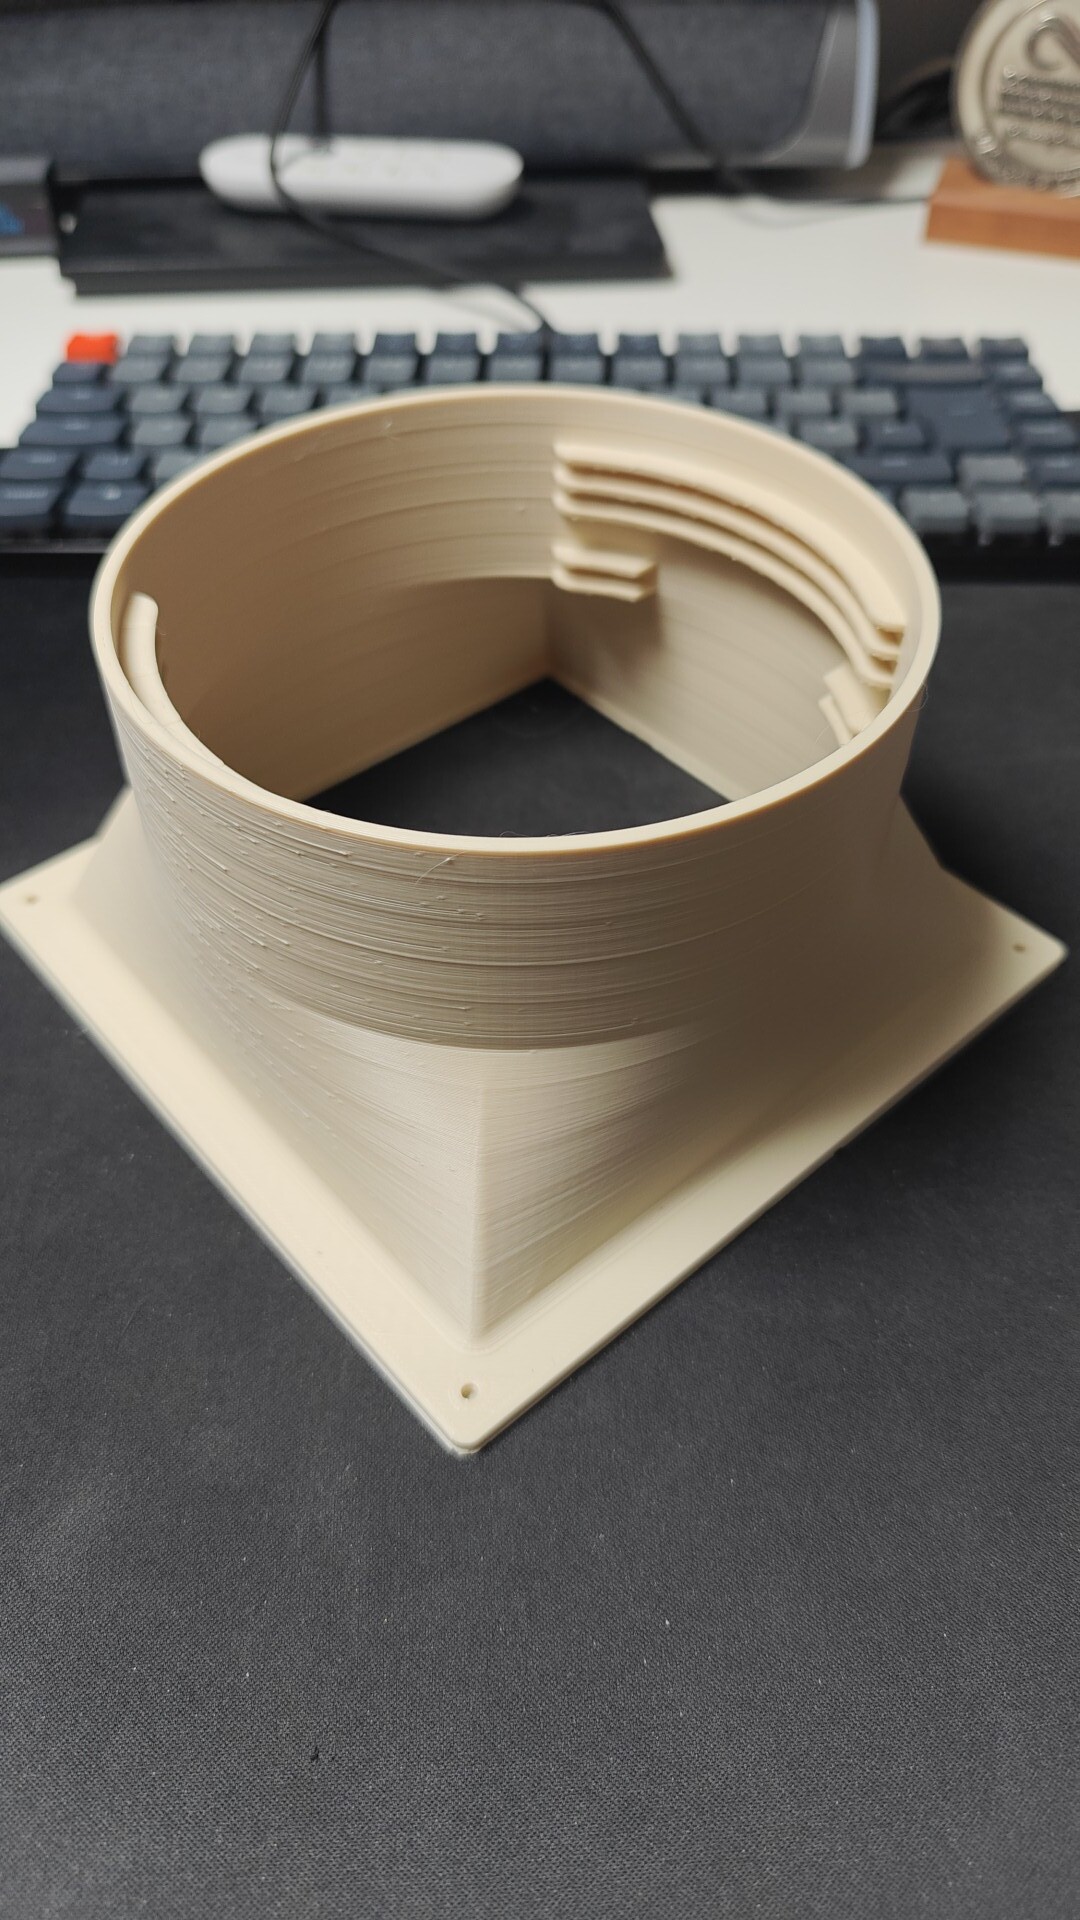
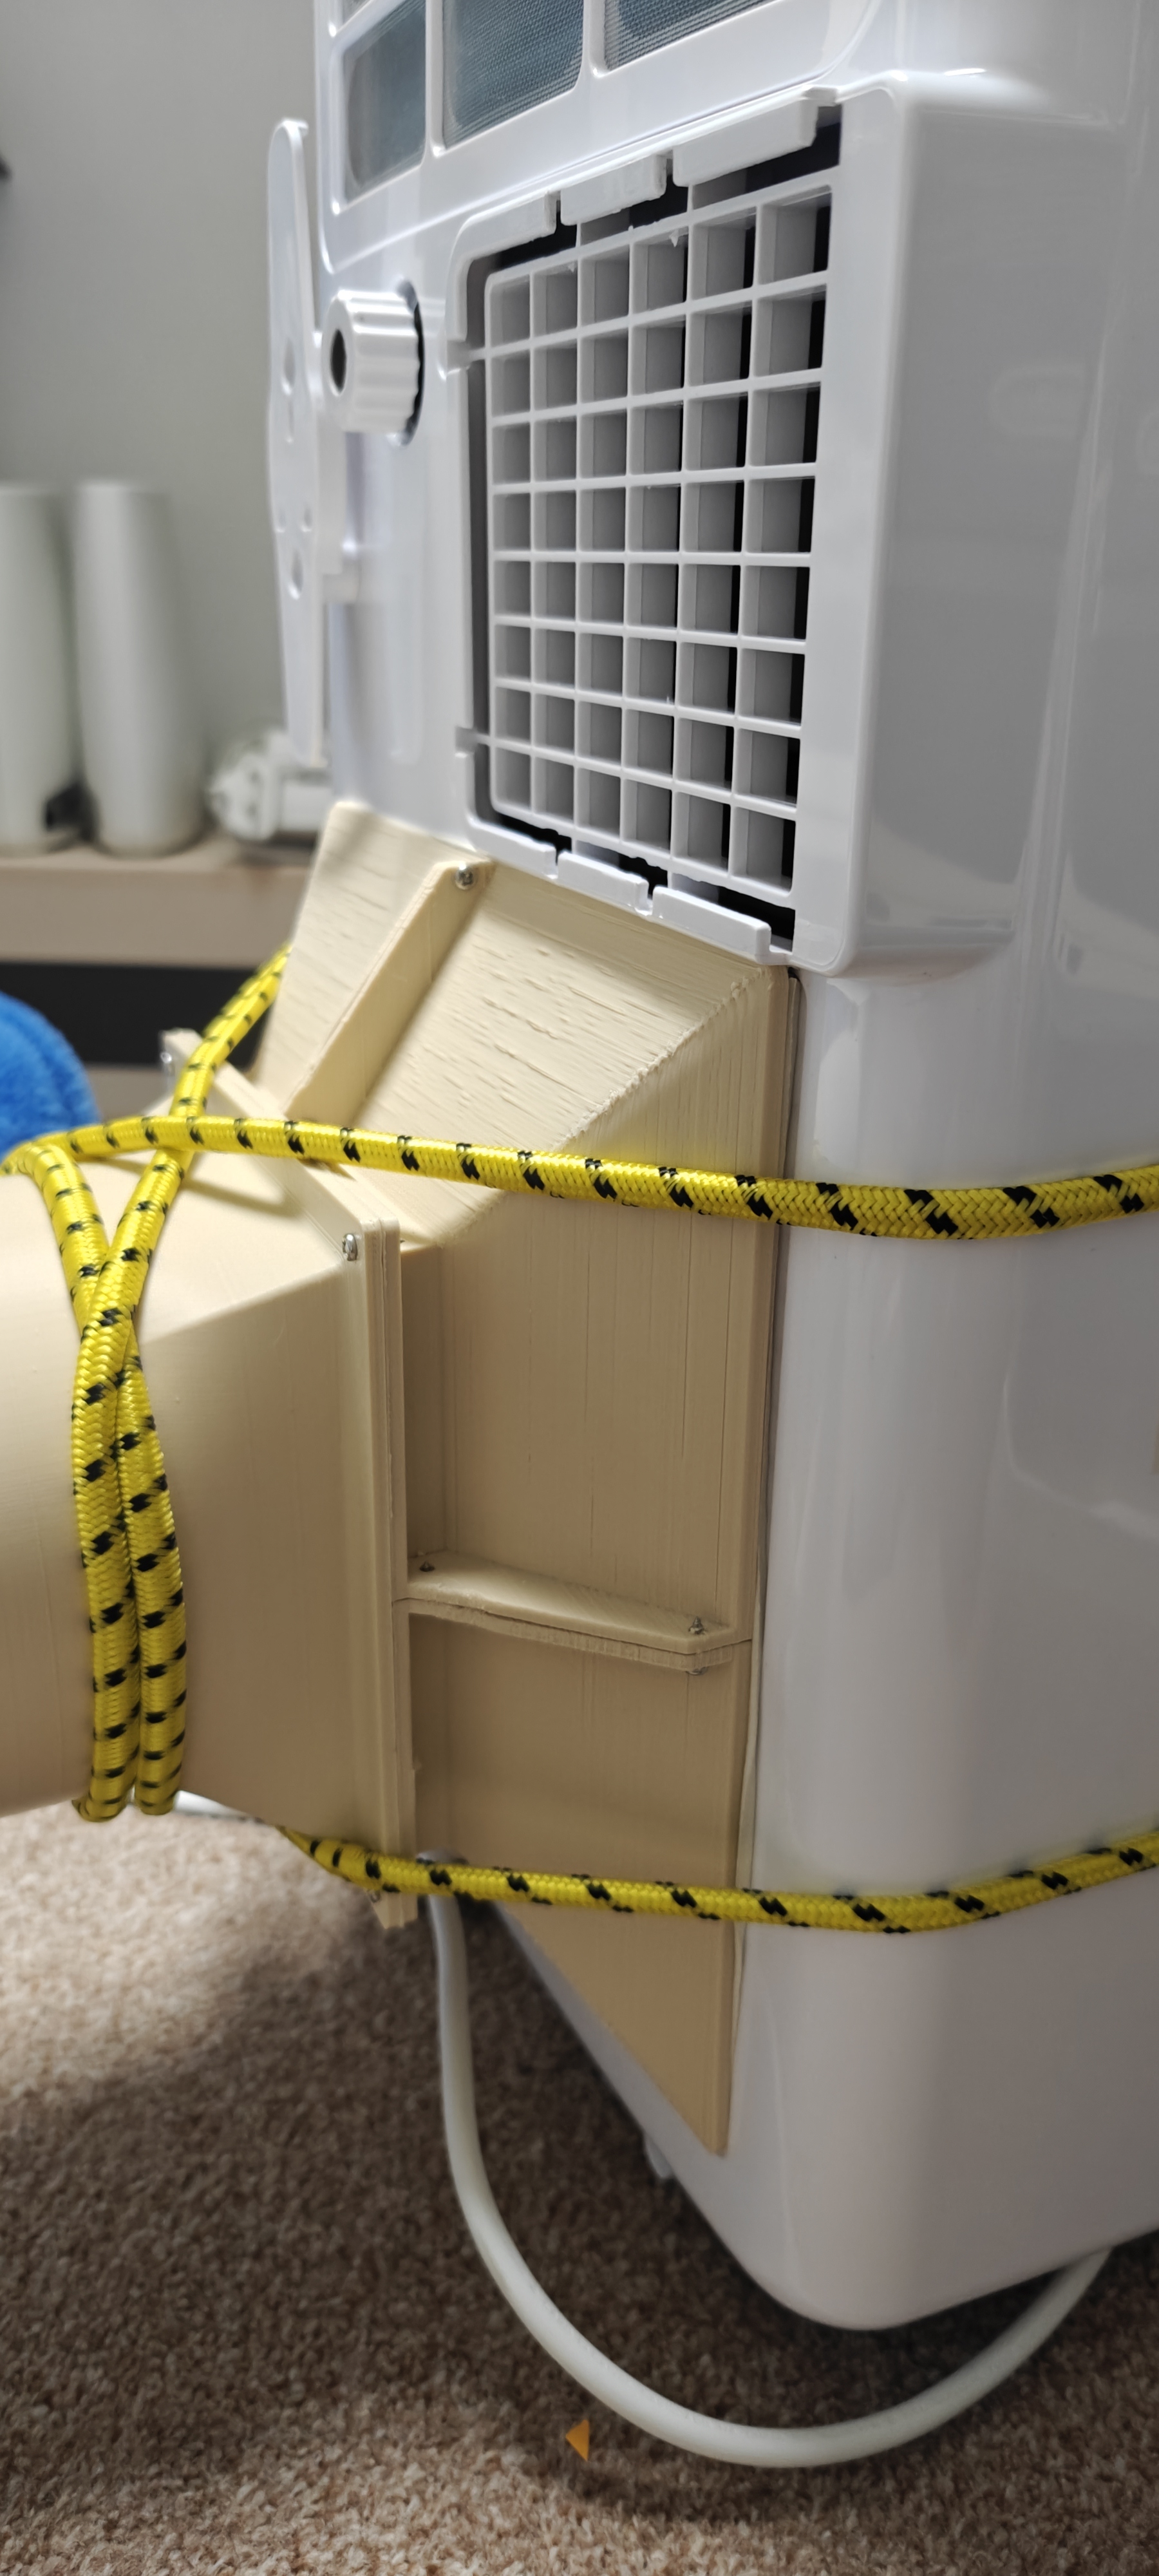
Thomas sent in this successful modification of a Silvercrest SMK 7000 B2, with a 3D printed cowl:
I stumbled across your website while trying to improve the performance of a cheap Lidl unit.
It inspired me to design and 3D printed a cowl that receives the standard flexible tubing, and that’s held on to the back using bungee cords. Using some weather stripping it’s a perfect fit.
Given the limited bed size of my old printer, I designed it to be printed in sections and screwed together.
ElectriQ Airflex15-v2
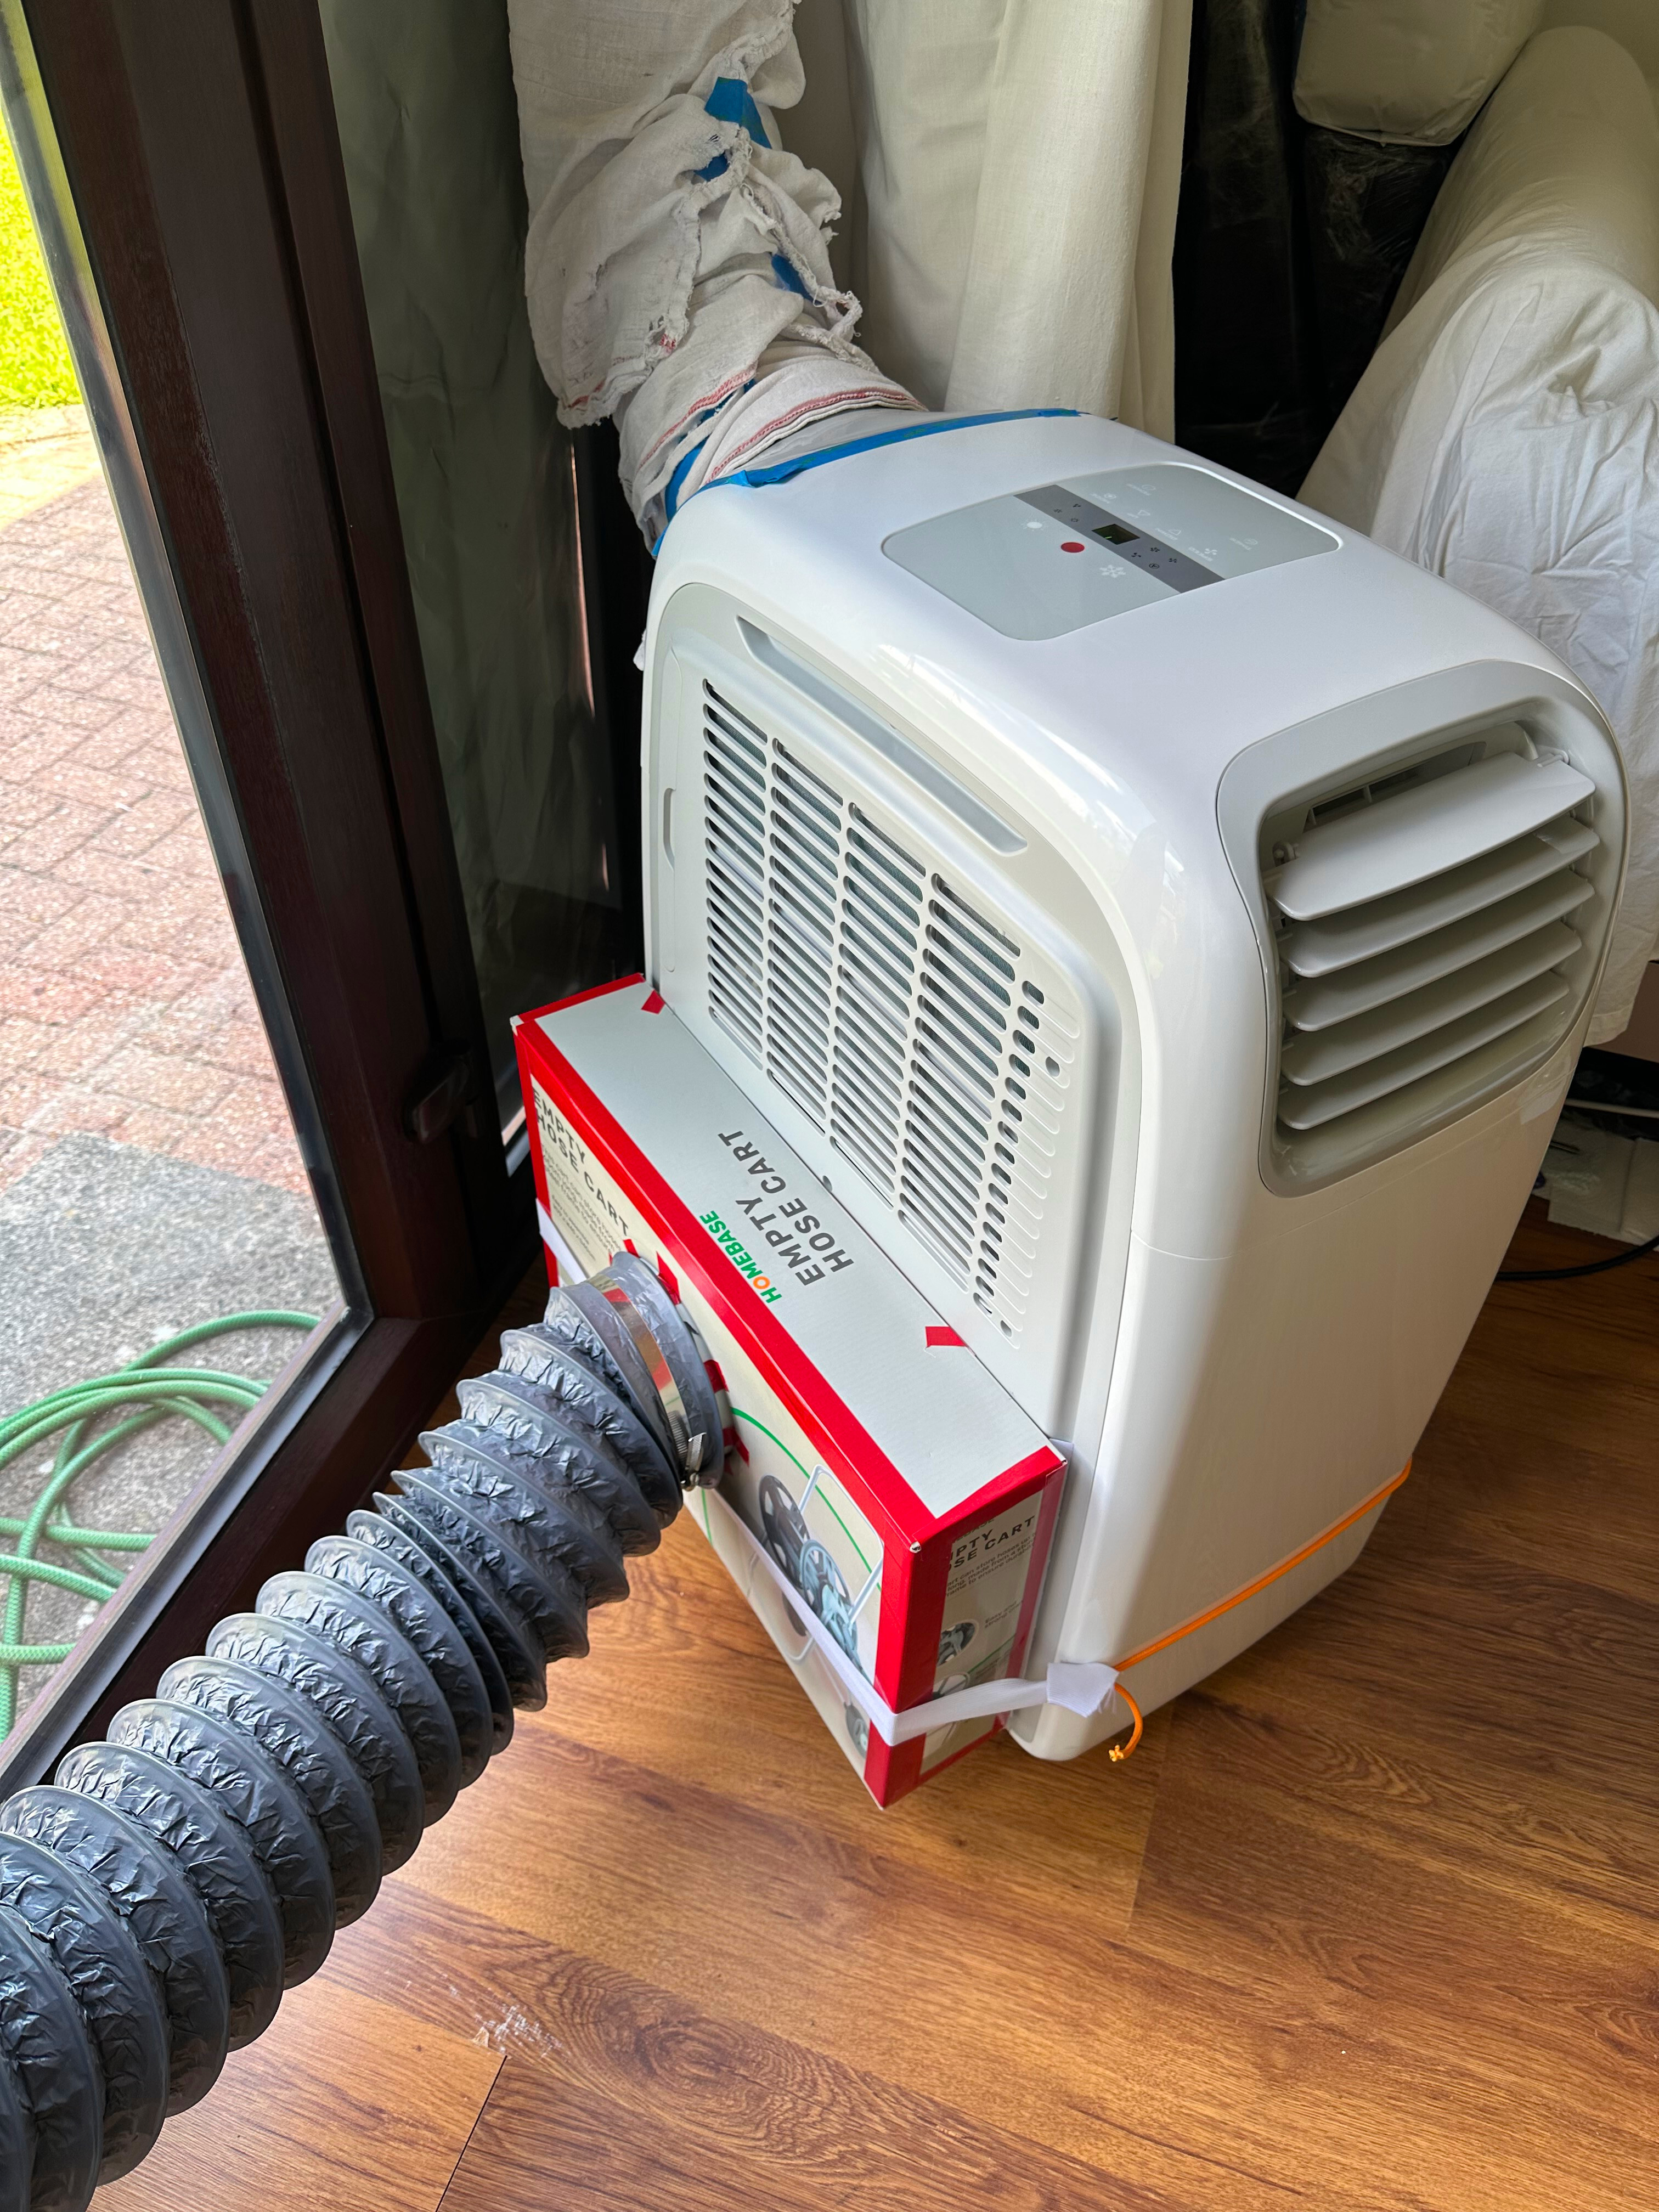
A successful modification of an ElectriQ Airflex15-v2 was sent in:
I have successfully modified my unit into a dual-hose, using a simple cowling box.
It is an ElectriQ Airflex15-v2.
Unfortunately, this unit is no longer sold.
As an aside, I believe (although I cannot confirm) that a model currently sold (iPAC-40) is extremely similar to my unit and can probably be modified in exactly the same way.
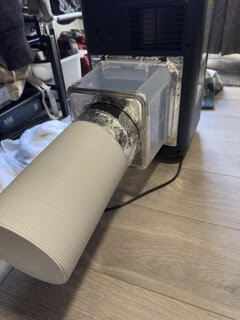
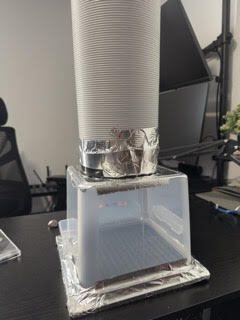
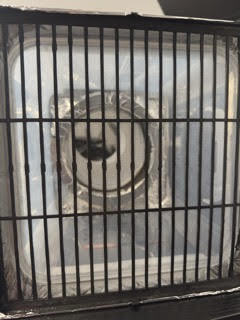
HOMCOM 5000BTU
Samy sent in this successful modification of a HOMCOM 5000BTU:
I recently discovered the issues with single hose ACs during a heatwave and, after coming across your page, made the decision to convert mine.
It’s a Homcom 5000BTU, I’ve cut a hole in a tupperware container, stuck a flange through it, and stuck the hose through that with HVAC tape to seal everything. The idea is that I can pop this off whenever I need to store it and that the regular grille is there to catch anything that gets picked up.
I’m waiting on a tall table and an acrylic window seal to reach the window and add more space where the AC will be. Overall it’s pretty affordable, still portable, and it works.
As for anyone who would like to do the same:
- Araven Square Food Container & Lid 6 Litre is the container I used. It sits right within the grille’s borders, so you can tape over the remaining edge and leave the clips free (with the right tape it will hold)
- I cut the hole by marking it around the flange and using a heated knife to melt through it bit by bit
- I sanded any edges and covered them with tape afterward to ensure nothing loose could be picked up
- I avoided using tape in areas where something wasn’t blocking their entry to the intake (if the tape came loose)
Inventor Magic M2GHP290-12
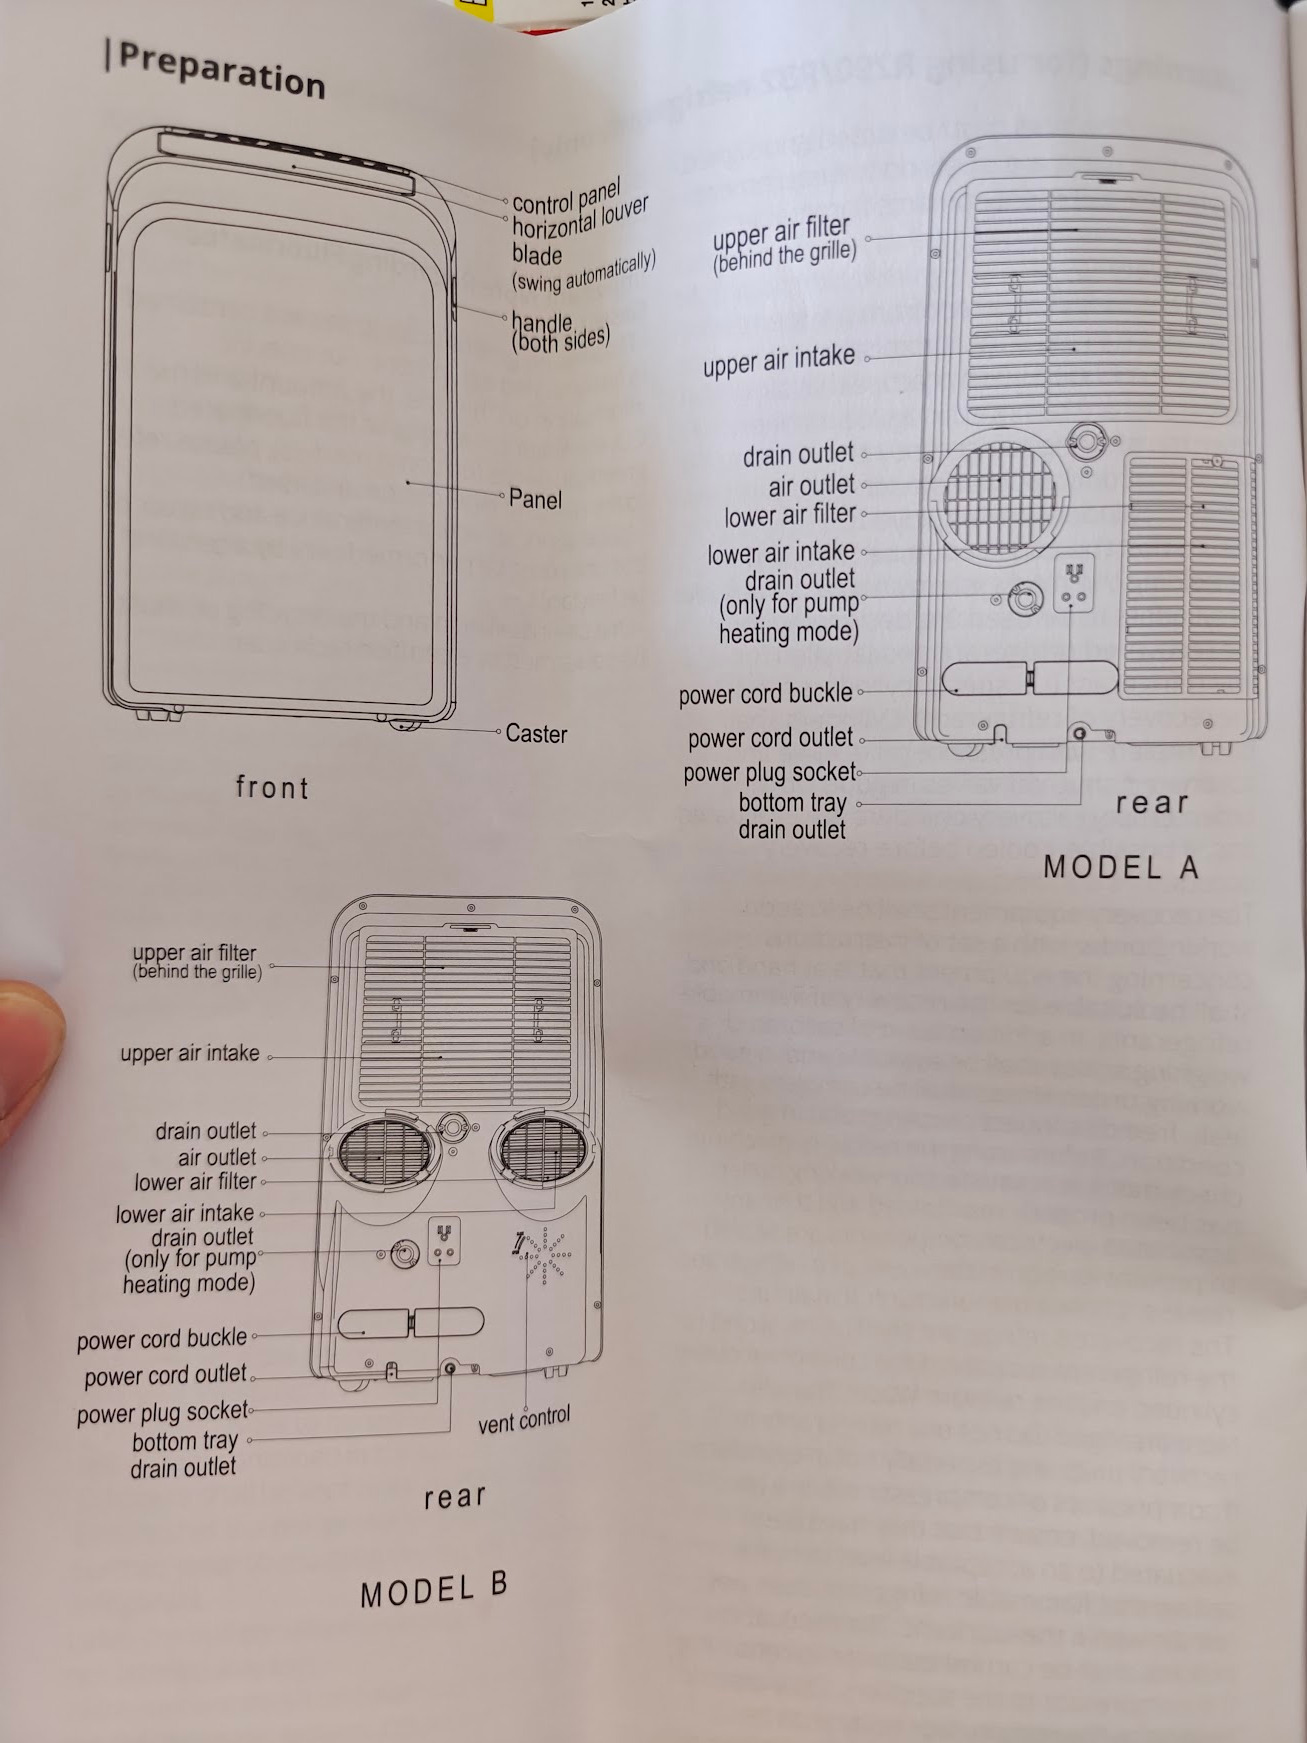
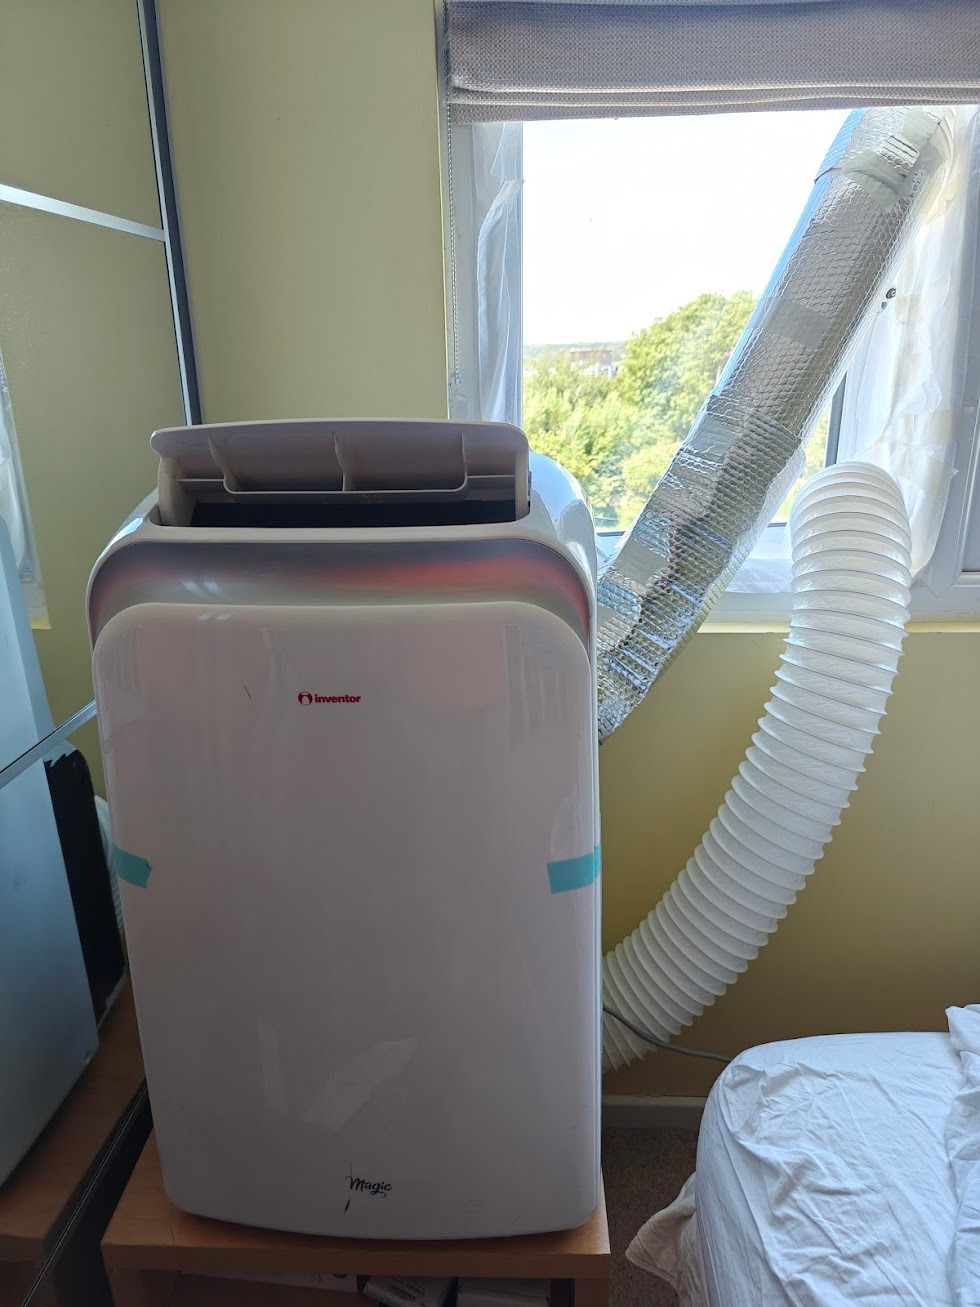
A successful modification of an Inventor Magic M2GHP290-12 (also sold as the Wessex):
I’ve converted my 12000 BTU Inventor Magic (otherwise known as Wessex) to dual hose.
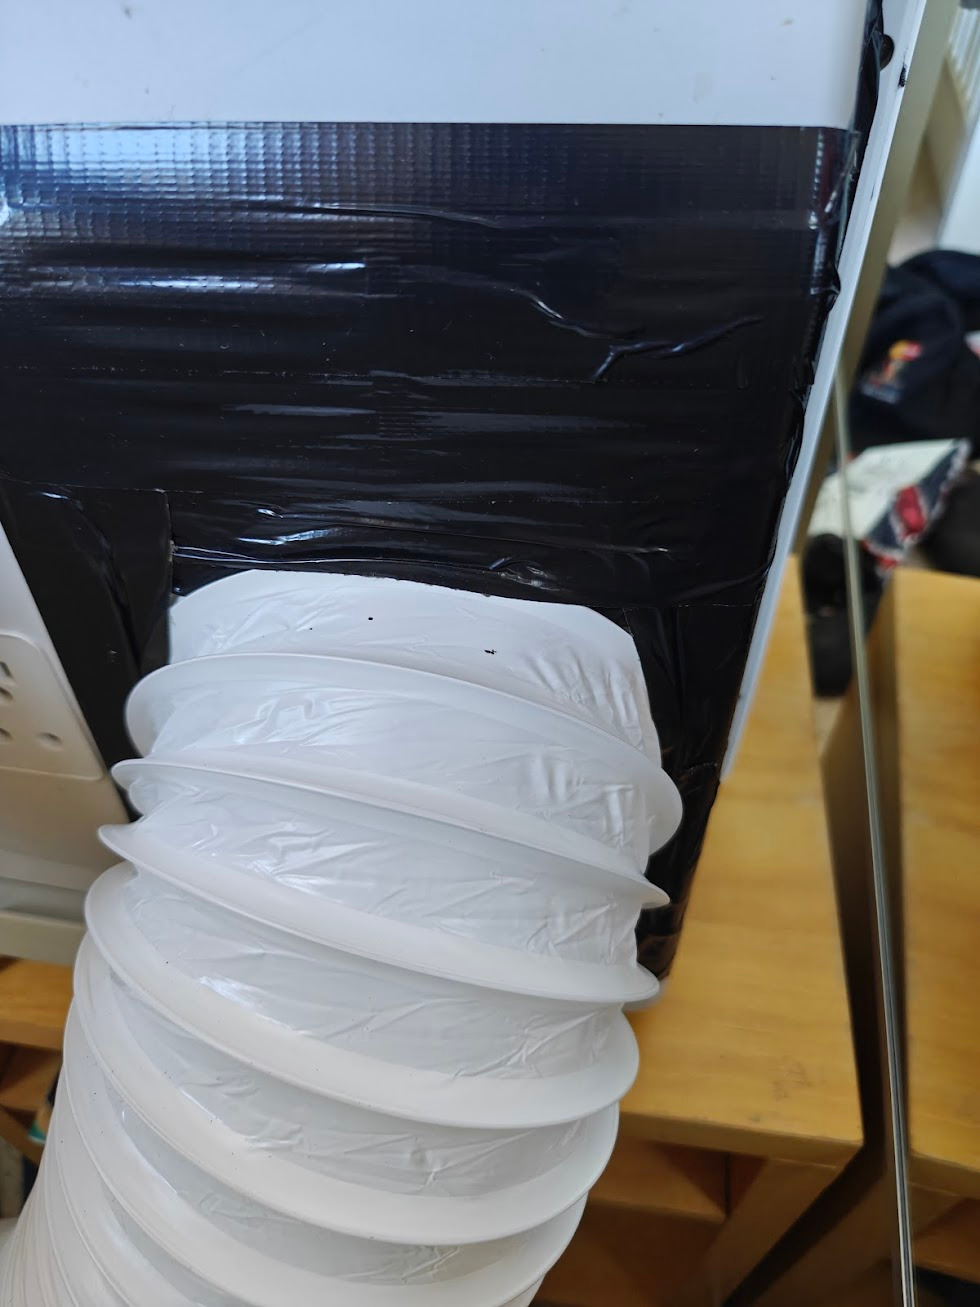
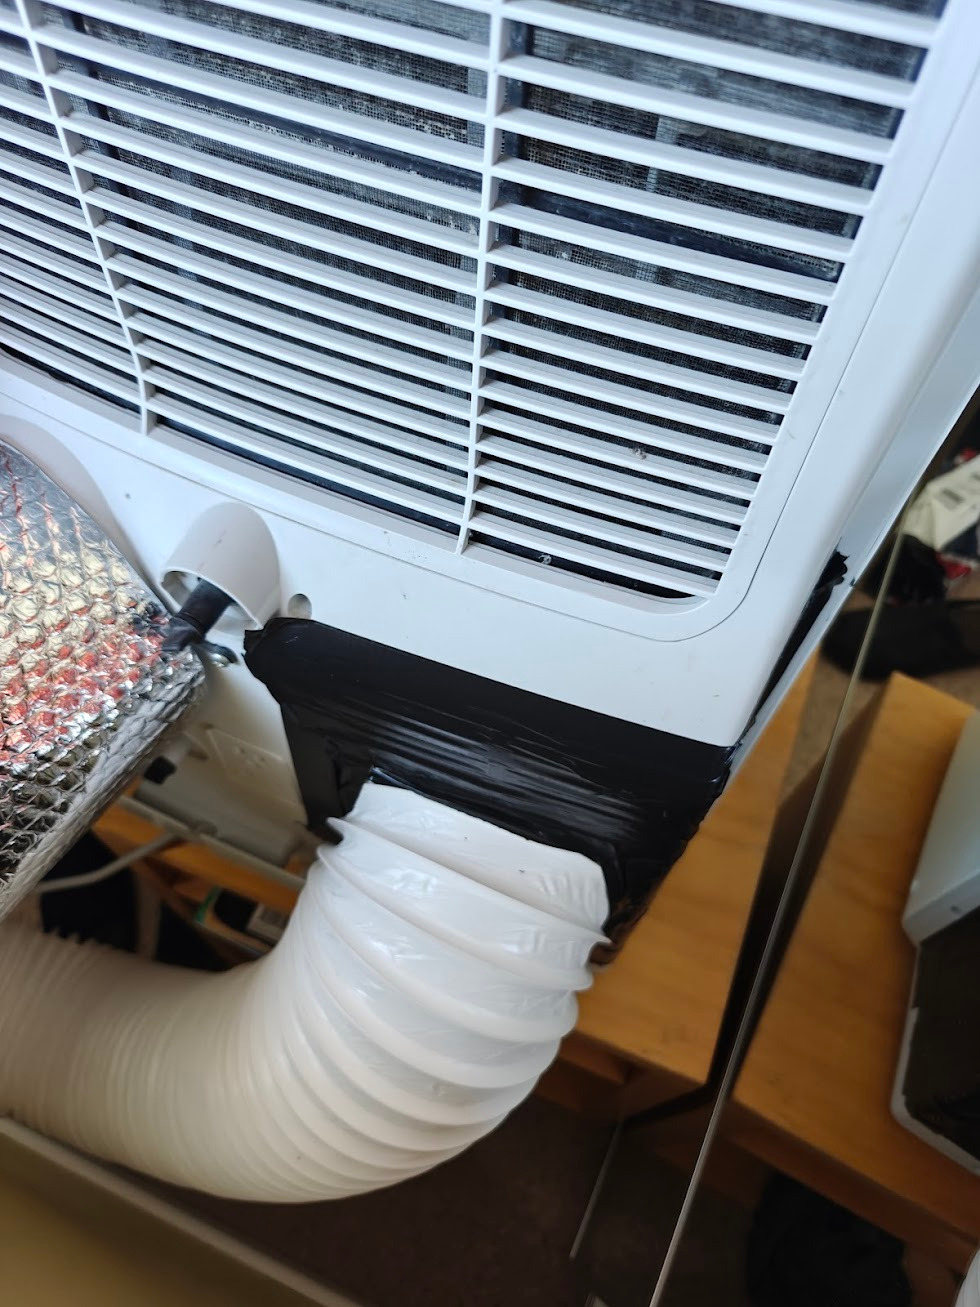
The Inventor model is M2GHP290-12 (quite annoyingly they don’t sell the dual hose variant M2GHP290-12BS in the UK - photo from the manual is included). I purchased a lightweight hose with the same 150mm diameter as the hot air hose from Toolstation [150mm PVC flexible ducting hose], then simply used double sided tape, then duct tape to attach the intake hose and block the other inputs.
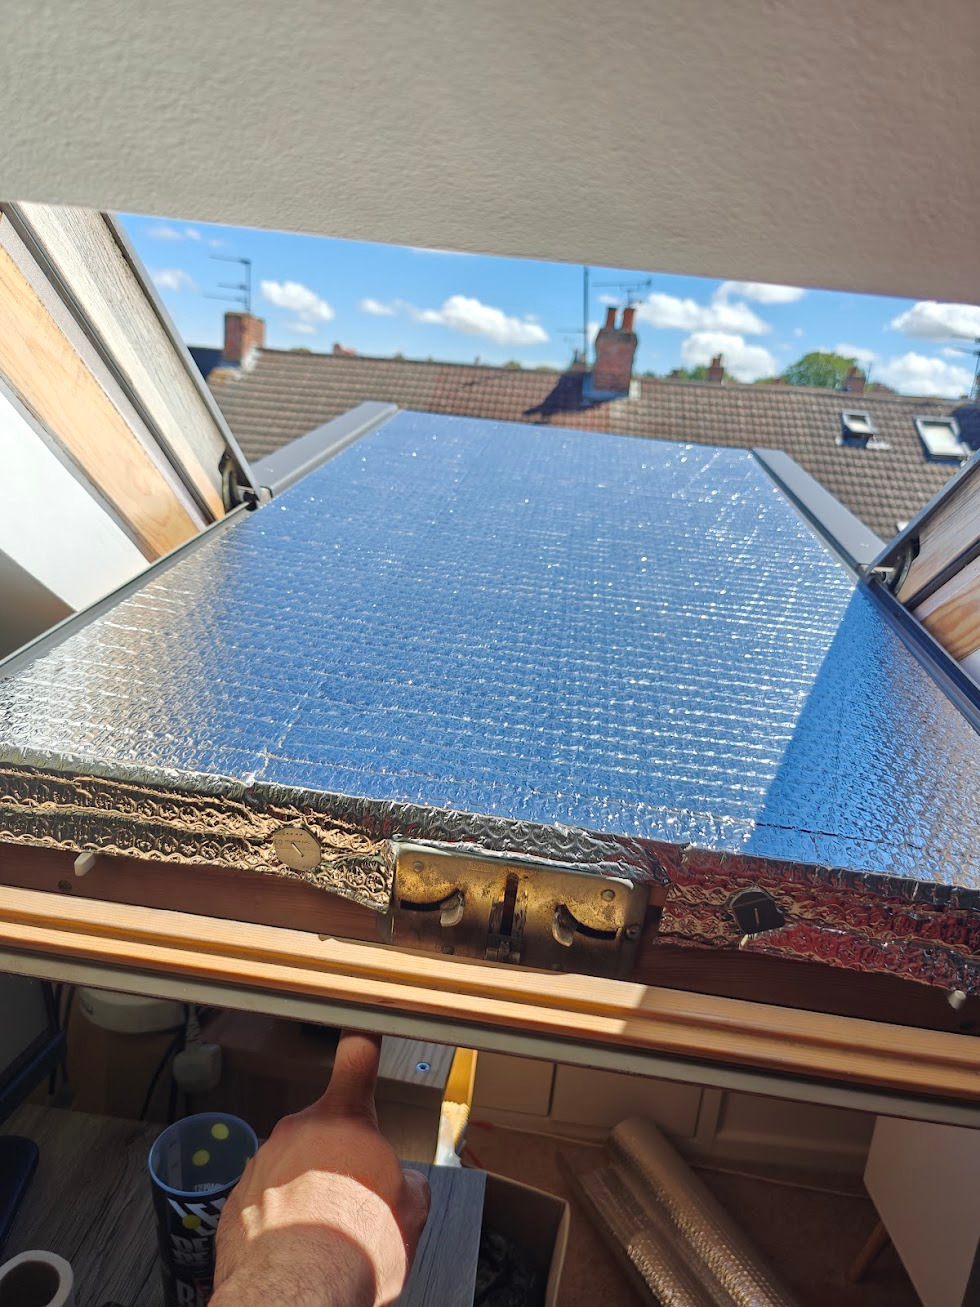
I then used Lidl reflective insulating roll to cover the hot air hose, as it radiates heat at 50C. That same reflective roll is used to crudely cover the outside of the velux window, which is the main source of radiative heat into the room.
The room is a loft room, that is boiling hot in the summer. Within 20 minutes the air temperature dropped 2C, and in 35 minutes it dropped another 1C.
It used to take over an hour or two to drop by 1C.
When I have more money I’d like to buy this kit for the intake hose [3-metre vent hose extension kit for portable AC units, eBay] and order a custom acrylic window slab with circular cutouts [custom-size 4mm acrylic AC window seal, plasticsheetsshop.co.uk] (rather than using the fabric window kit)
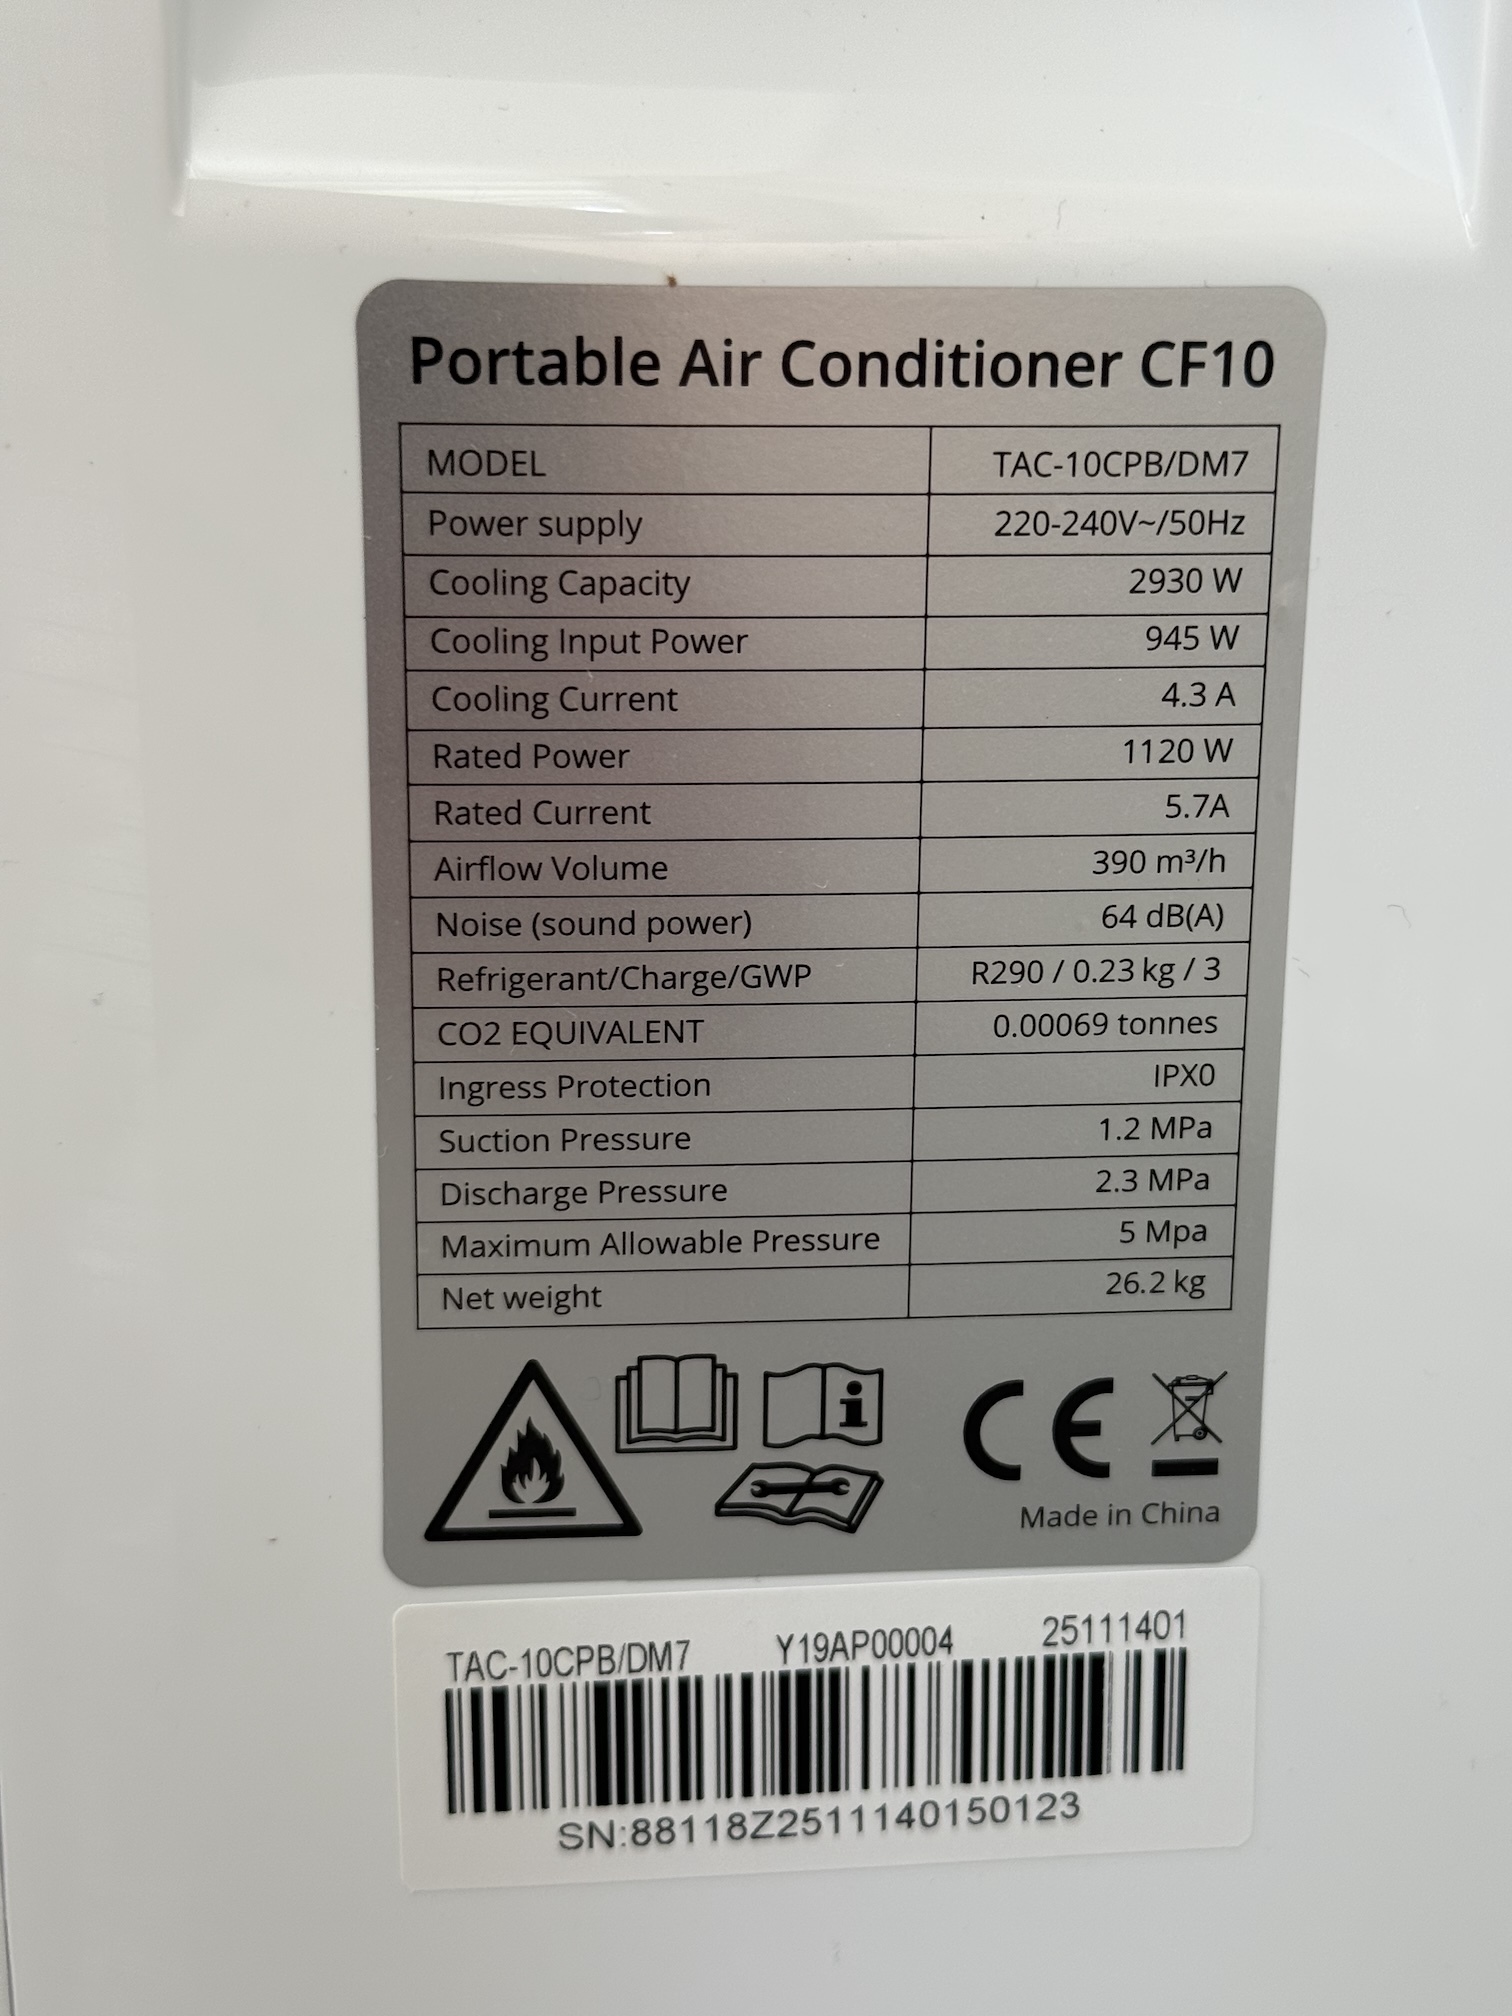
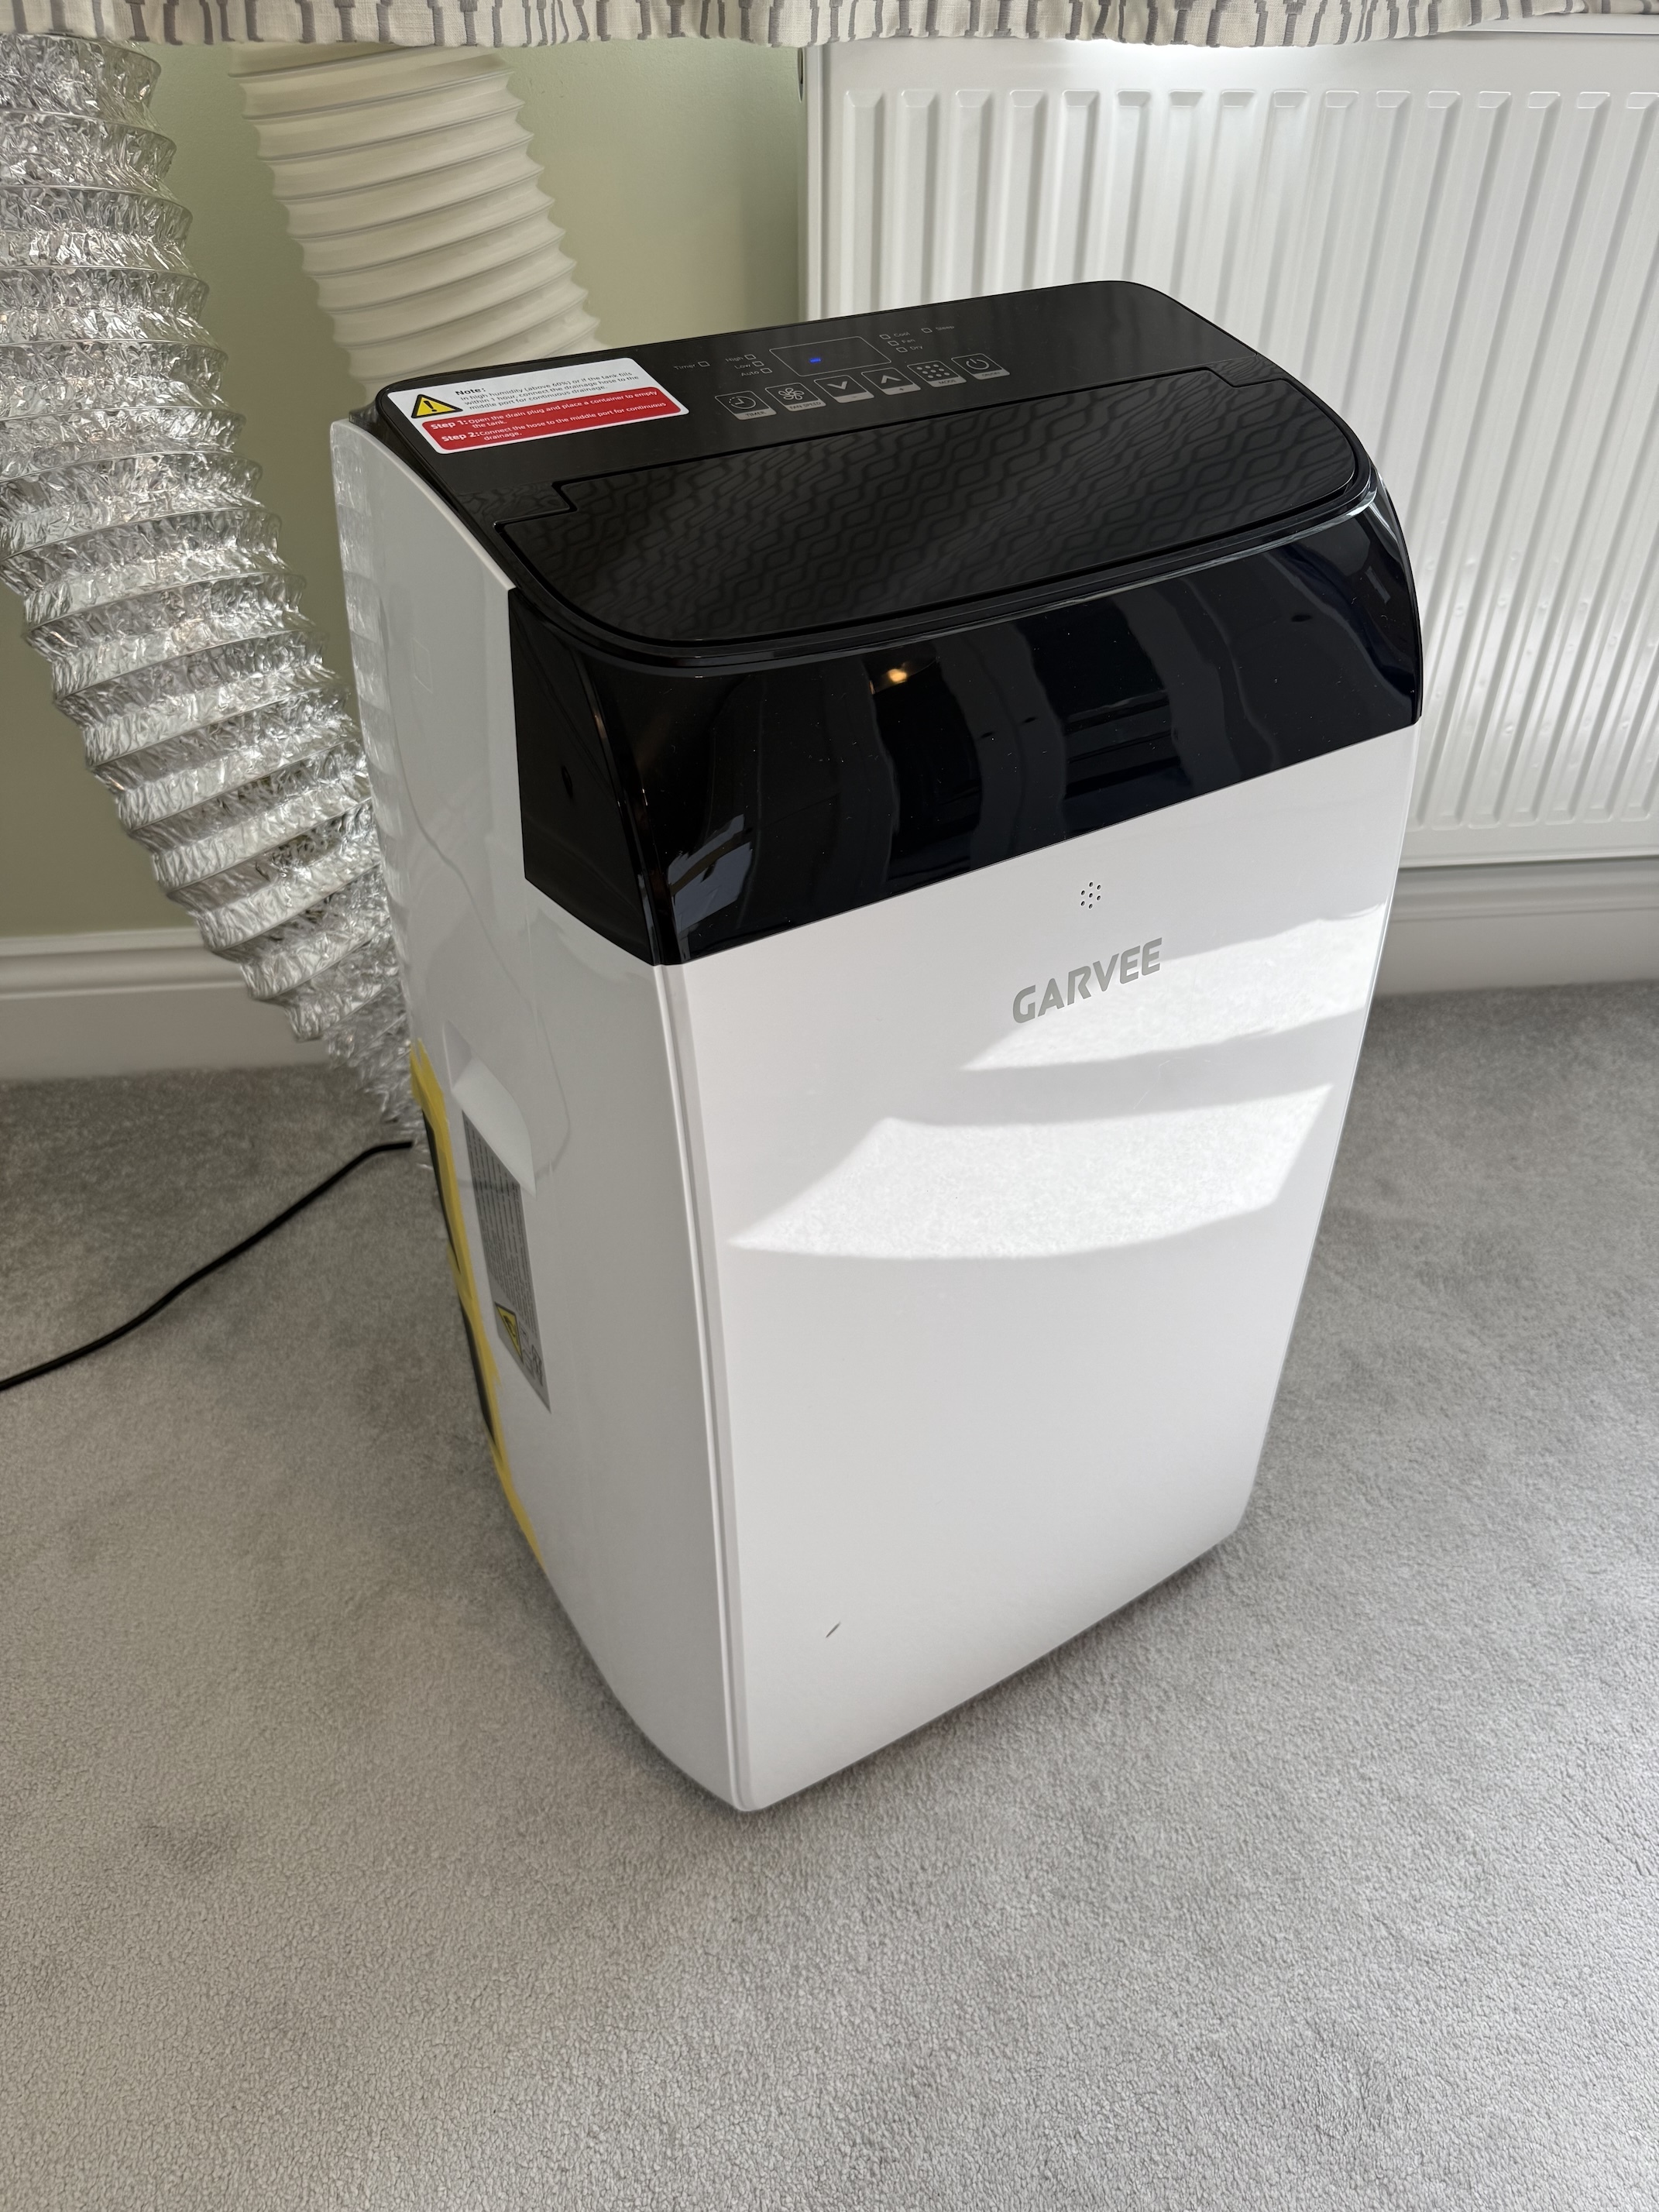
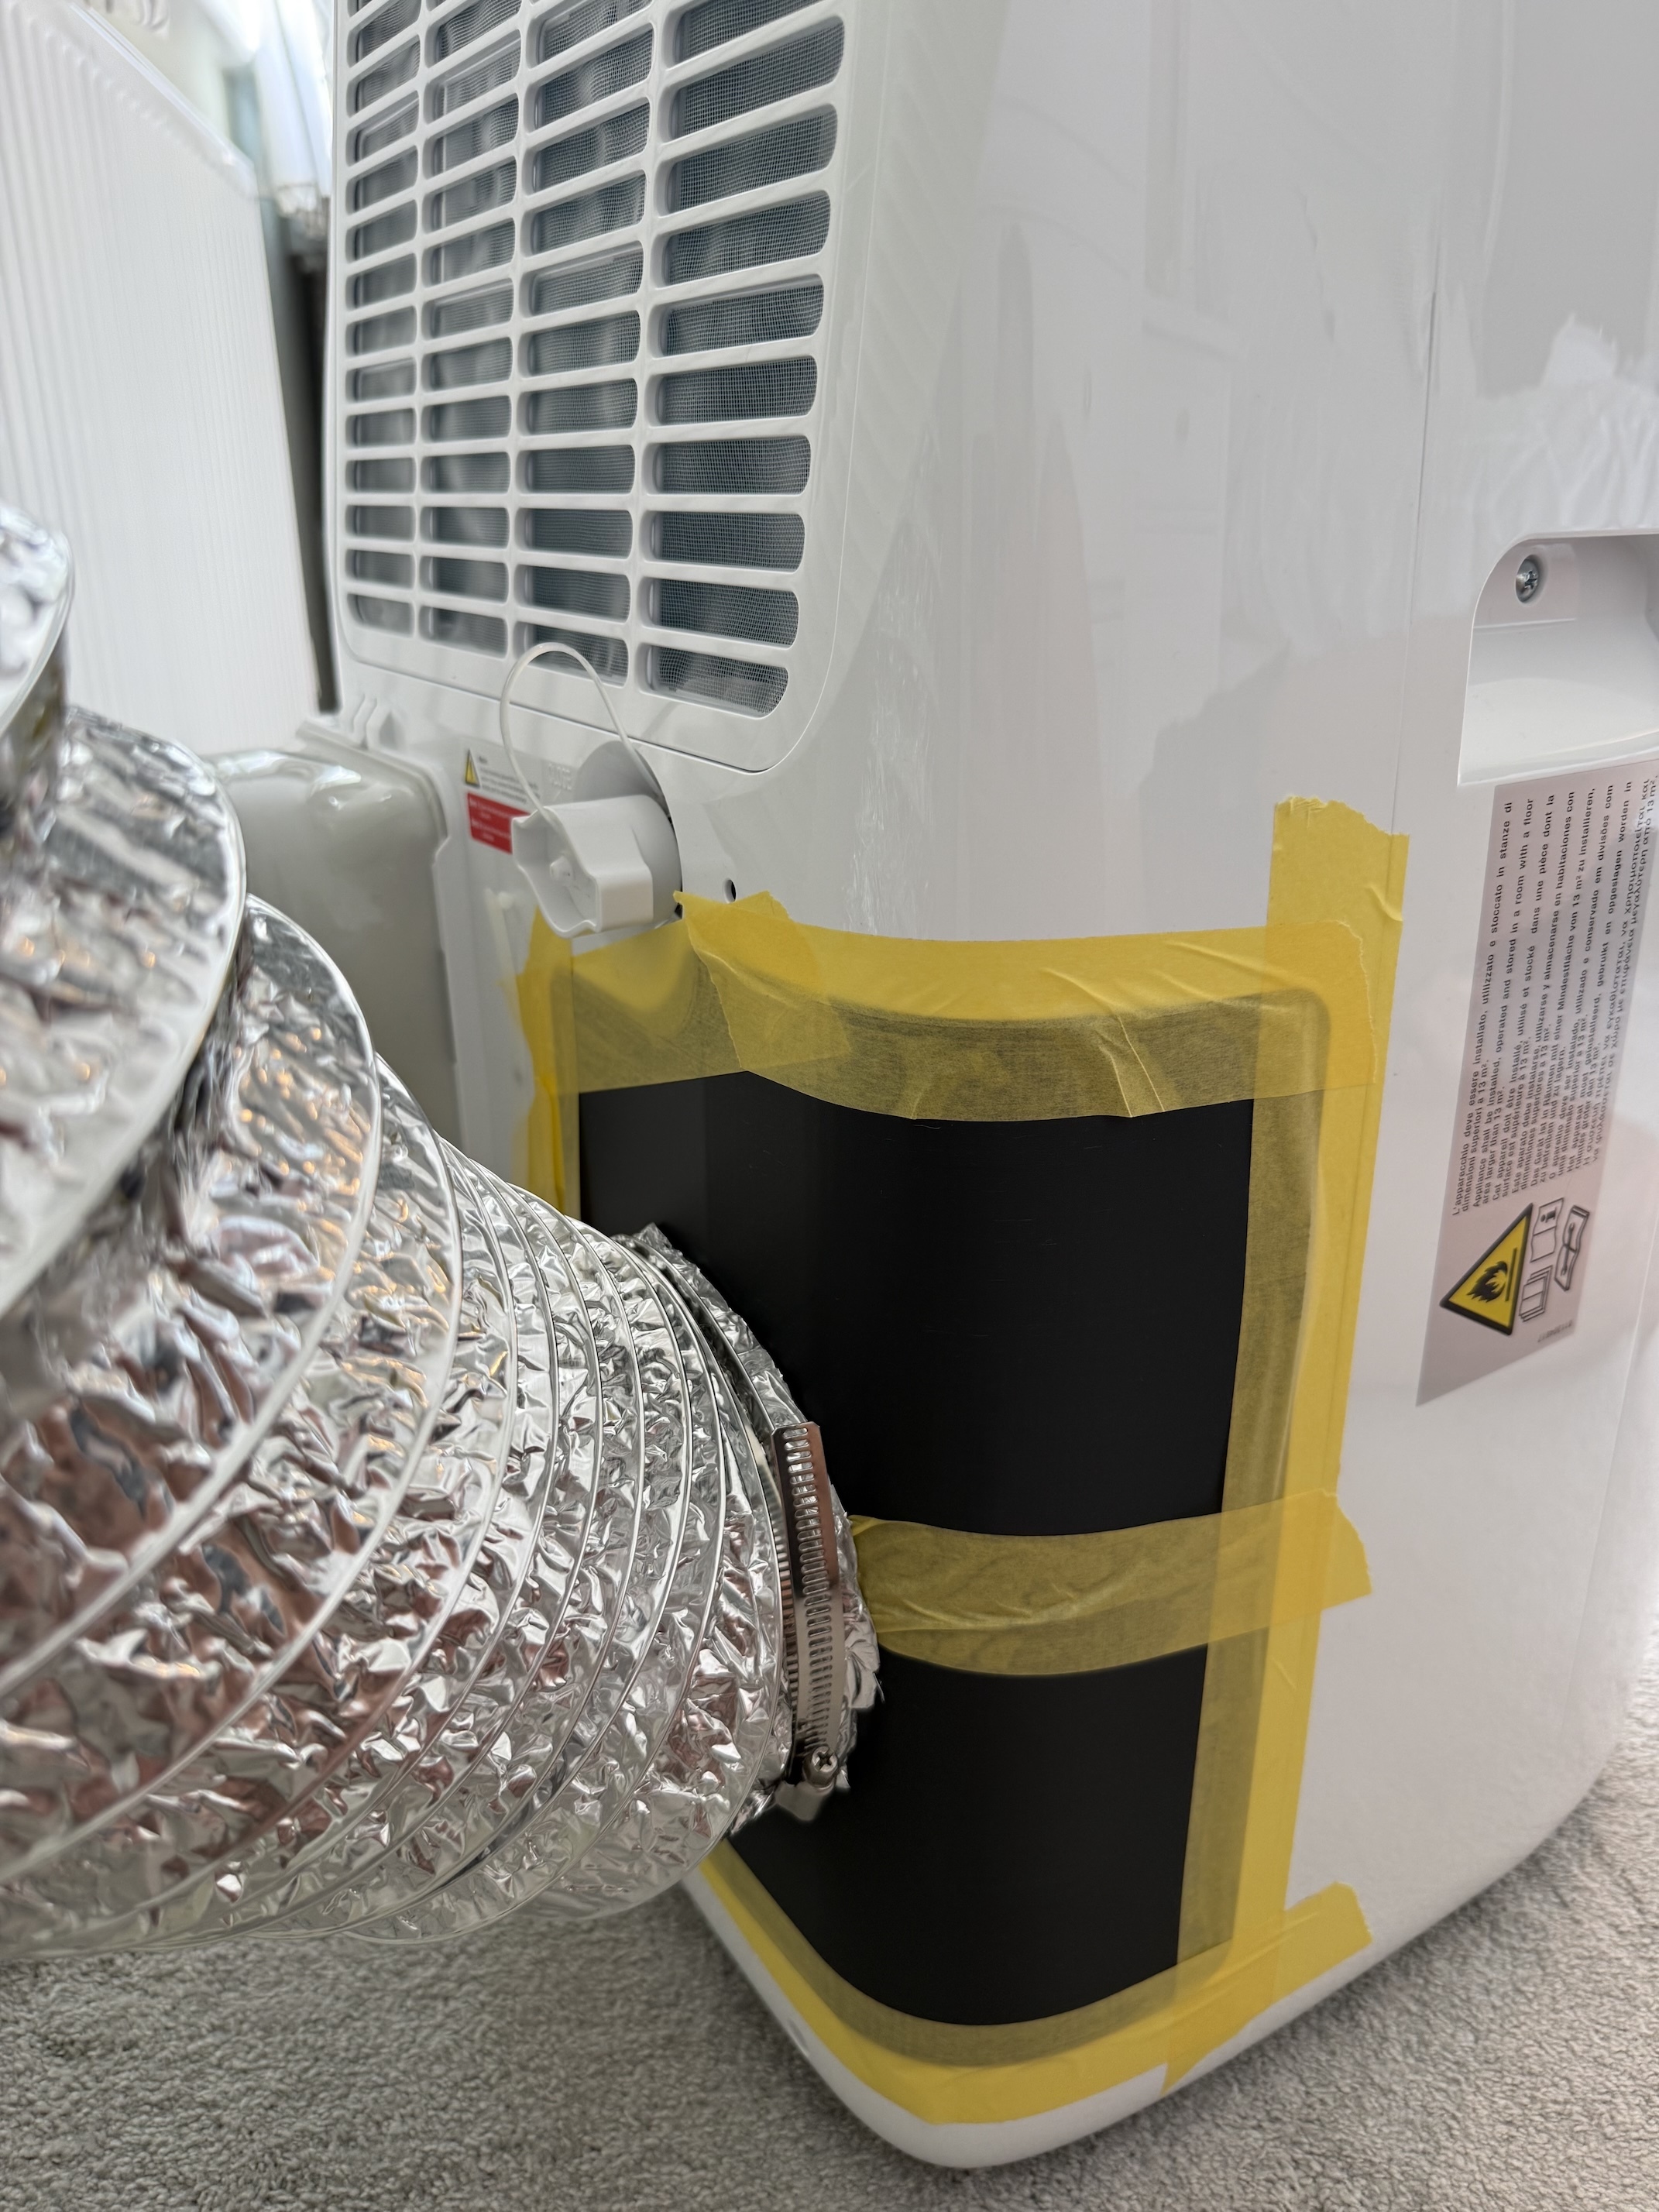
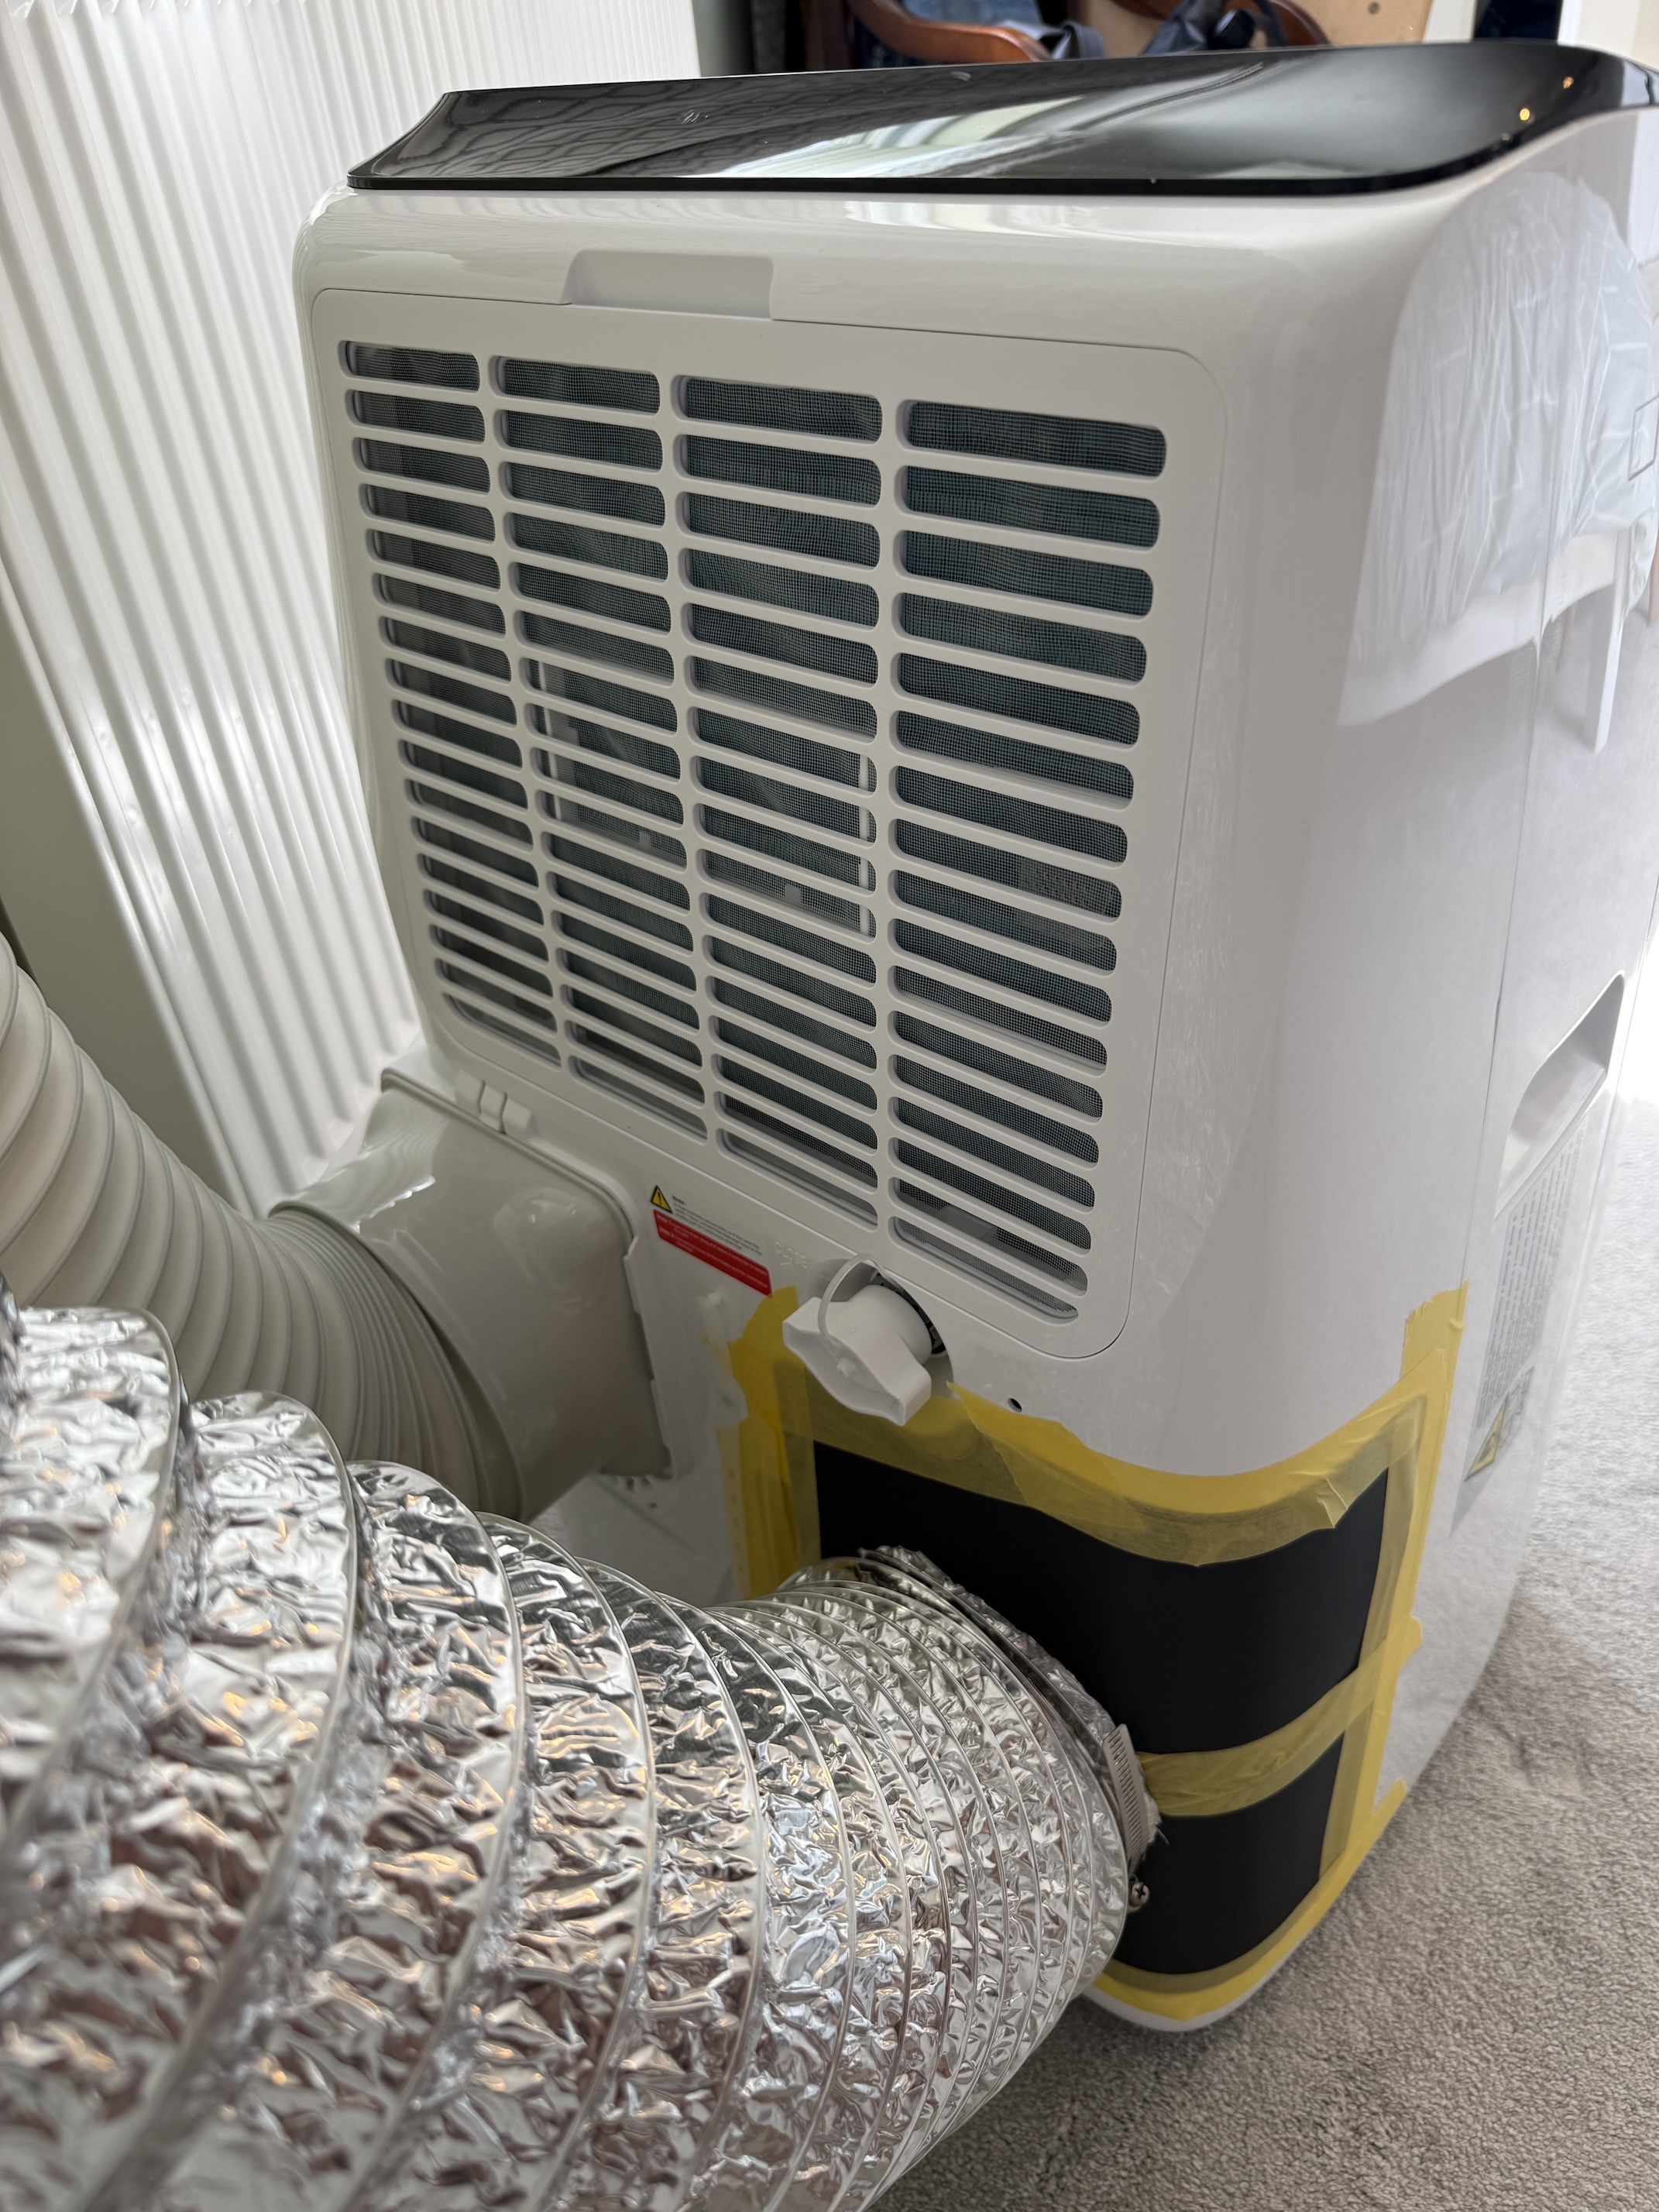
Garvee CF10 (TAC-10CPB/DM7)
A successful modification of a Garvee CF10 (TAC-10CPB/DM7):
Great page - I found a free model [dual-hose adapter kit for the Acecool U-A on MakerWorld] for another make that I could 3D print which pretty much fitted my AliExpress-special AC.
I didn’t disassemble the device to ensure it was completely sealed, but it has got to be better than how it was!
ElectriQ AC9000E
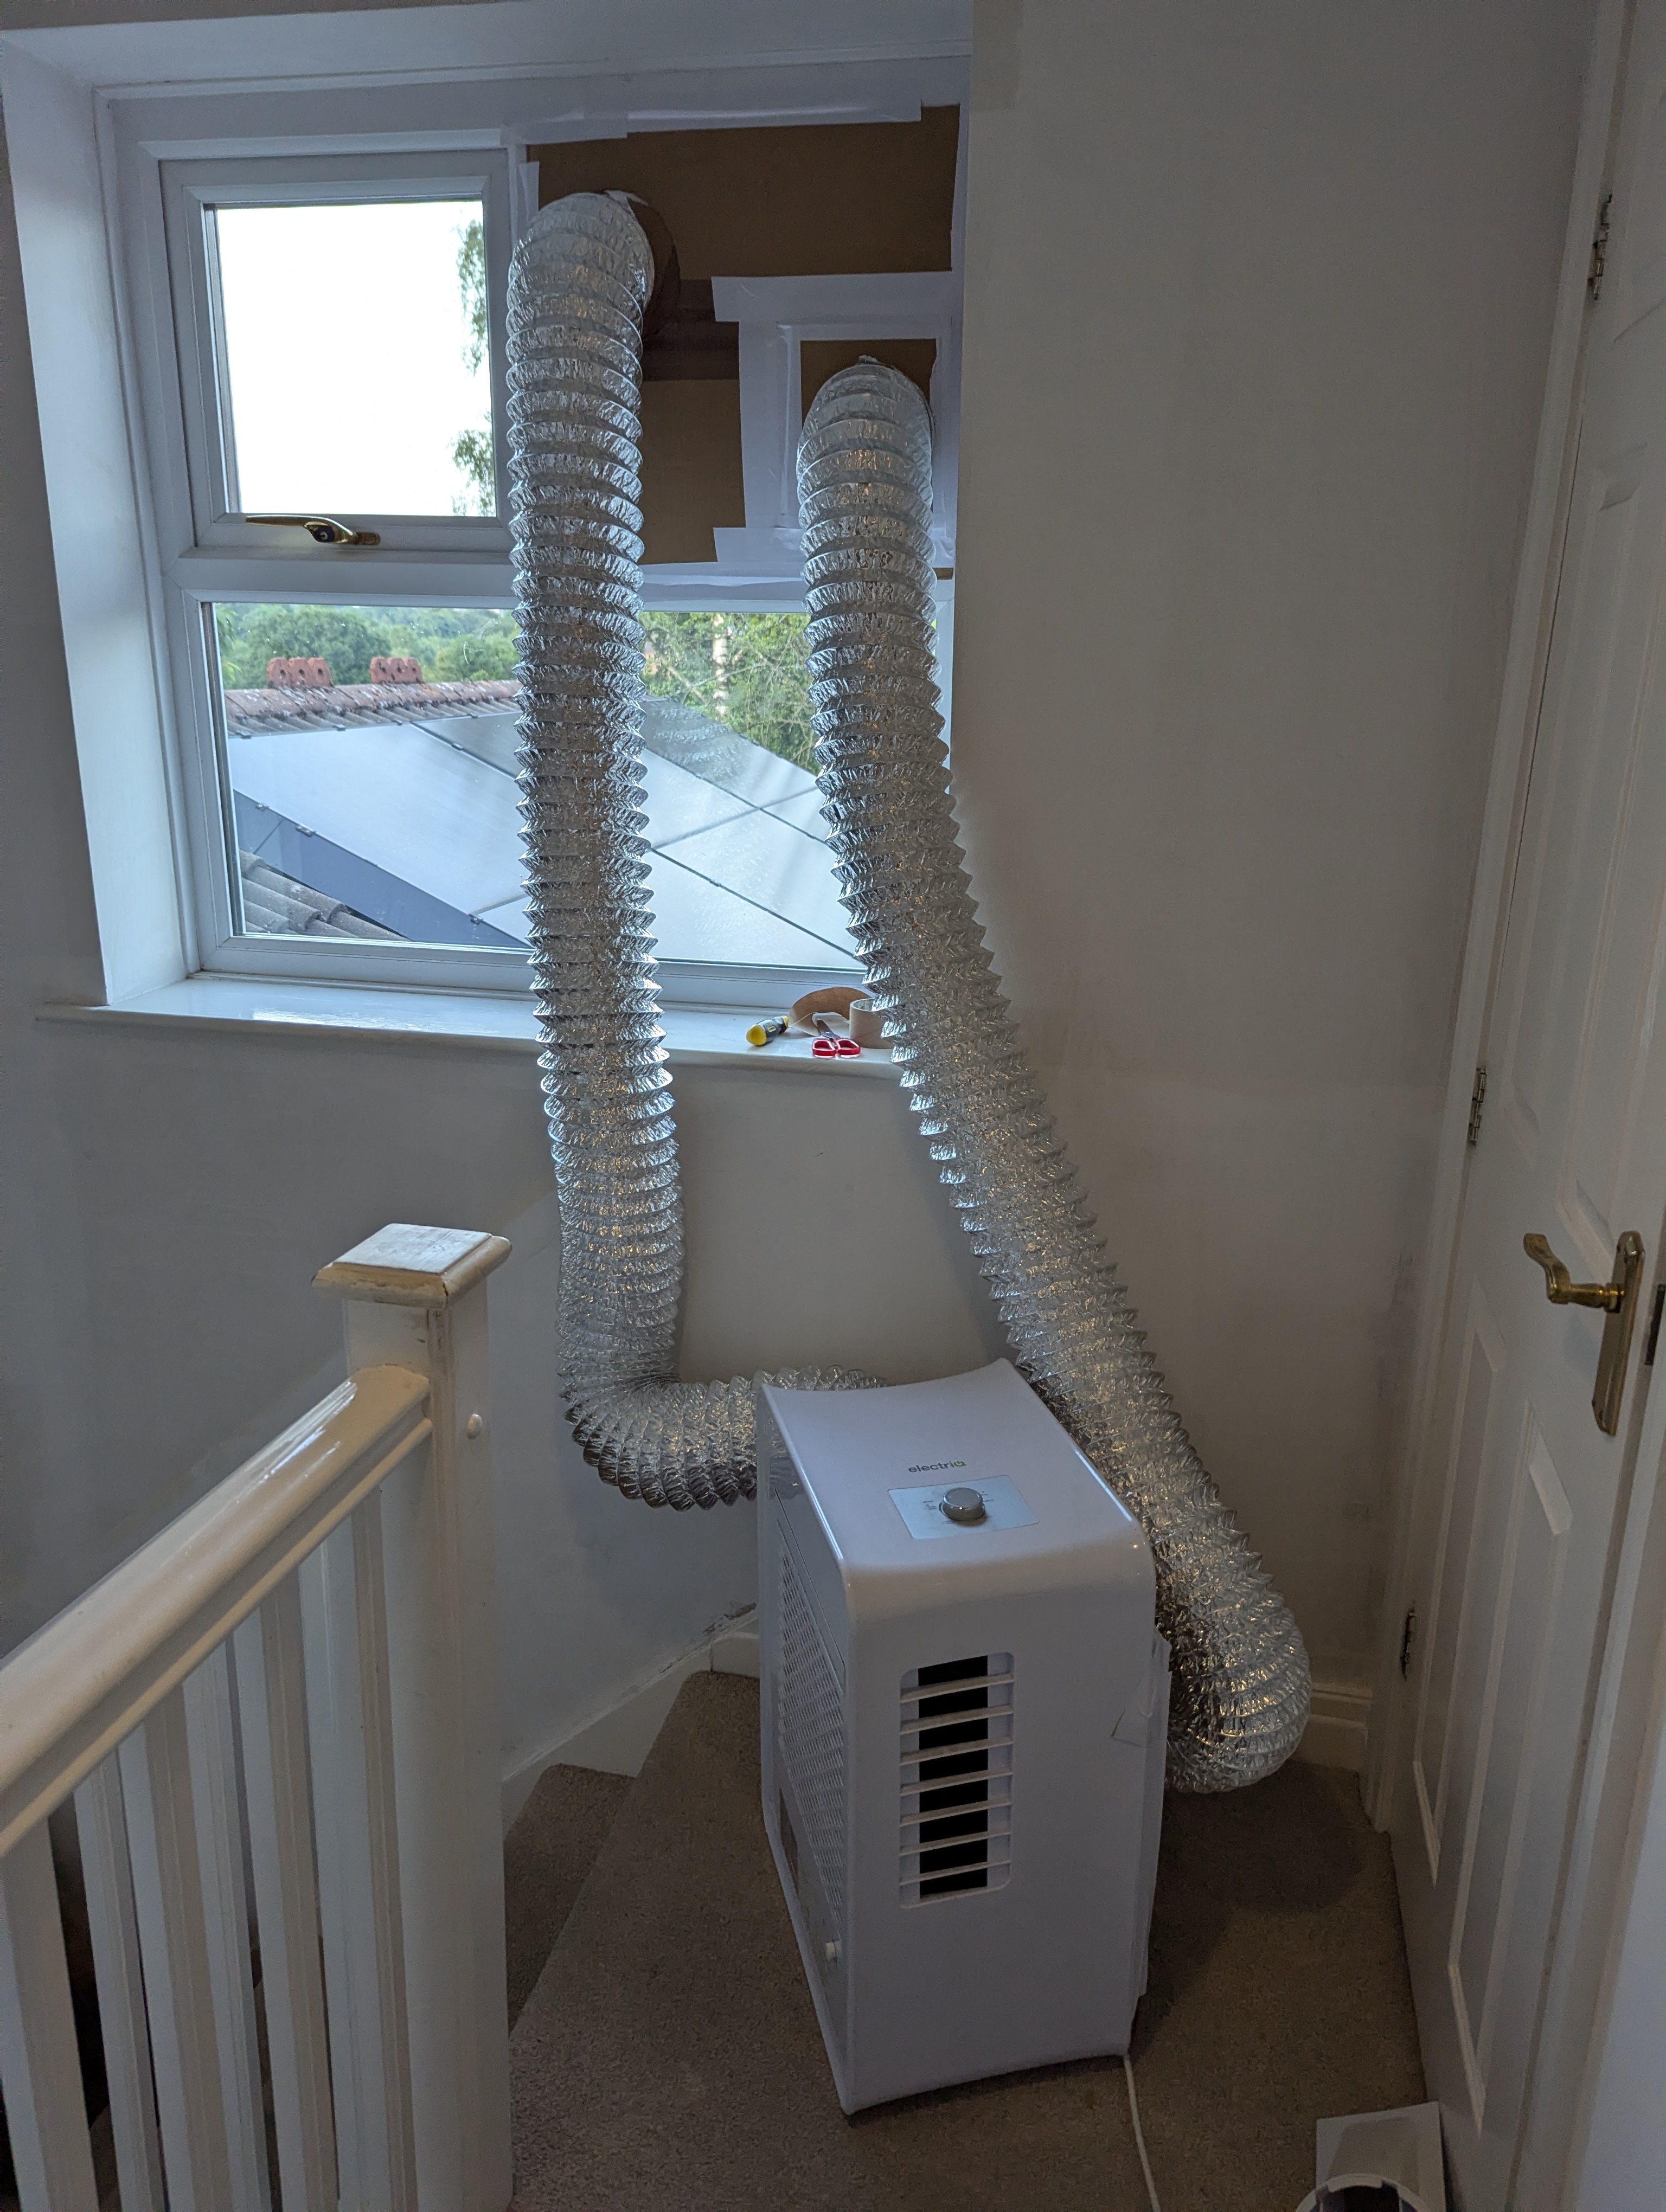
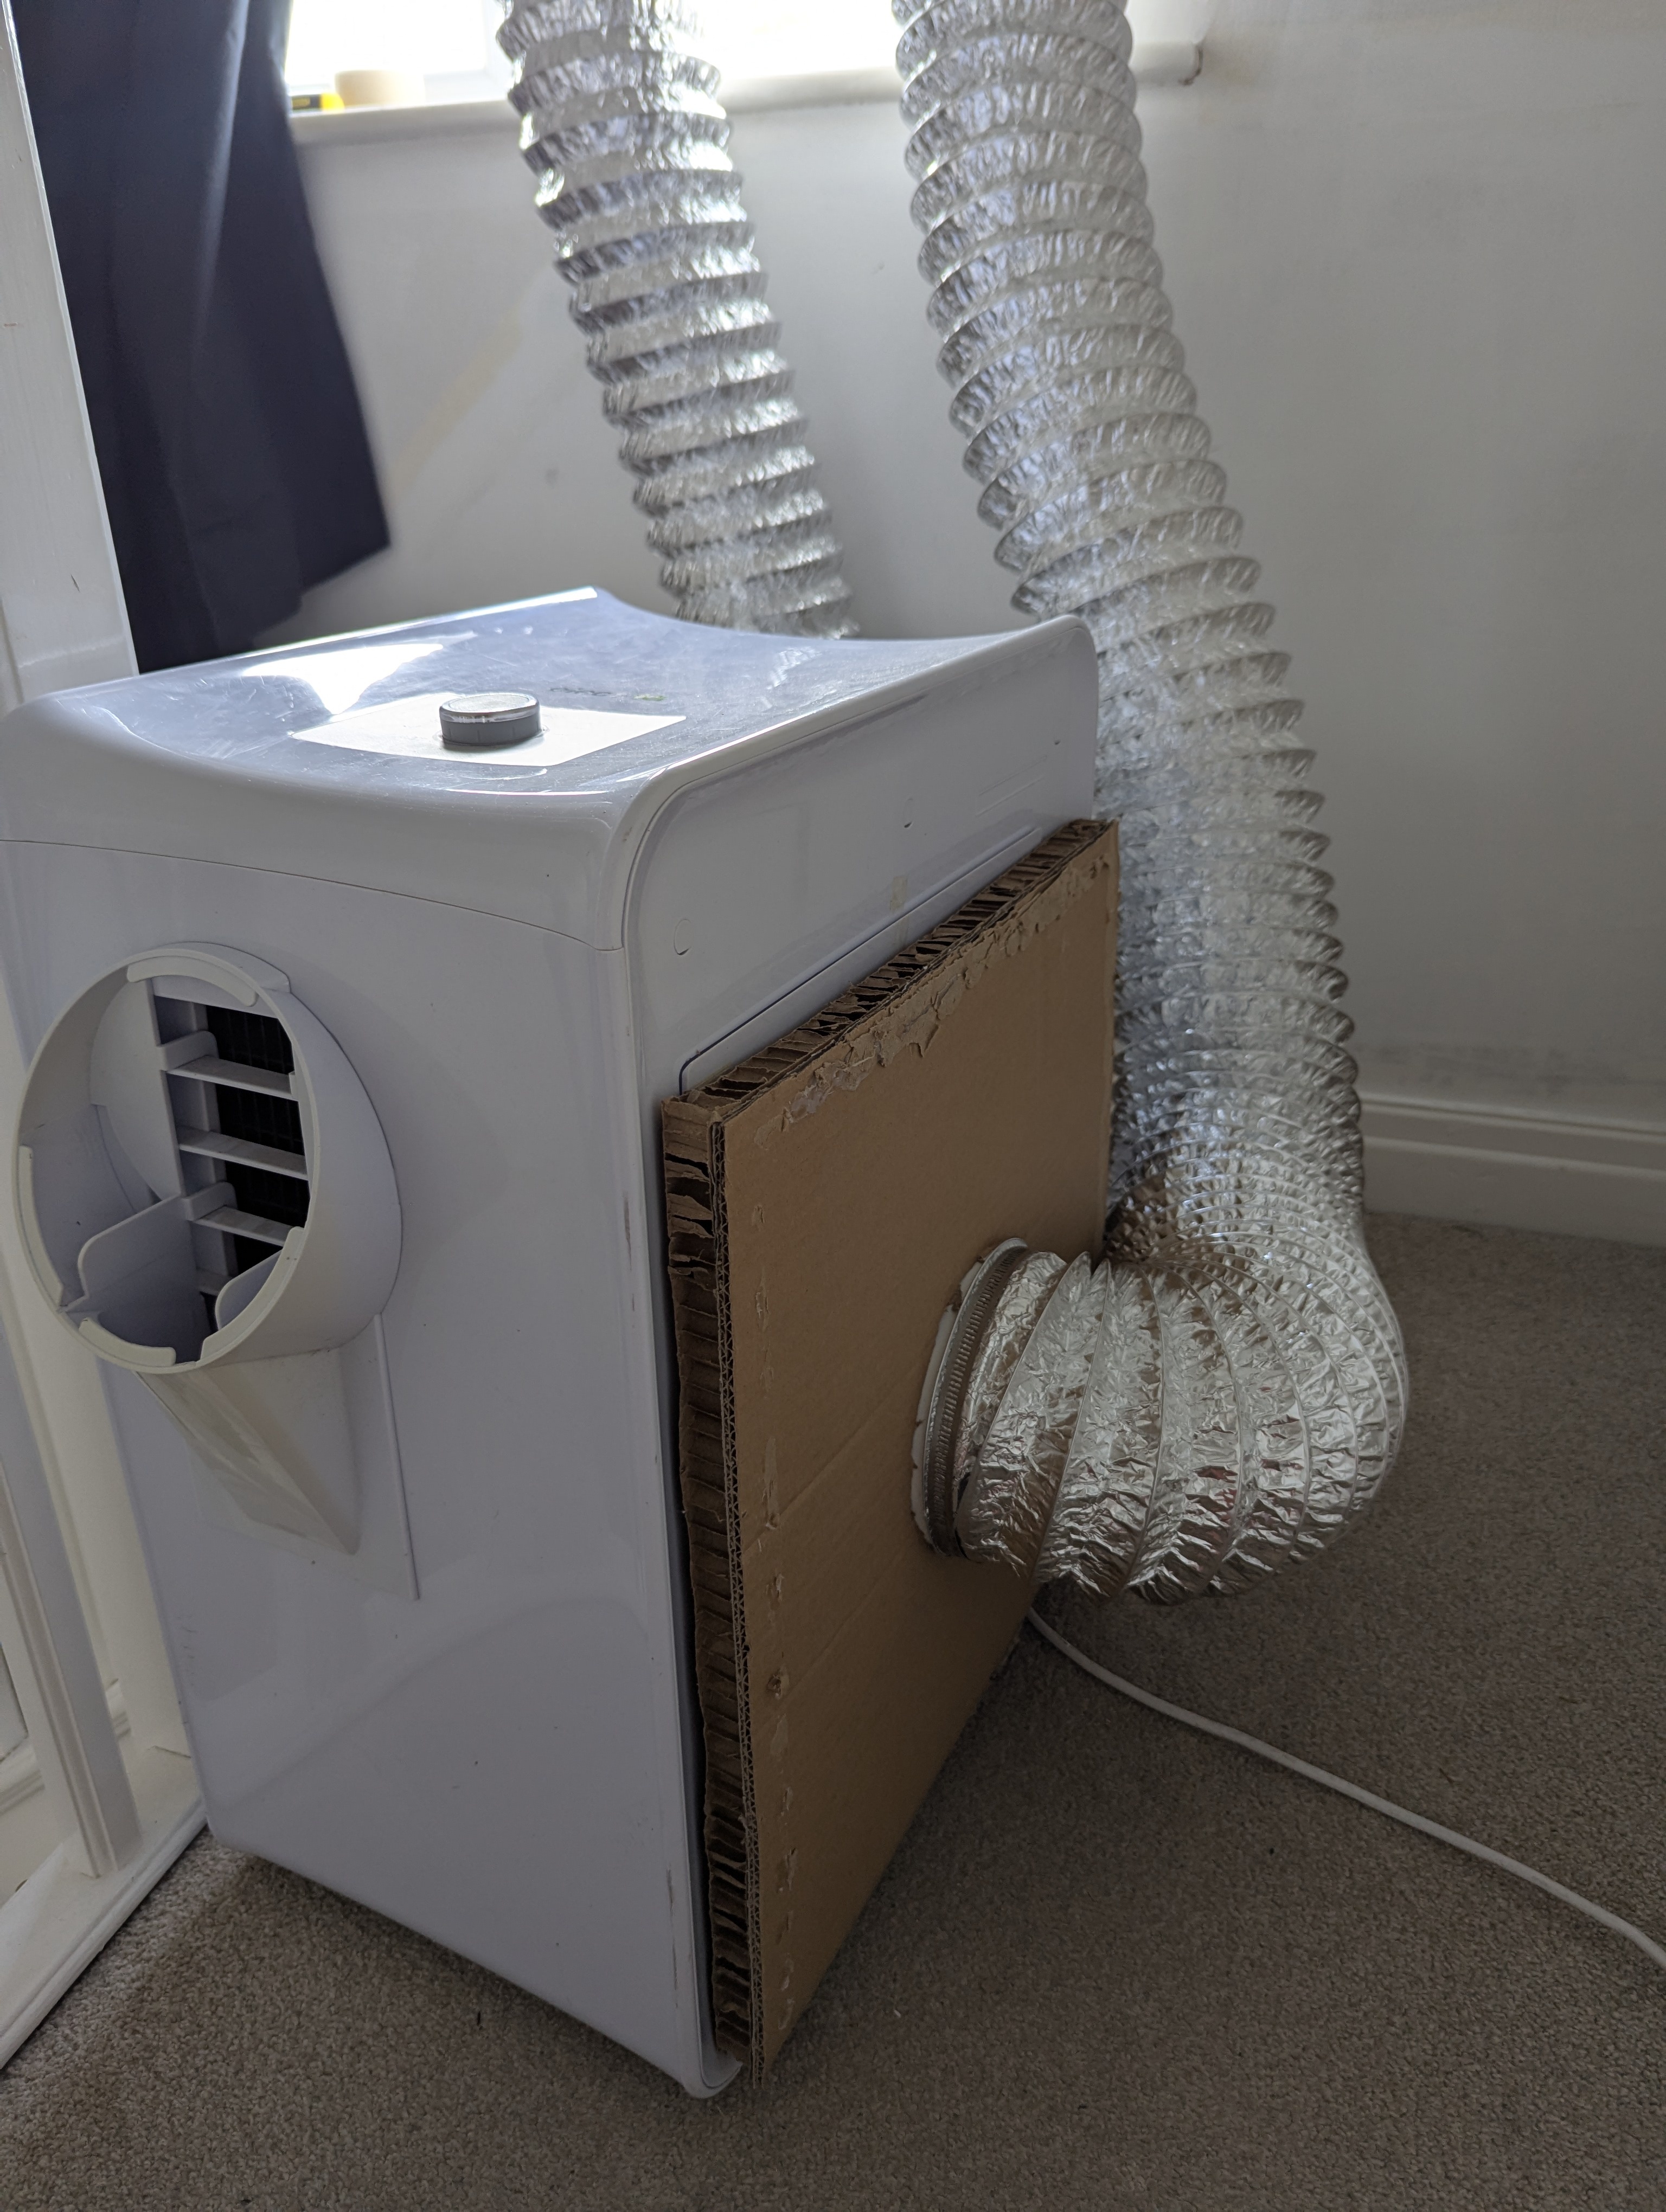
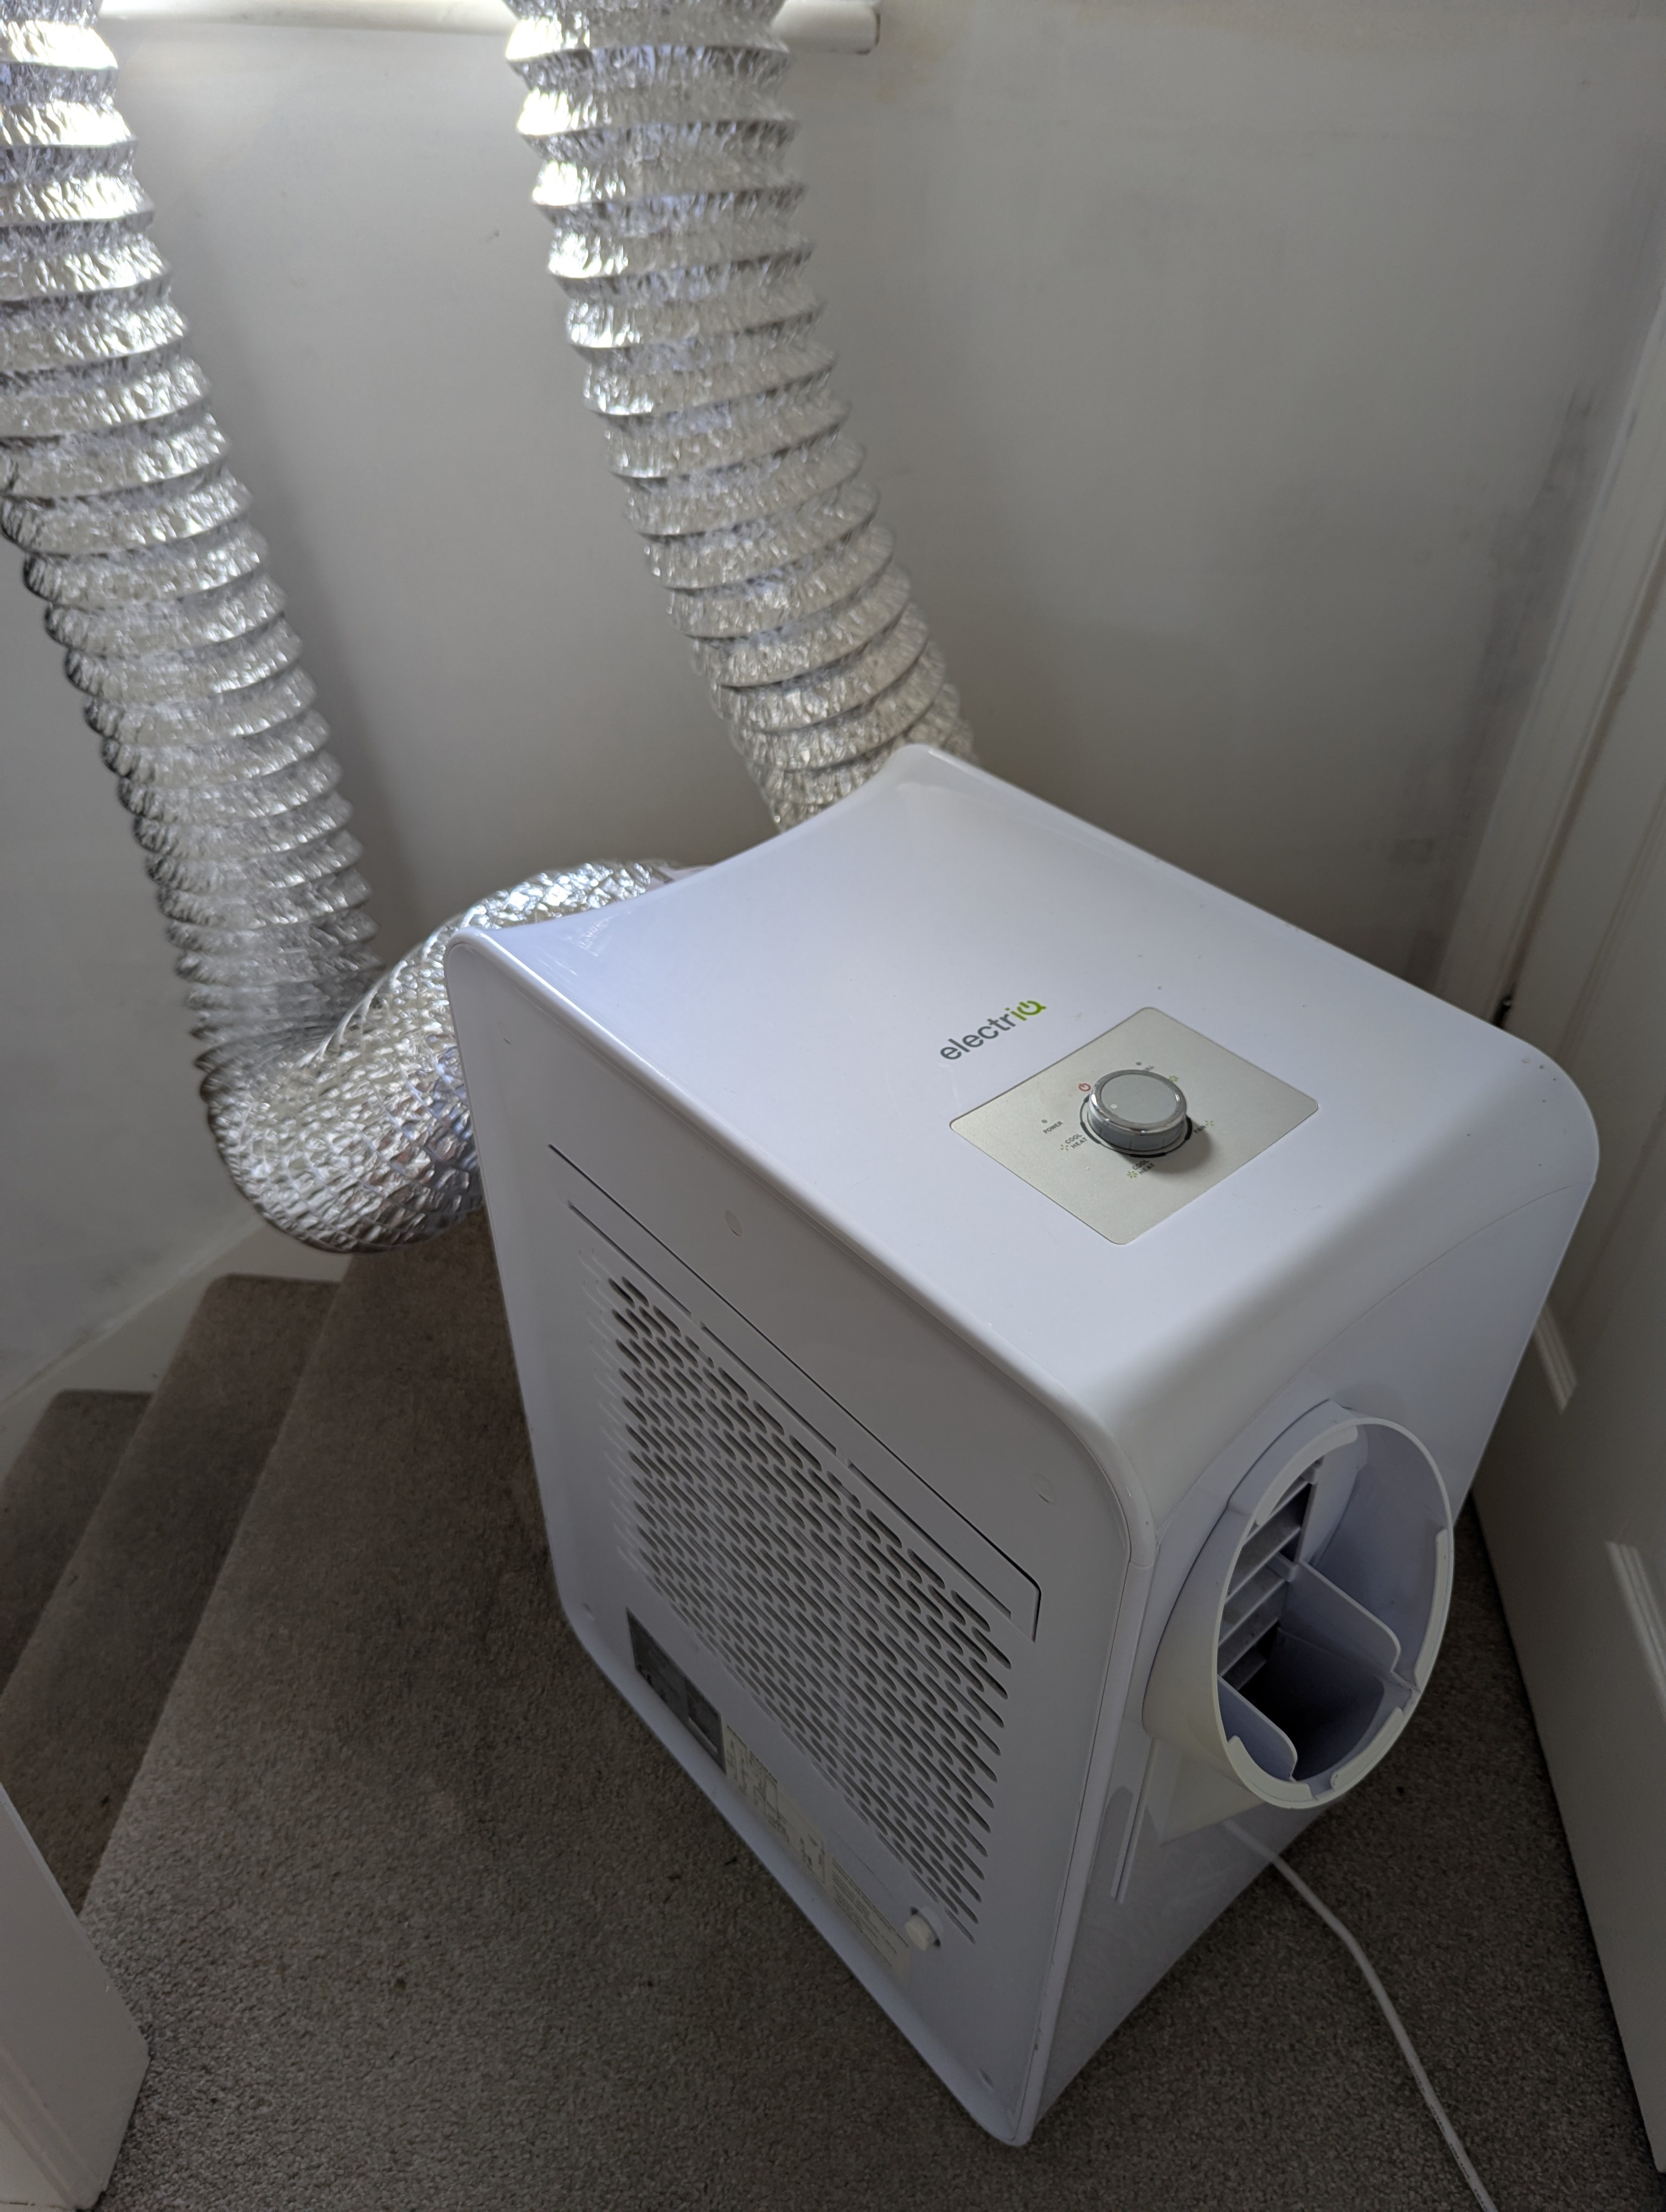
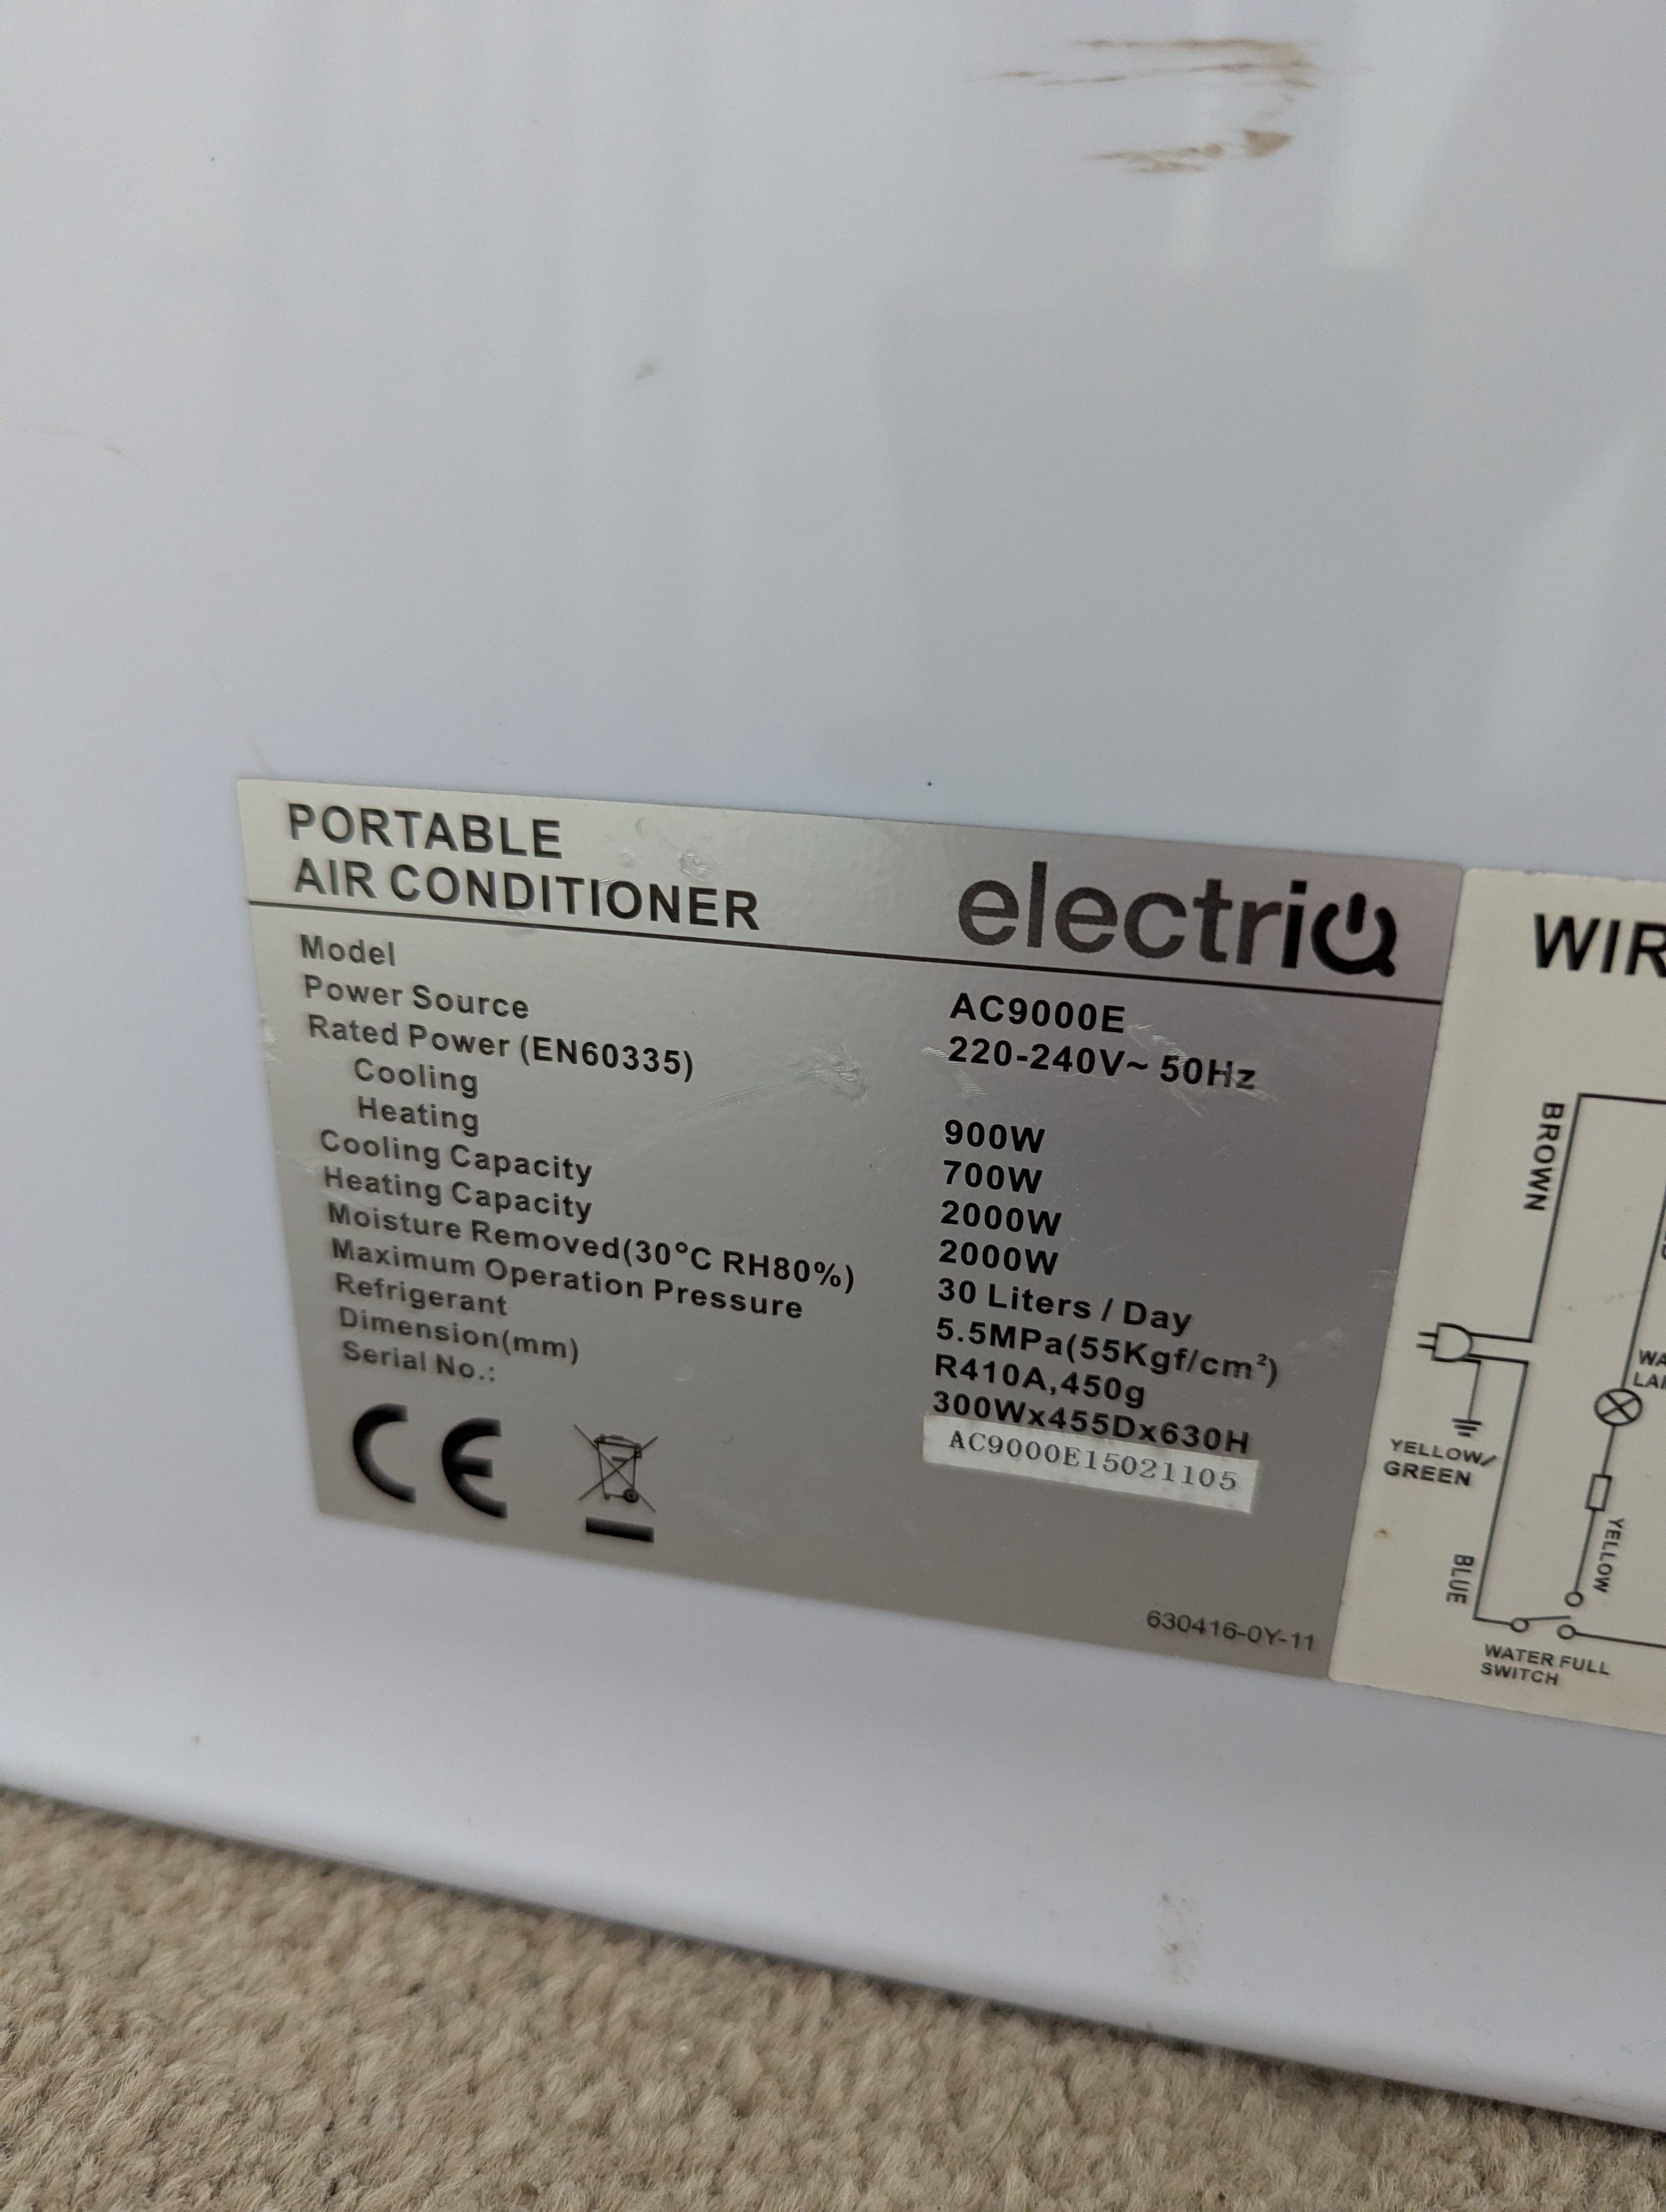
Rob sent in this successful modification of an ElectriQ AC9000E:
I was inspired to try and dual hose my electriq AC 9000, which is a pretty basic machine but after reading your website, I thought I’d give it a try.
I think it’s working! It seems to help take the edge off the heat and work more effectively.
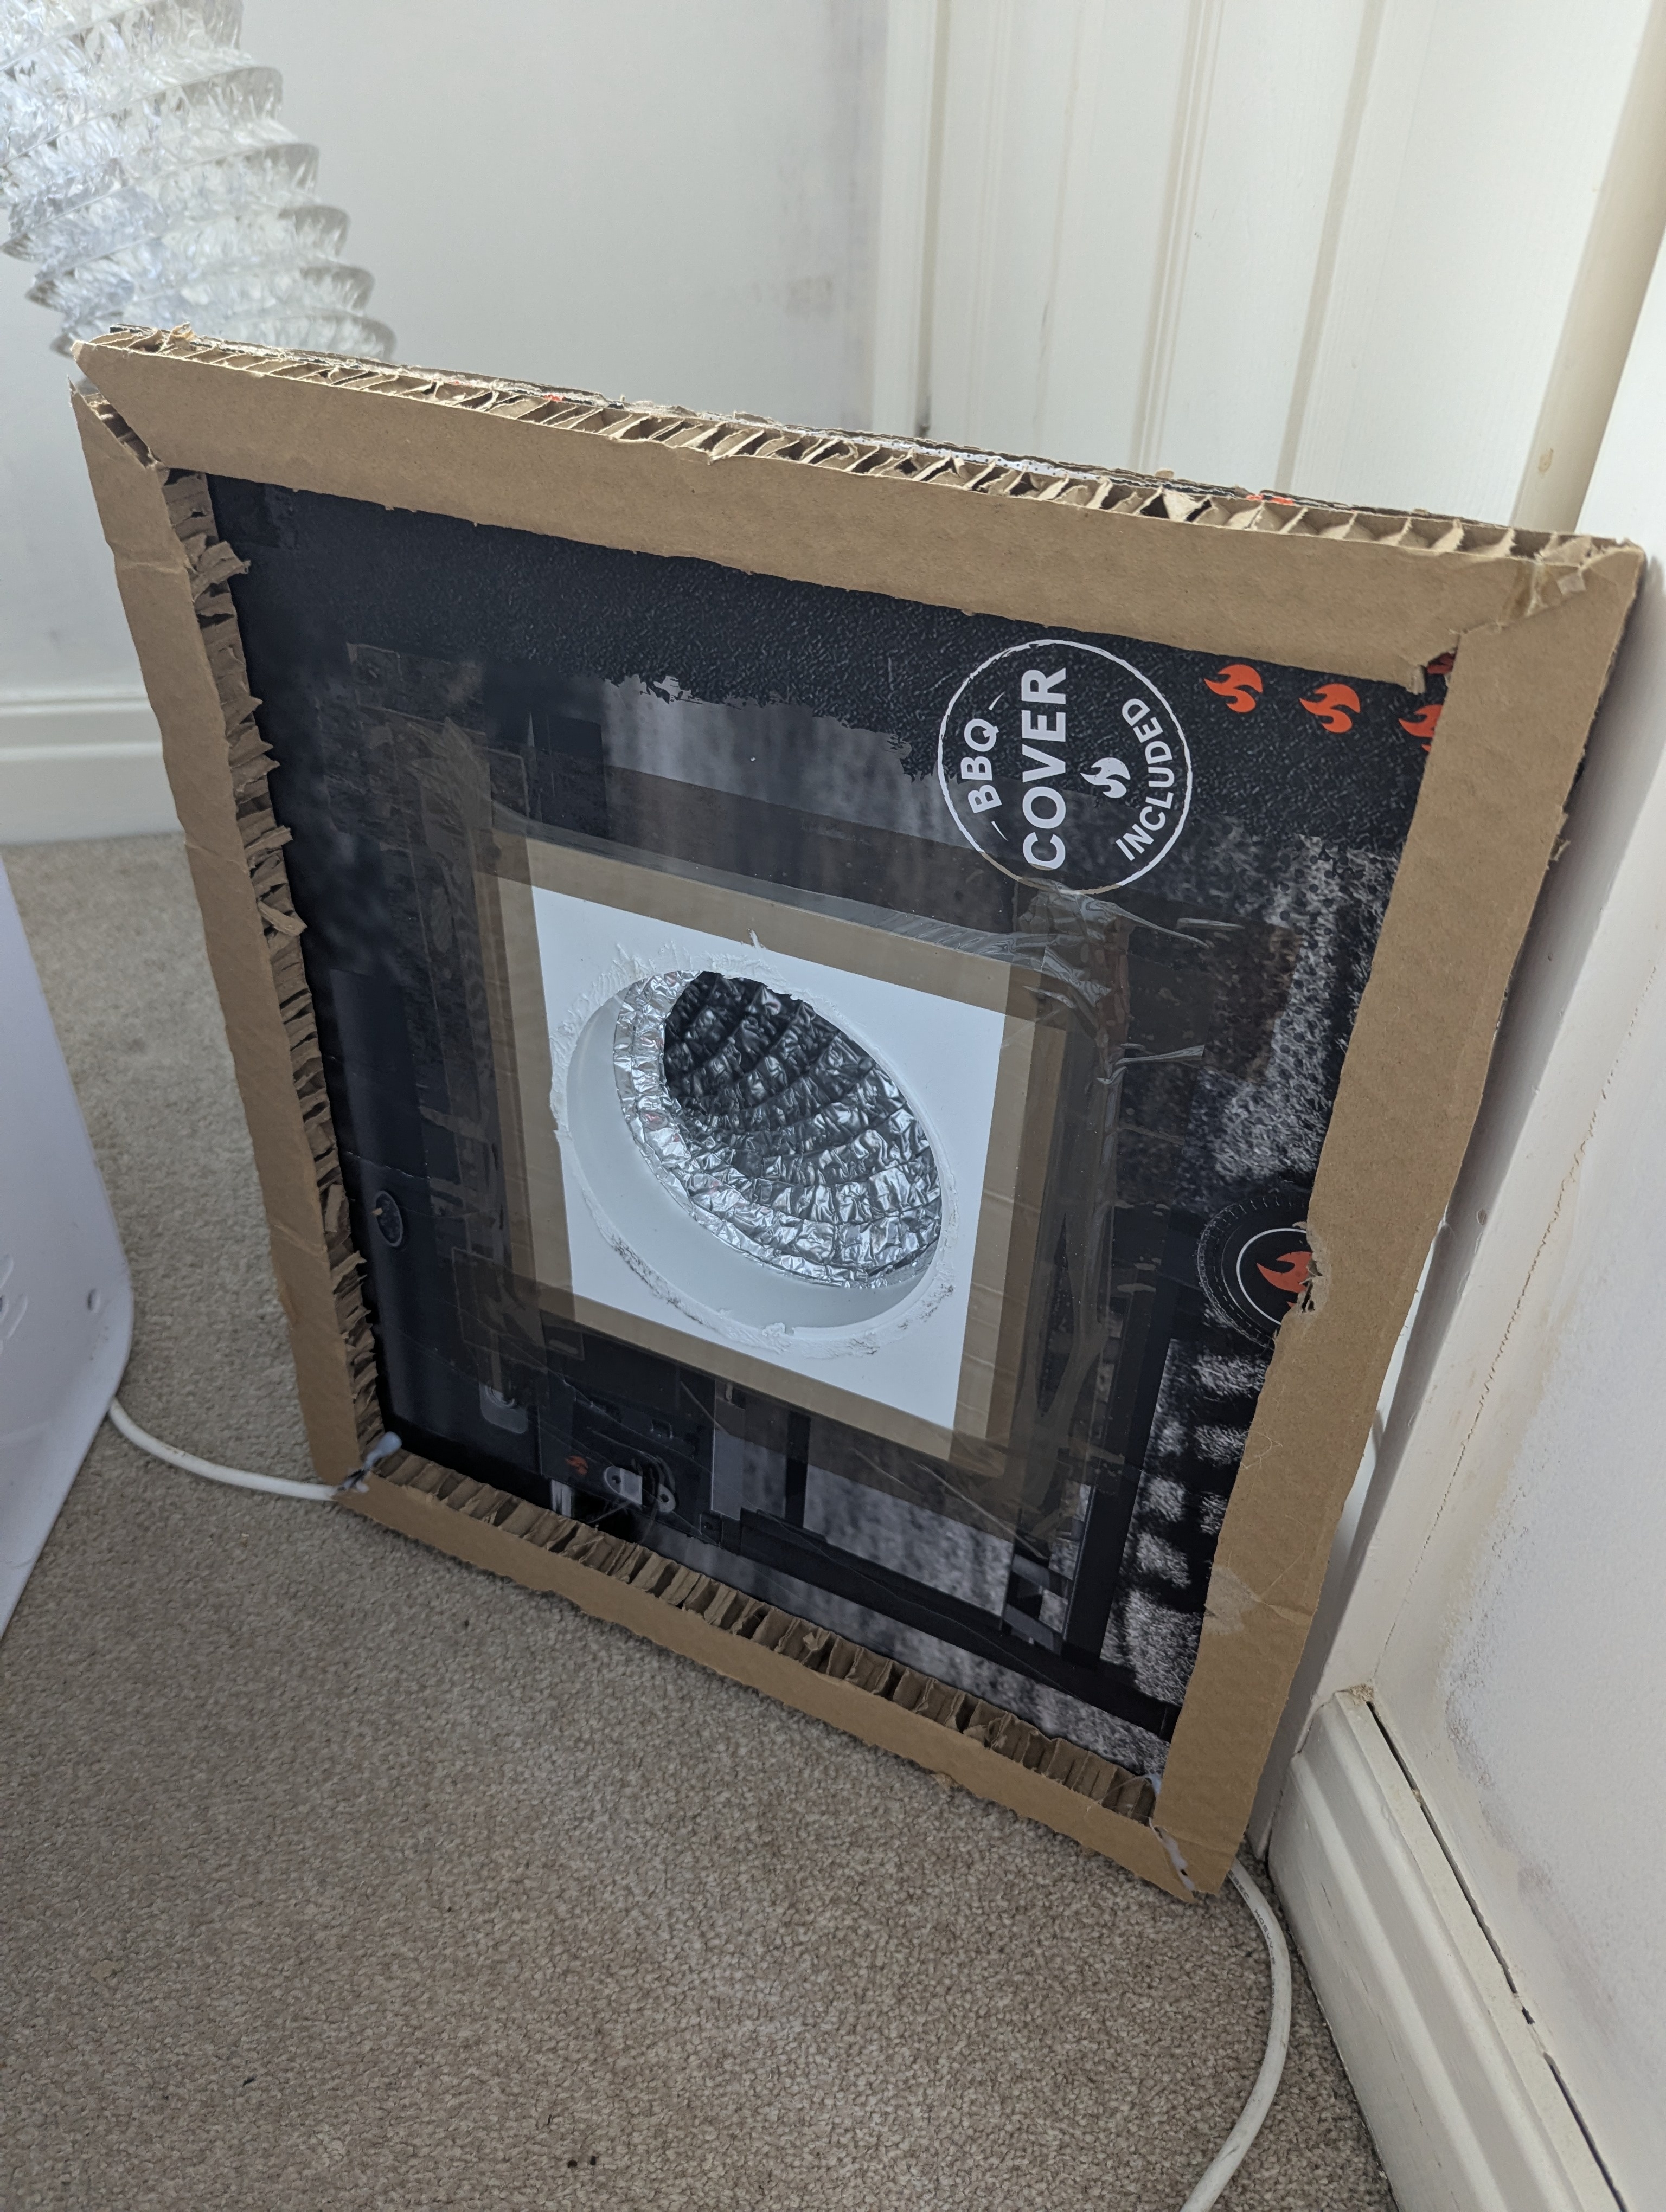
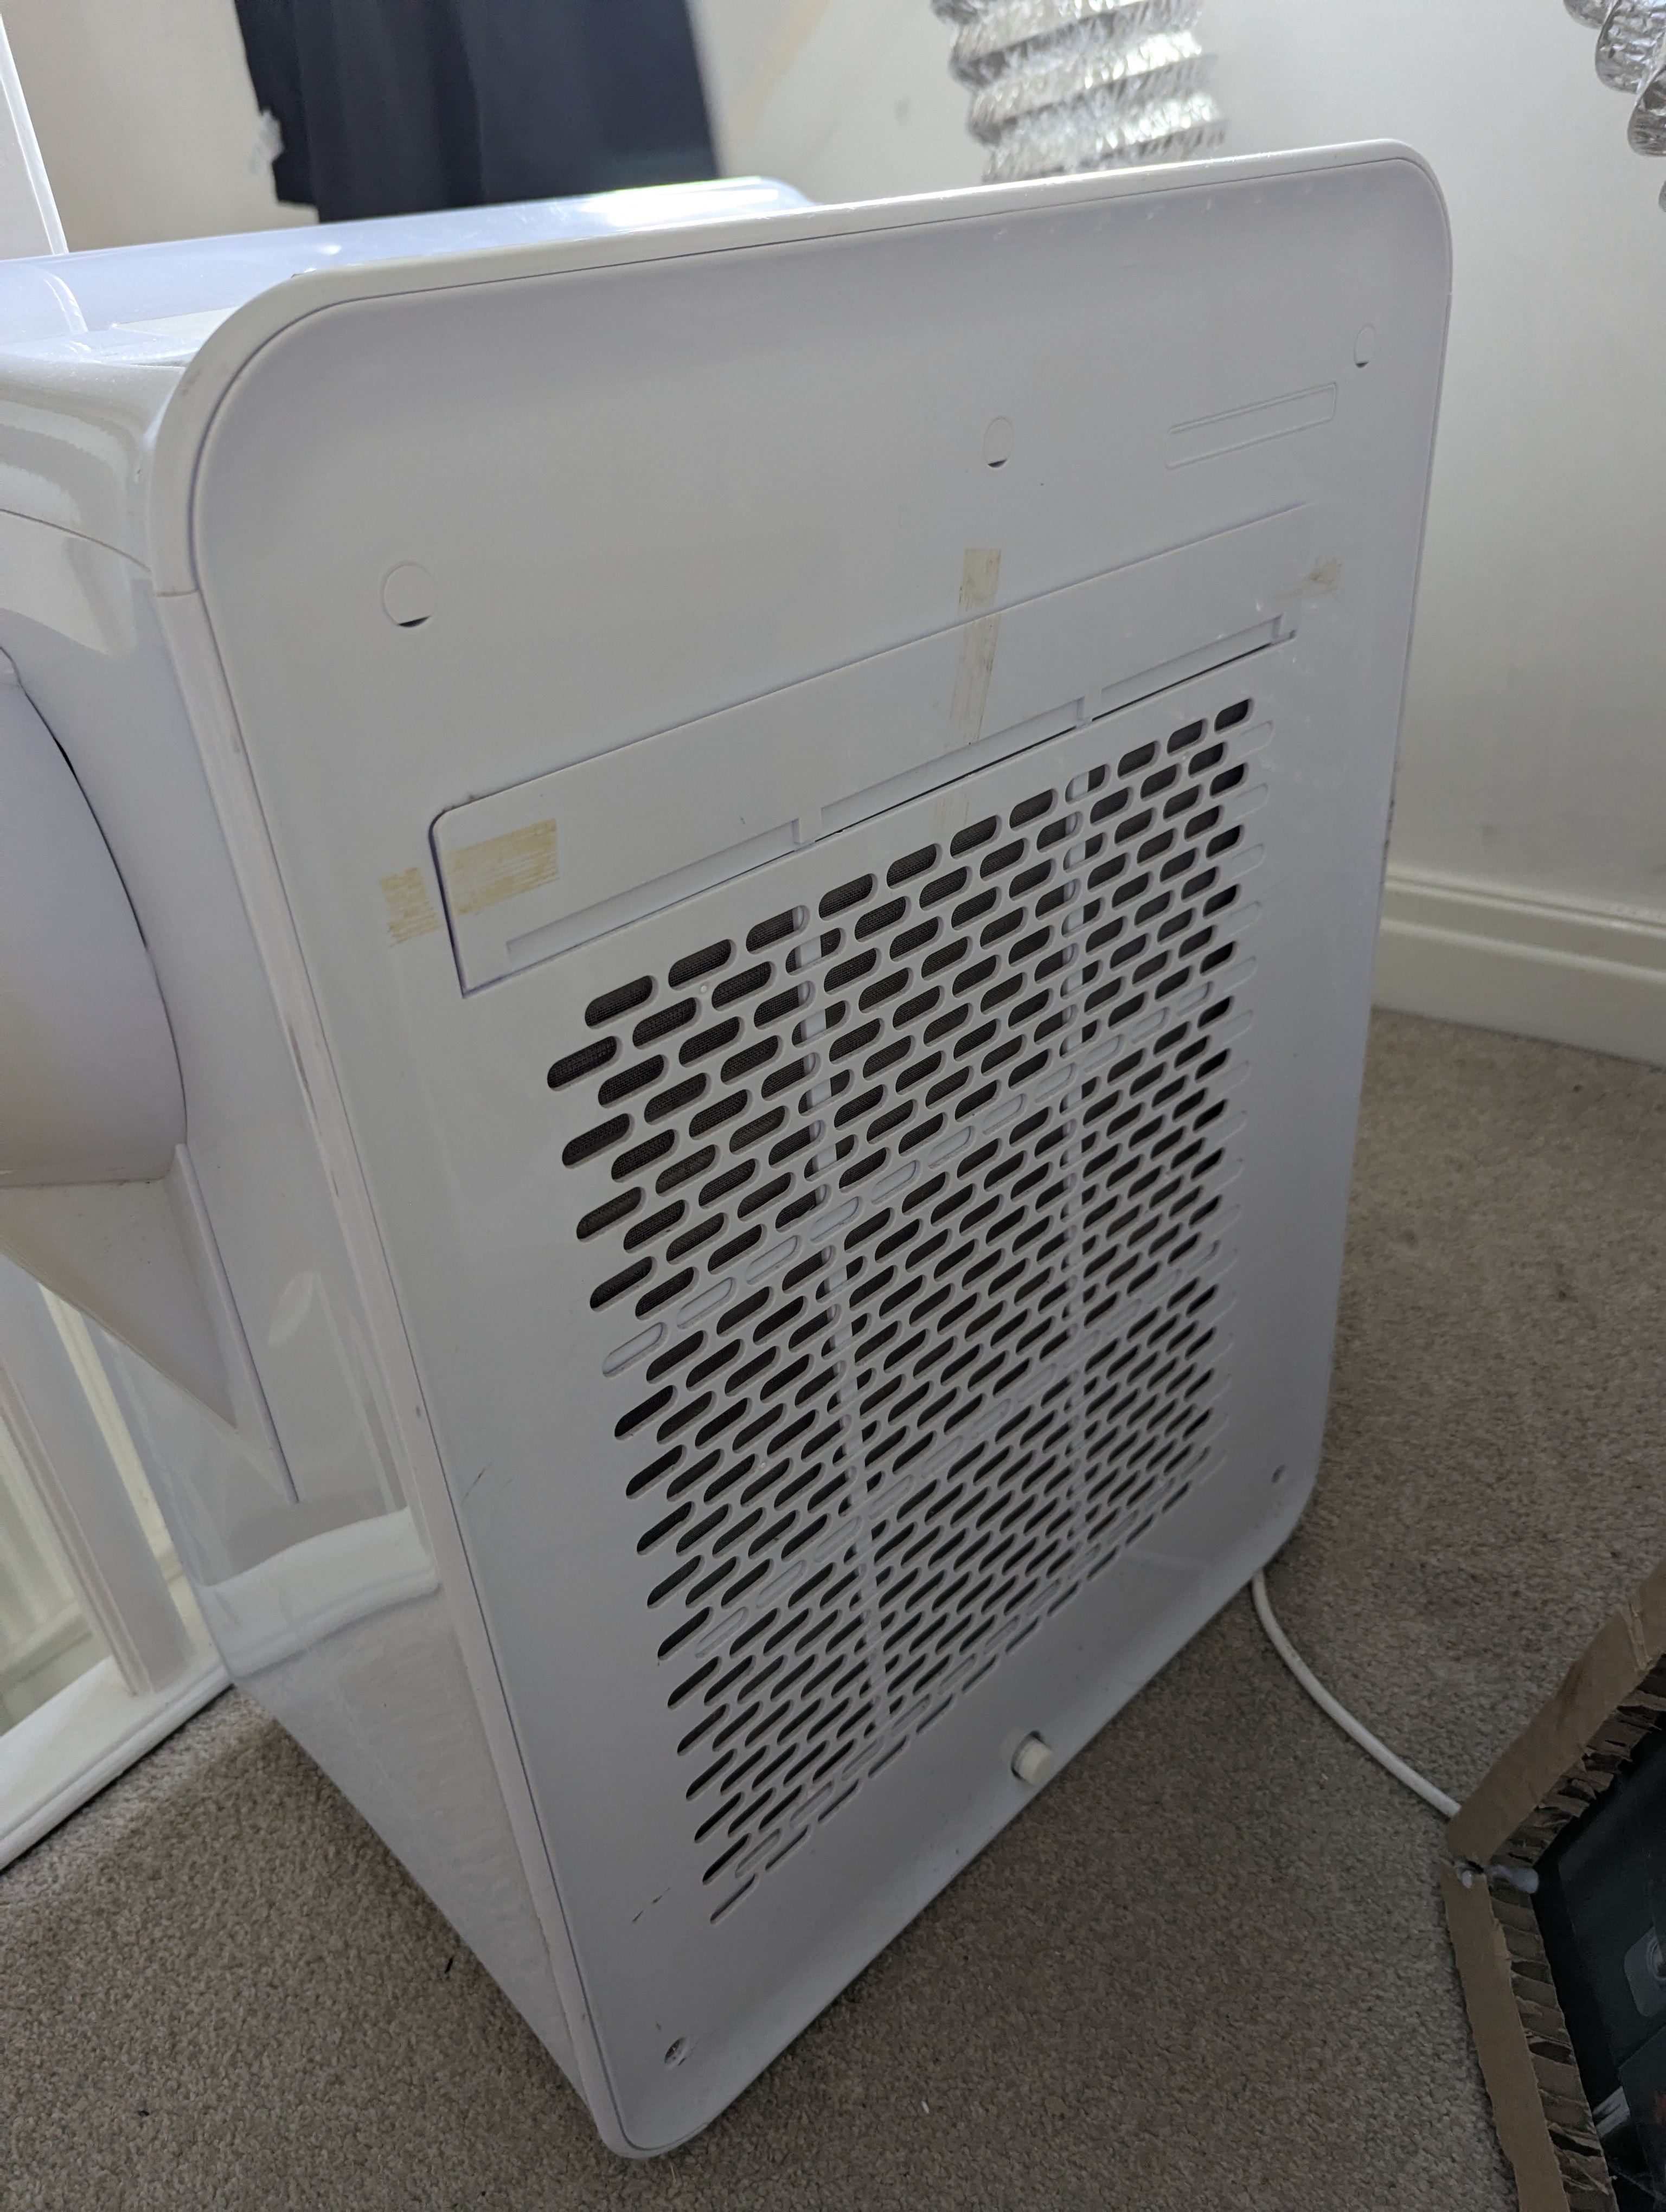
I basically taped some 150mm flanges to the thick cardboard and secured the hoses with jubilee clips.
I just need to figure out how to make the window setup more portable. We have these small top opening windows. If it’s more portable I can easily move it between rooms. Anyways, thanks for the inspiration.
Note the standoff around the edges of the cardboard ducting, this is to keep the cardboard from sitting flush against the grille and restricting airflow.
Kingfisher WAP31A15E (5000 BTU)
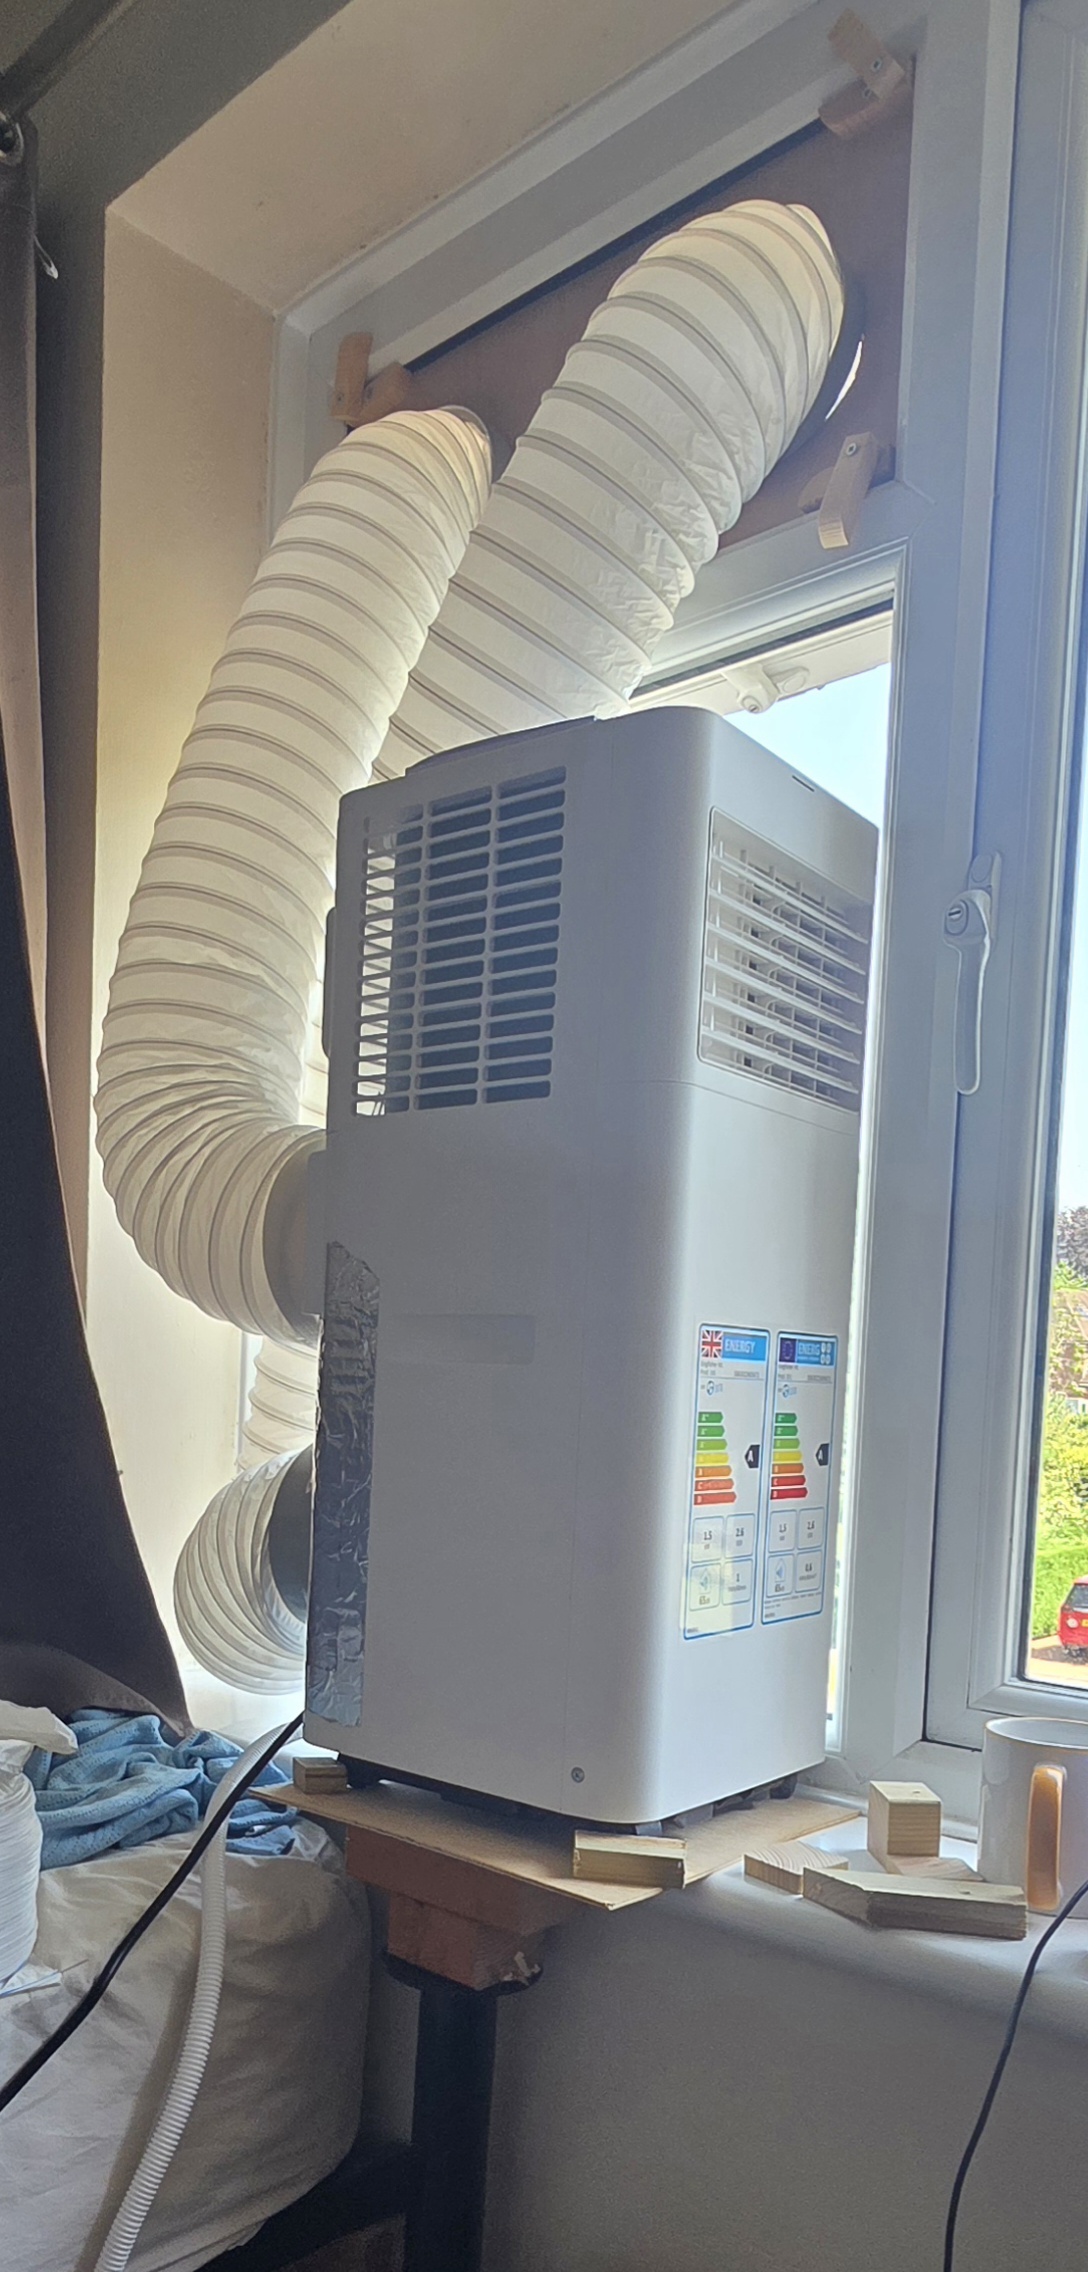
Patrick sent in this successful modification of a Kingfisher WAP31A15E 5000 BTU portable air conditioner. This unit is sold unbranded at both B&Q and Screwfix (Screwfix product code 931AX), and is manufactured by Kingfisher International Products. It may also be associated with Kingfisher’s Blyss appliance lineup.
The air conditioner is an unbranded 5000 BTU sold at Screwfix and B&Q. The brand might technically be Kingfisher (owner of screwfix and b&q) and model is WAP31A15E according to the manual.
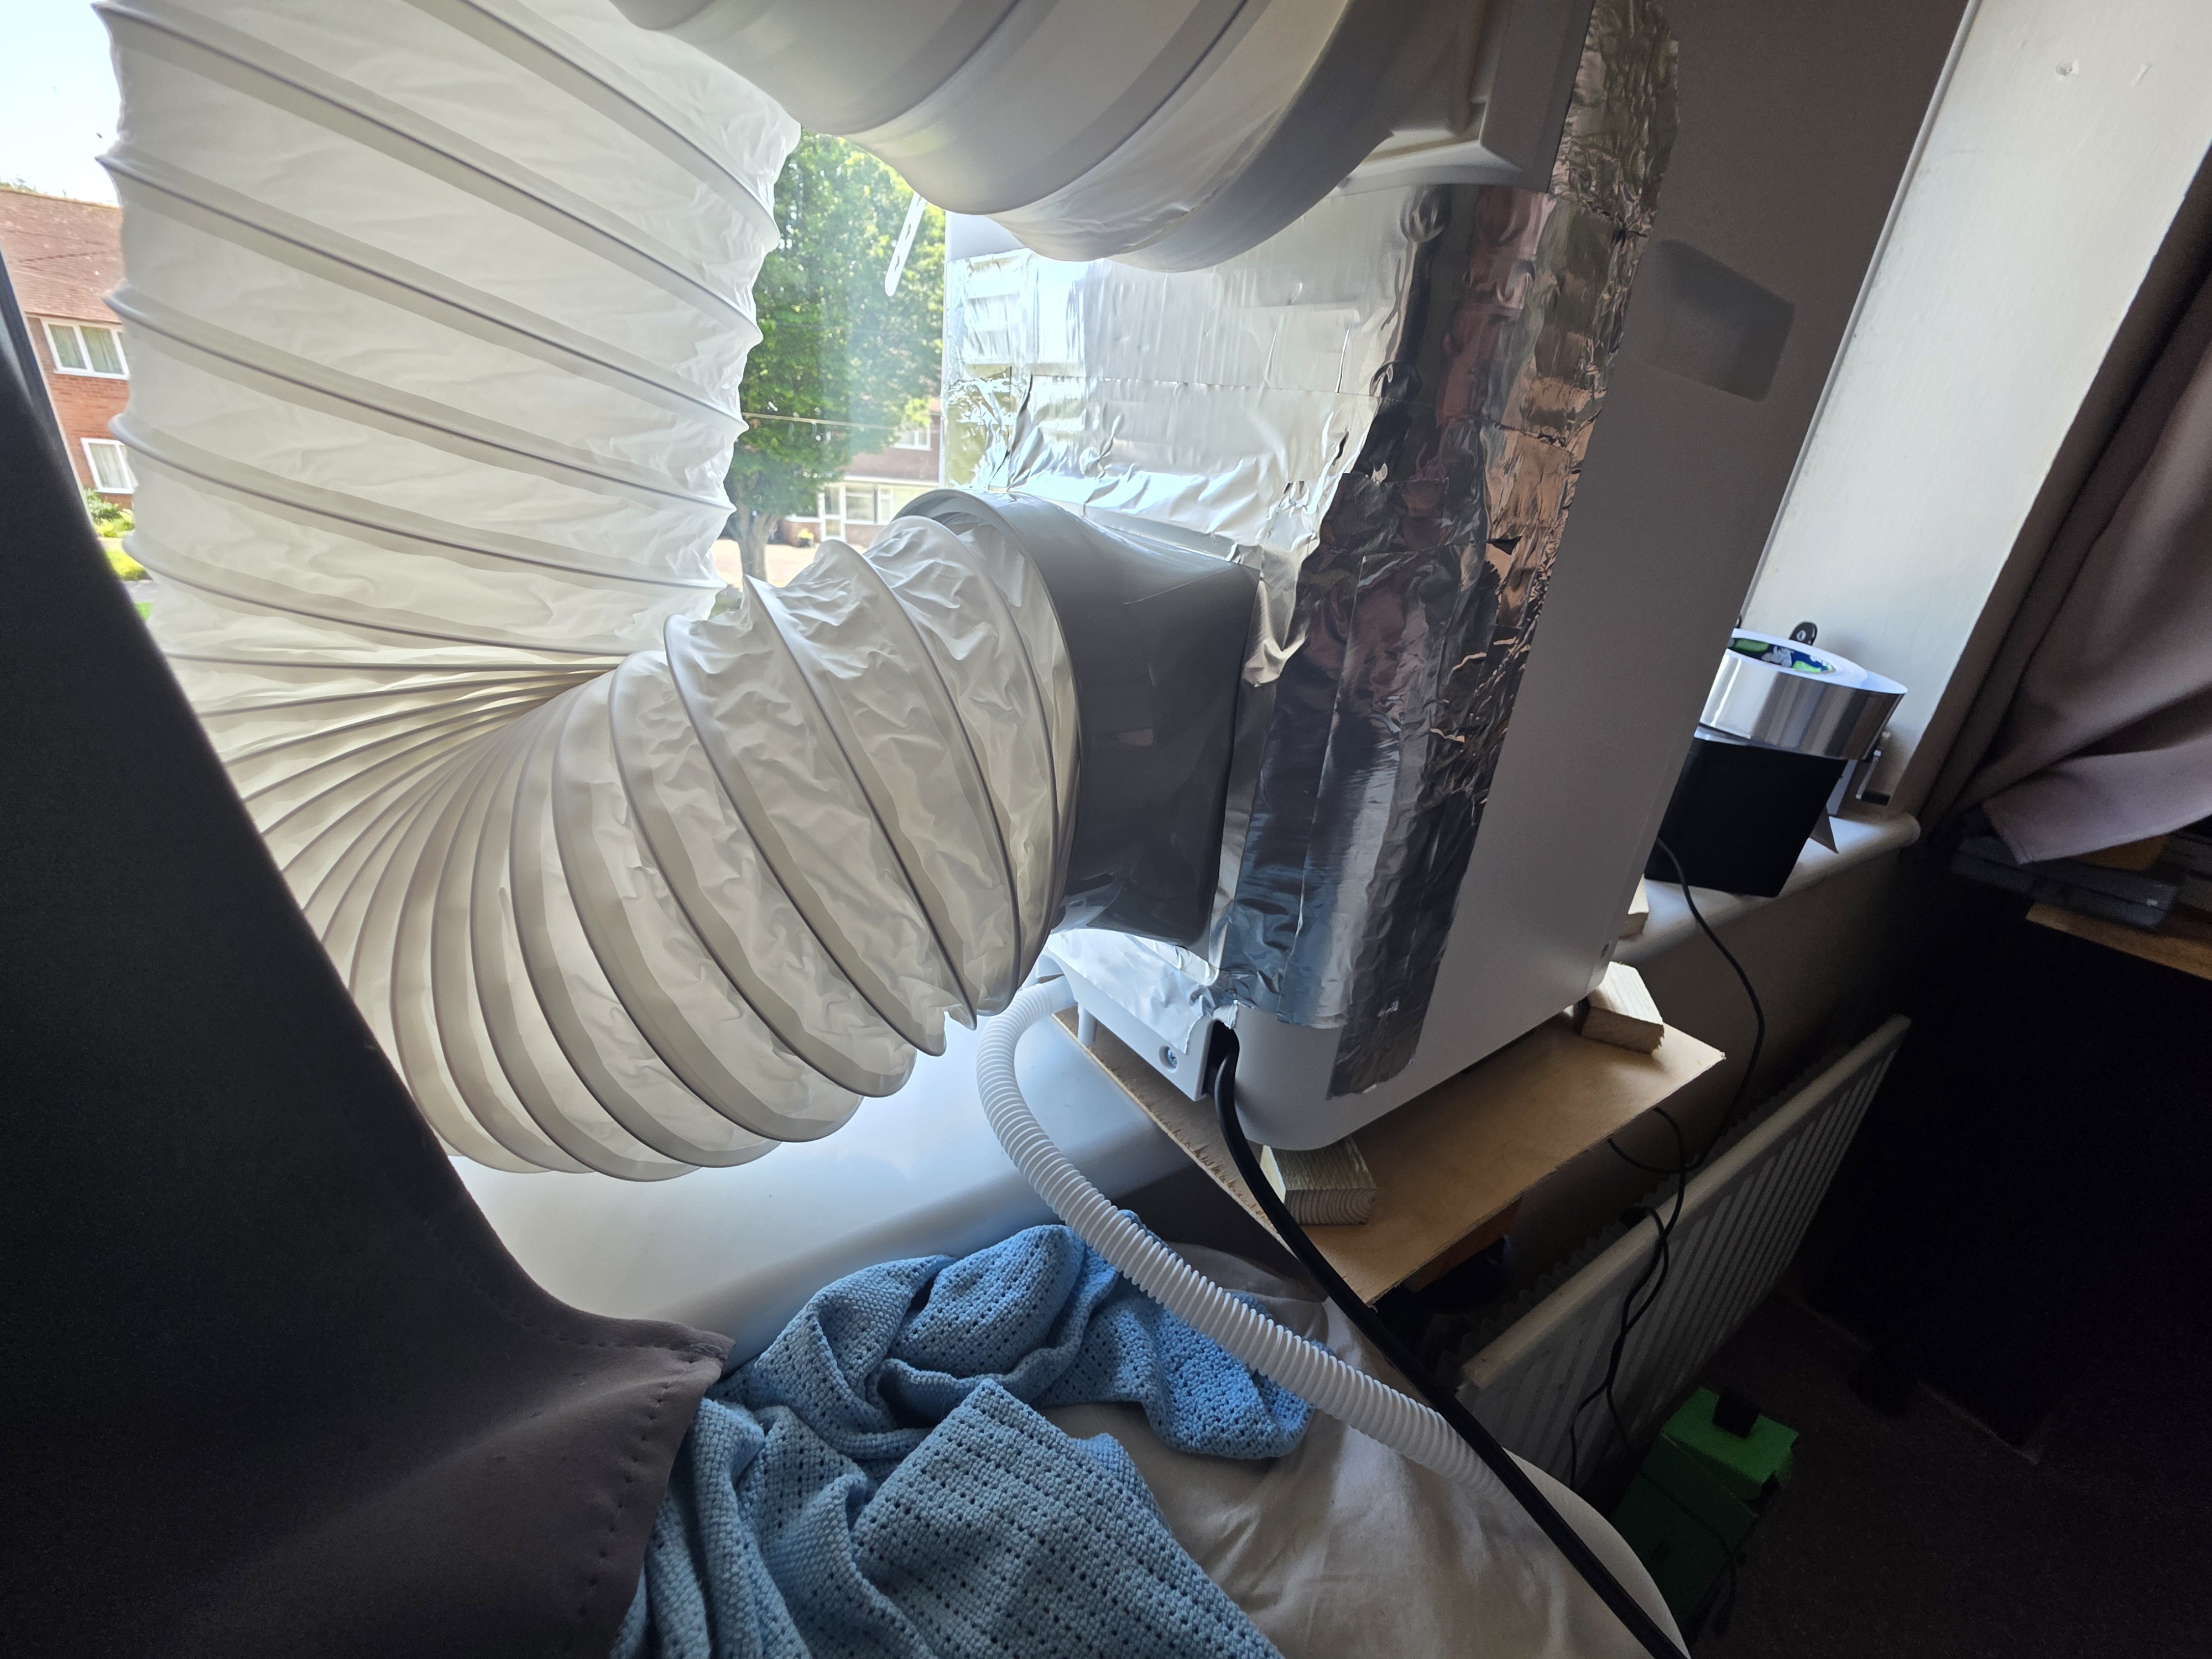
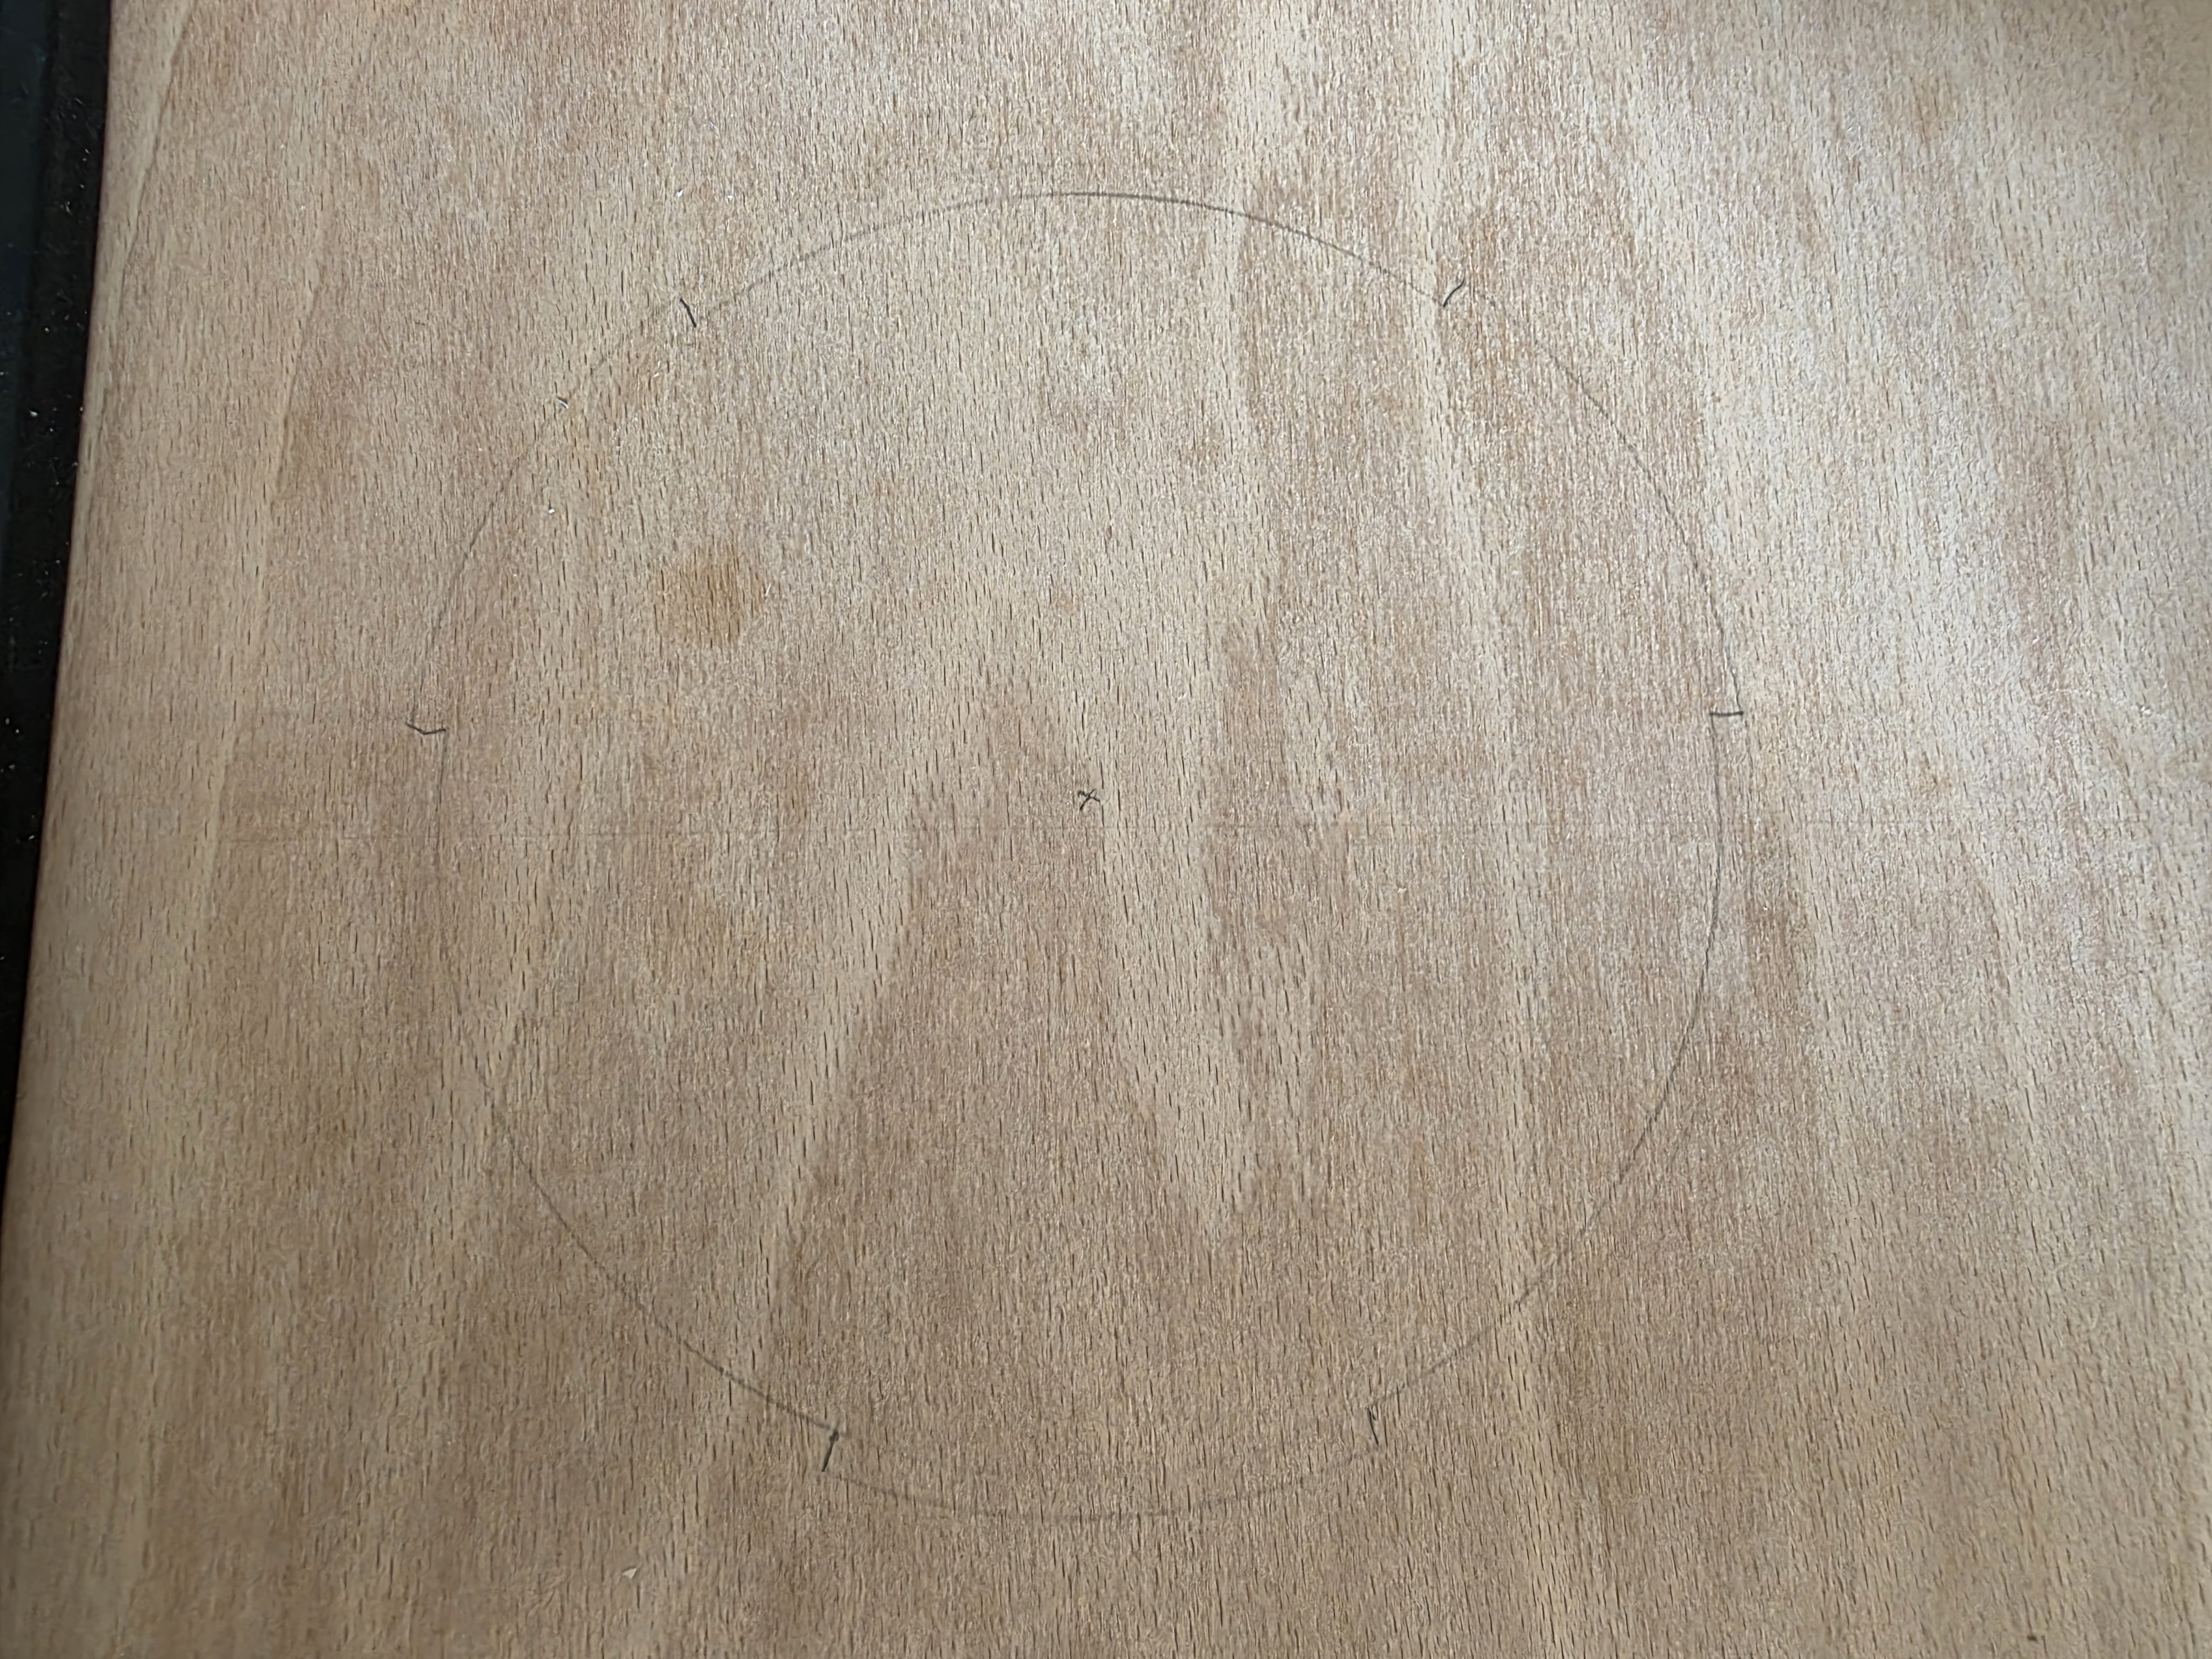
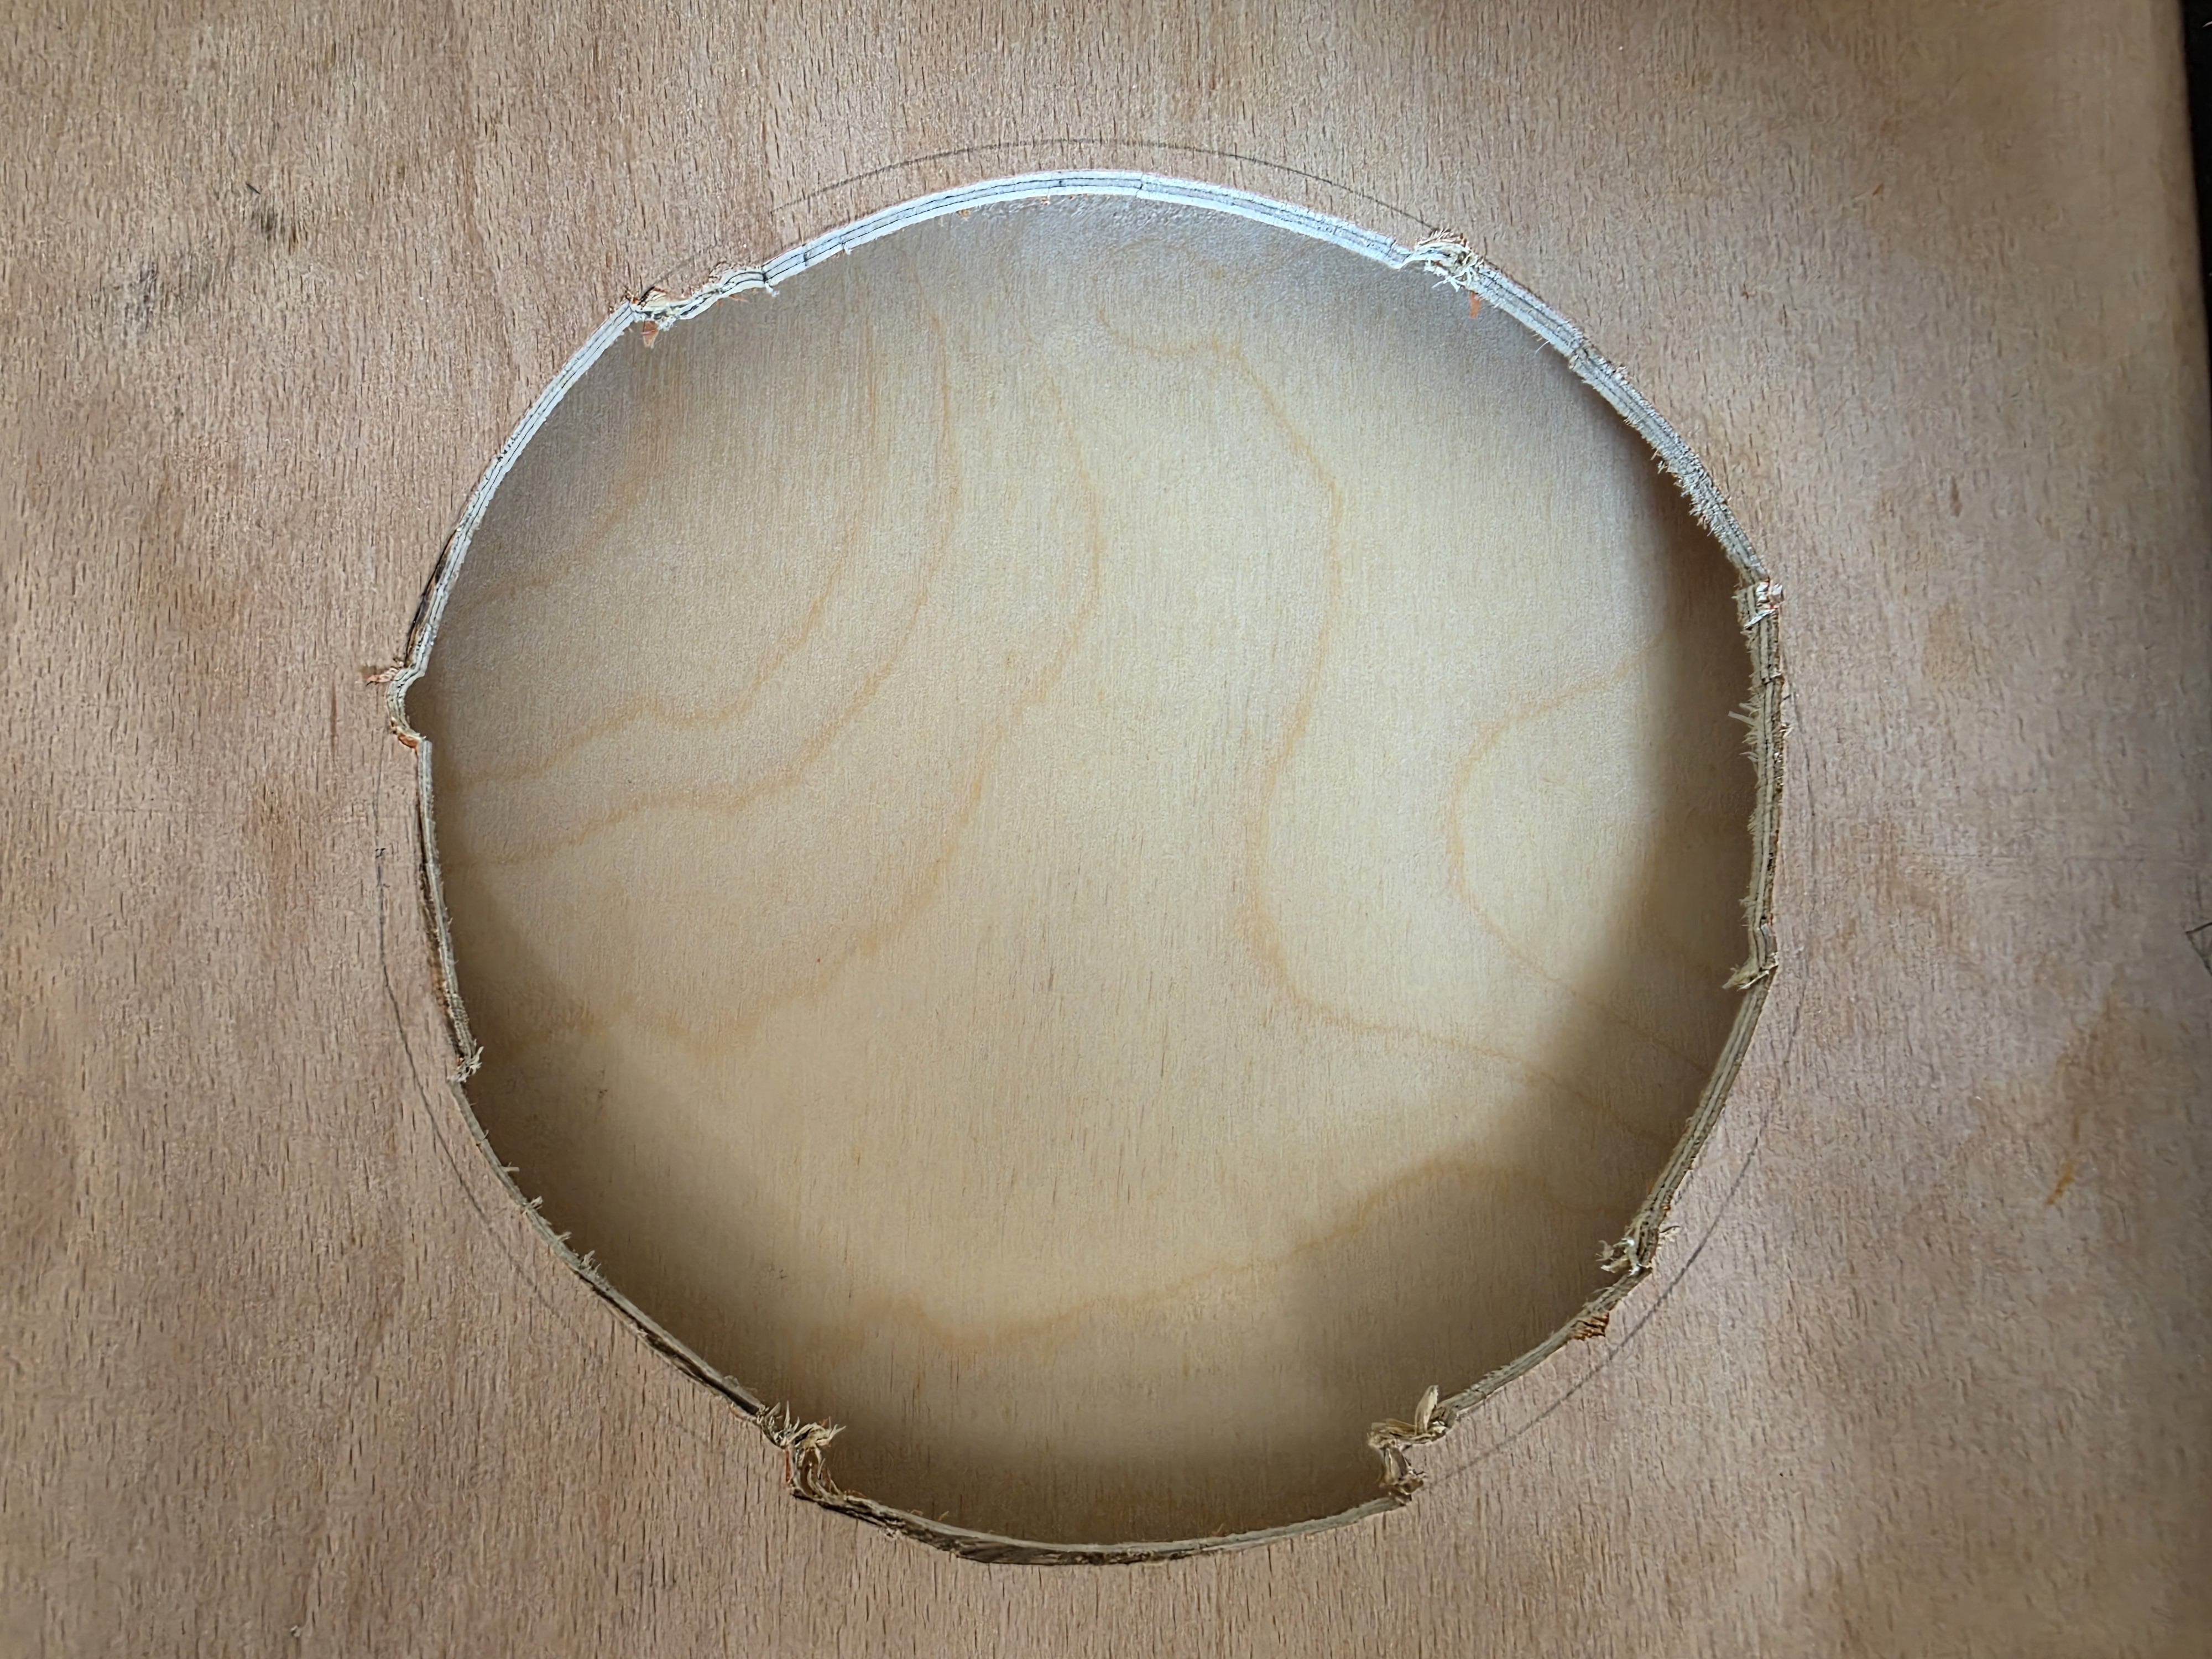
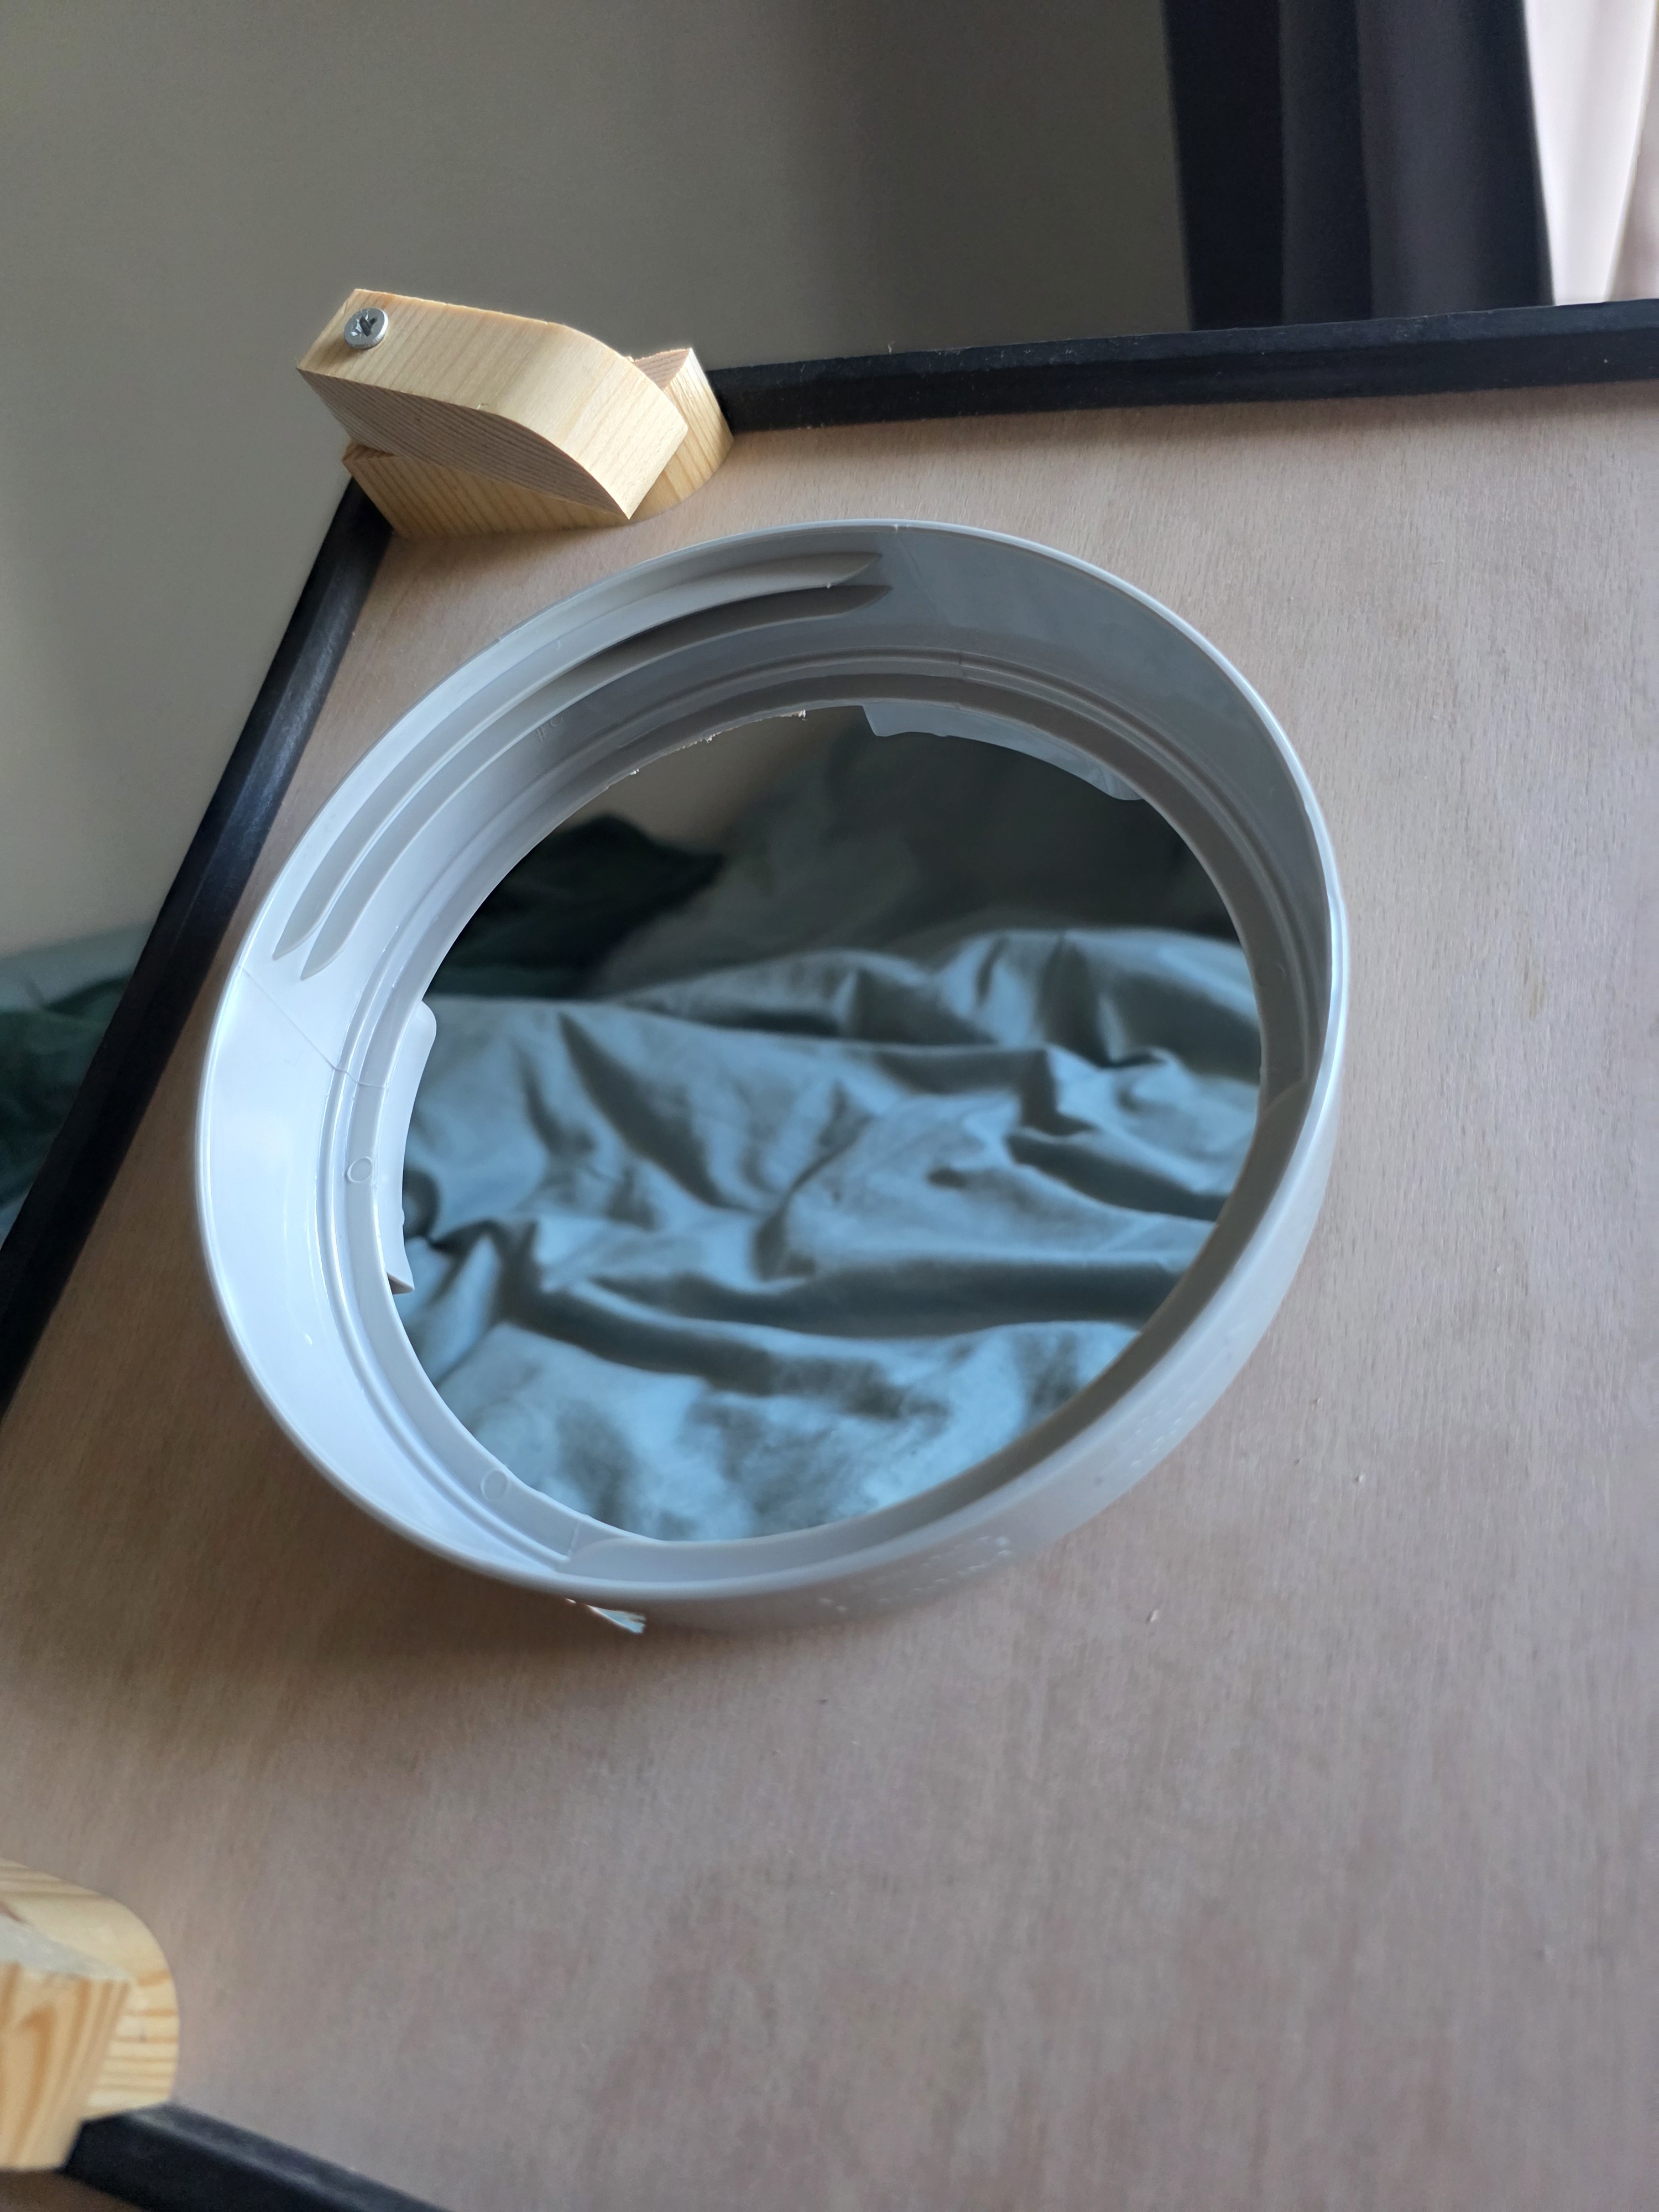
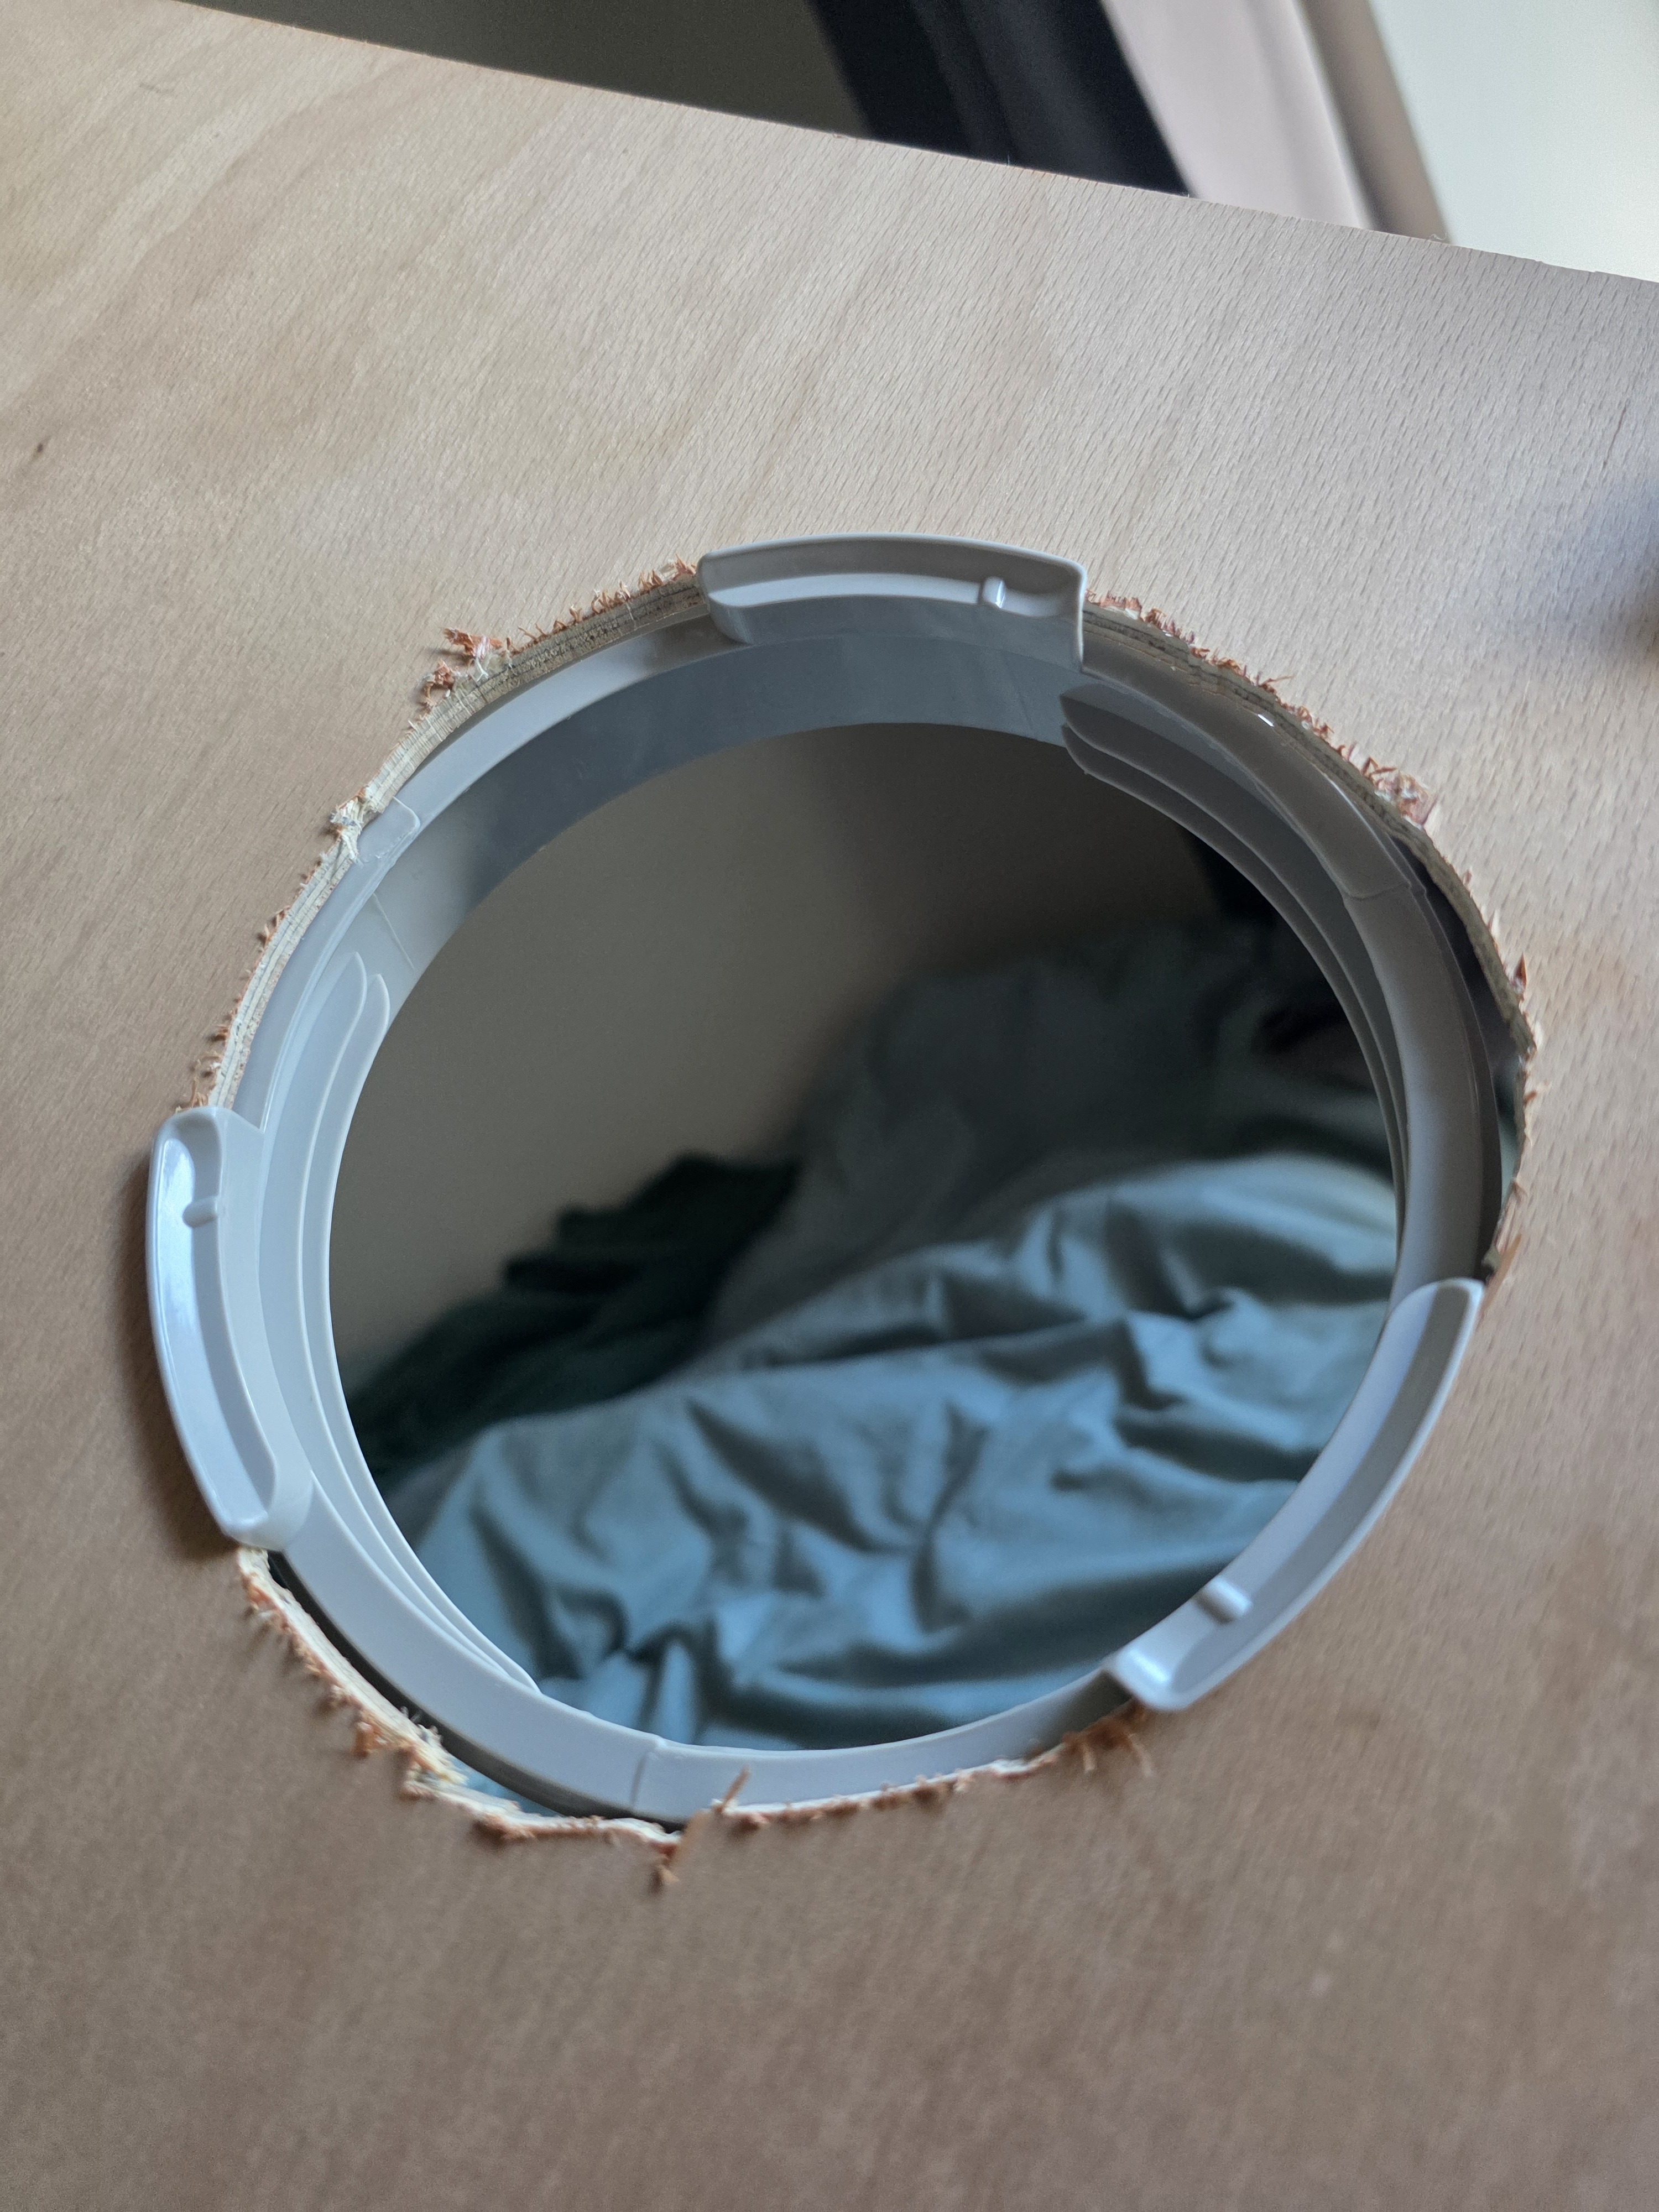
Window board is inspired by Matthew’s from your blog post. These cheap generic air con connectors from aliexpress fit very well using wickes 5.5mm plywood. Mark out two circles from the same center, with diameters 140mm and 150mm, then use them as a guide to cut out this shape (faintly pencilled in one of the attached photos).
The rest of it is foil tape, another type of aliexpress connector for the intake, and a makeshift window sill extension to save floor space.
One thing i might still change is adding a second 150mm hose for the intake, as I have read it might be starving the compressor a bit. Might be something to consider particularly for higher BTU units.
A note for others with similar models: the foil tape in this example covers a portion of the grille to create a seal around the connector. When doing this, aim to make sure at least 75% of the grille area remains open and unobstructed. Sealing too much of the grille could introduce a flow restriction at the intake, reducing performance (see Patrick’s note in the message).
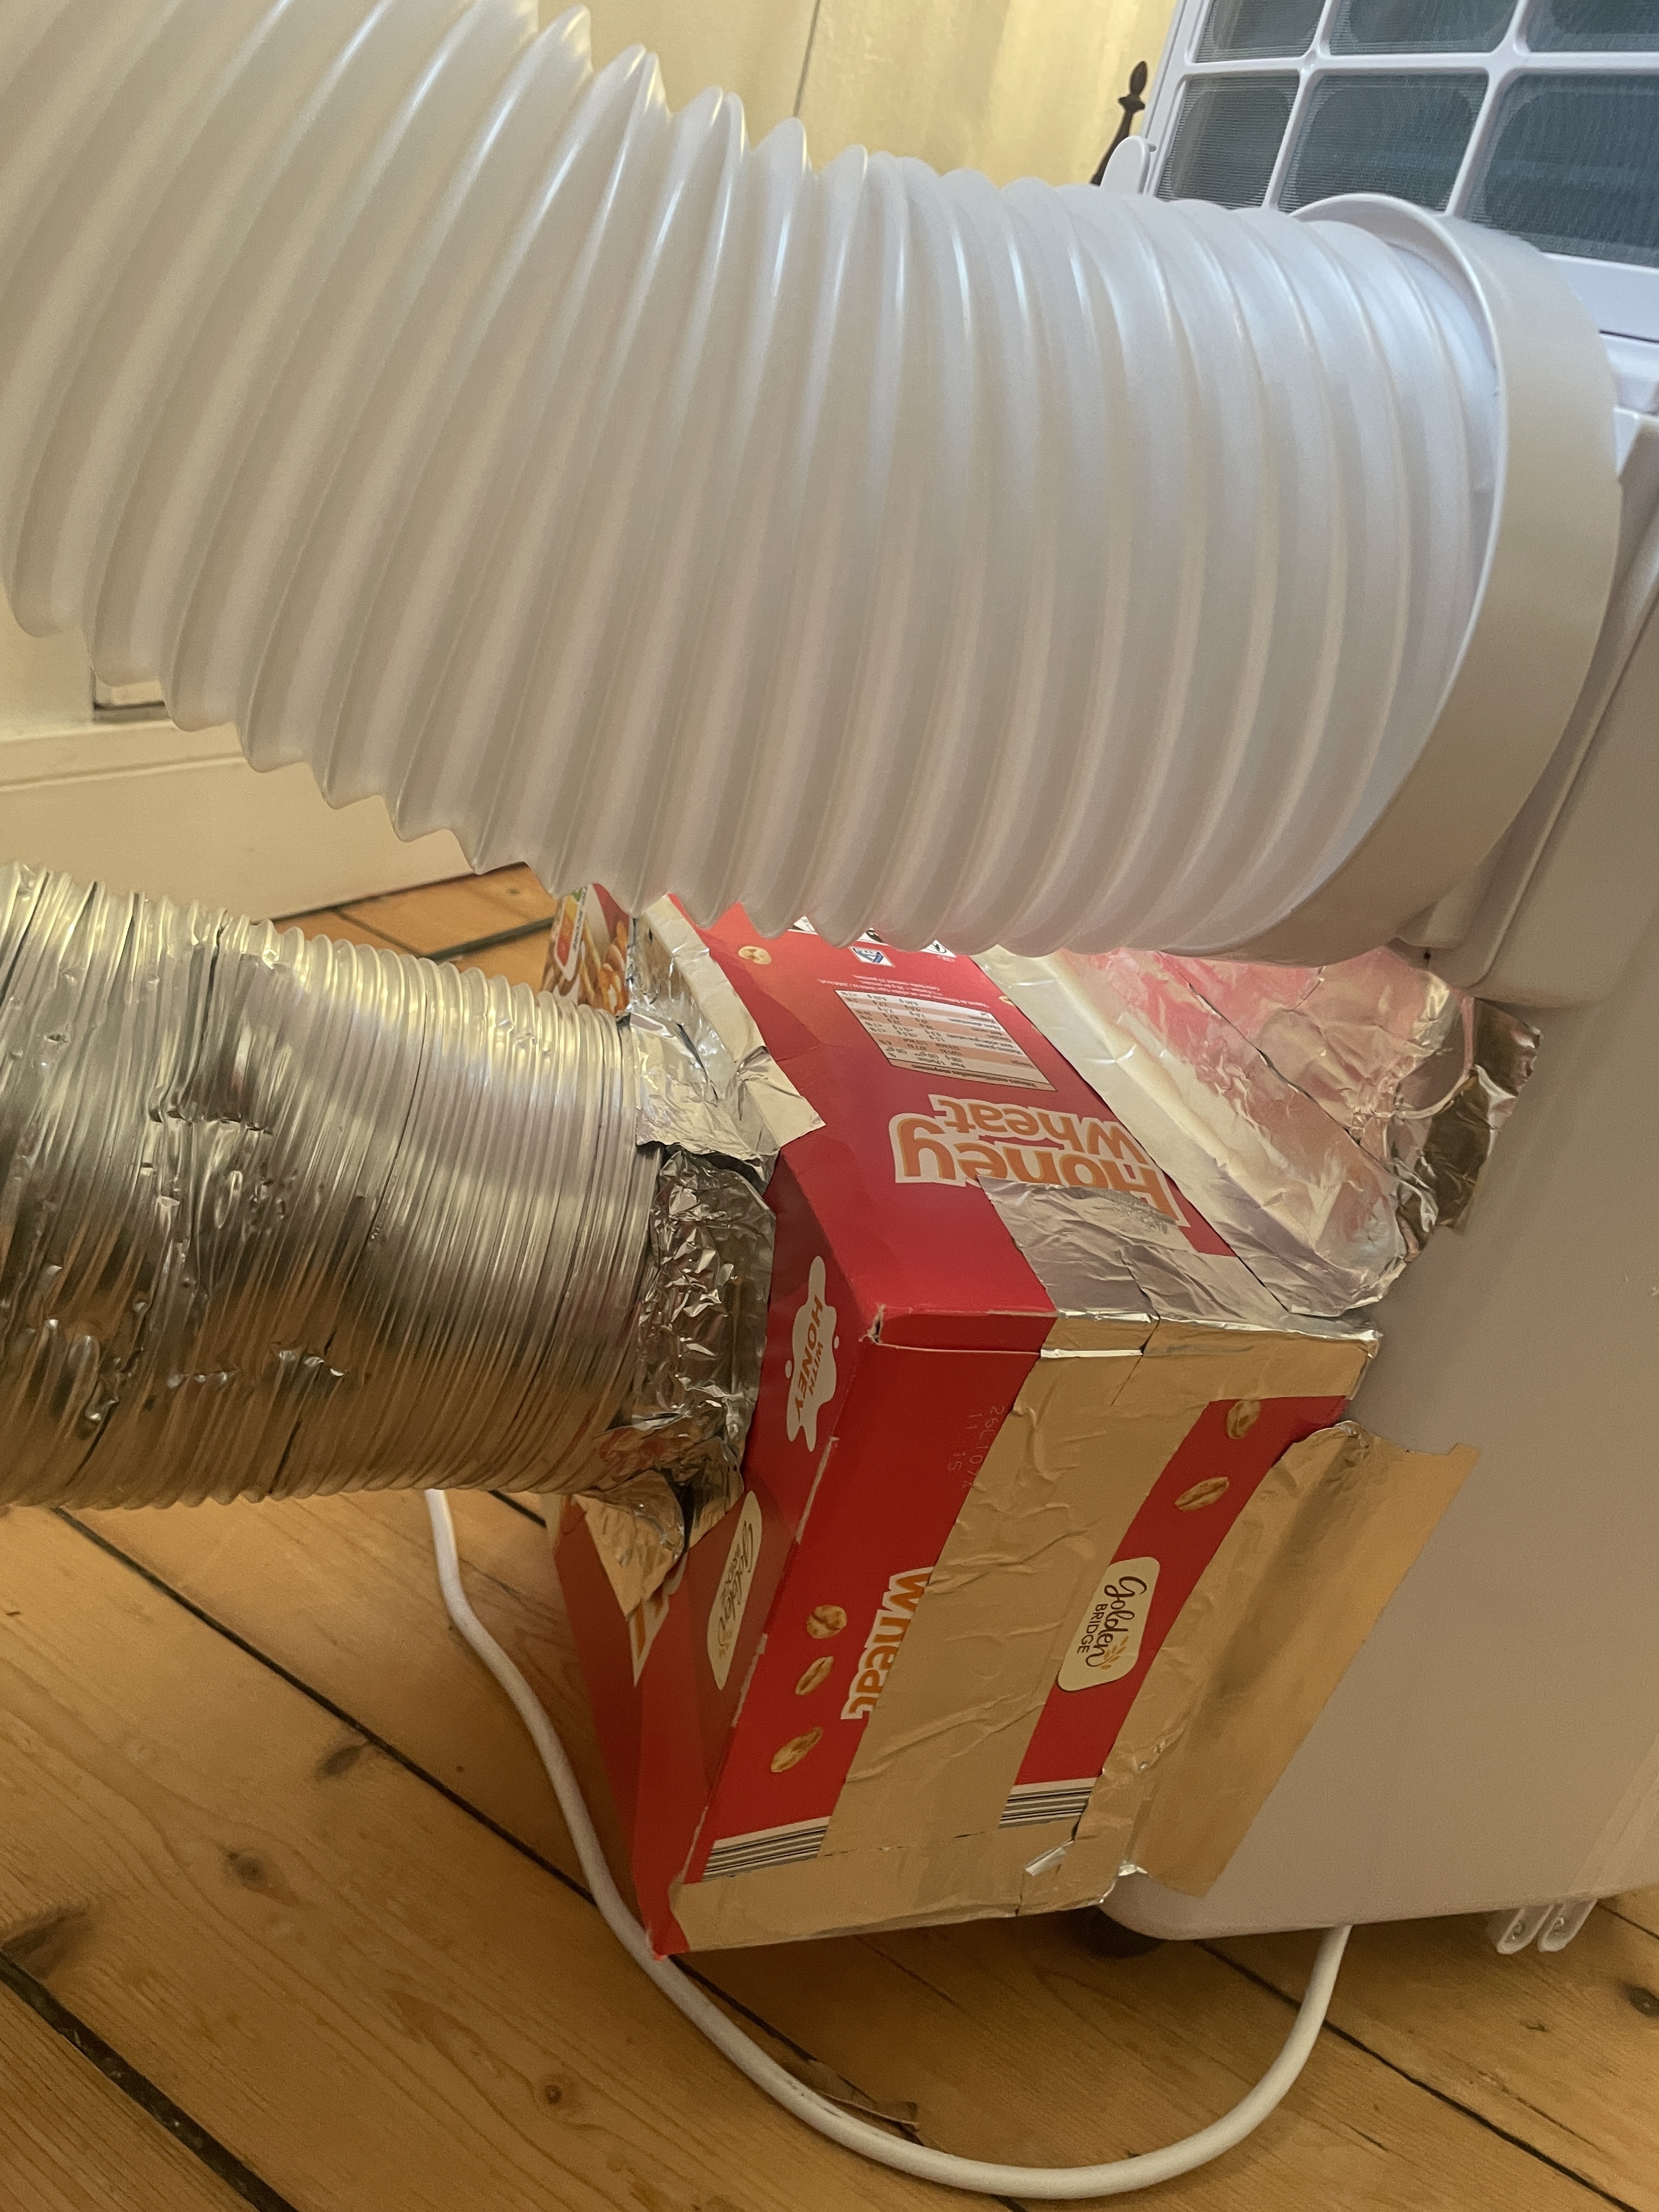
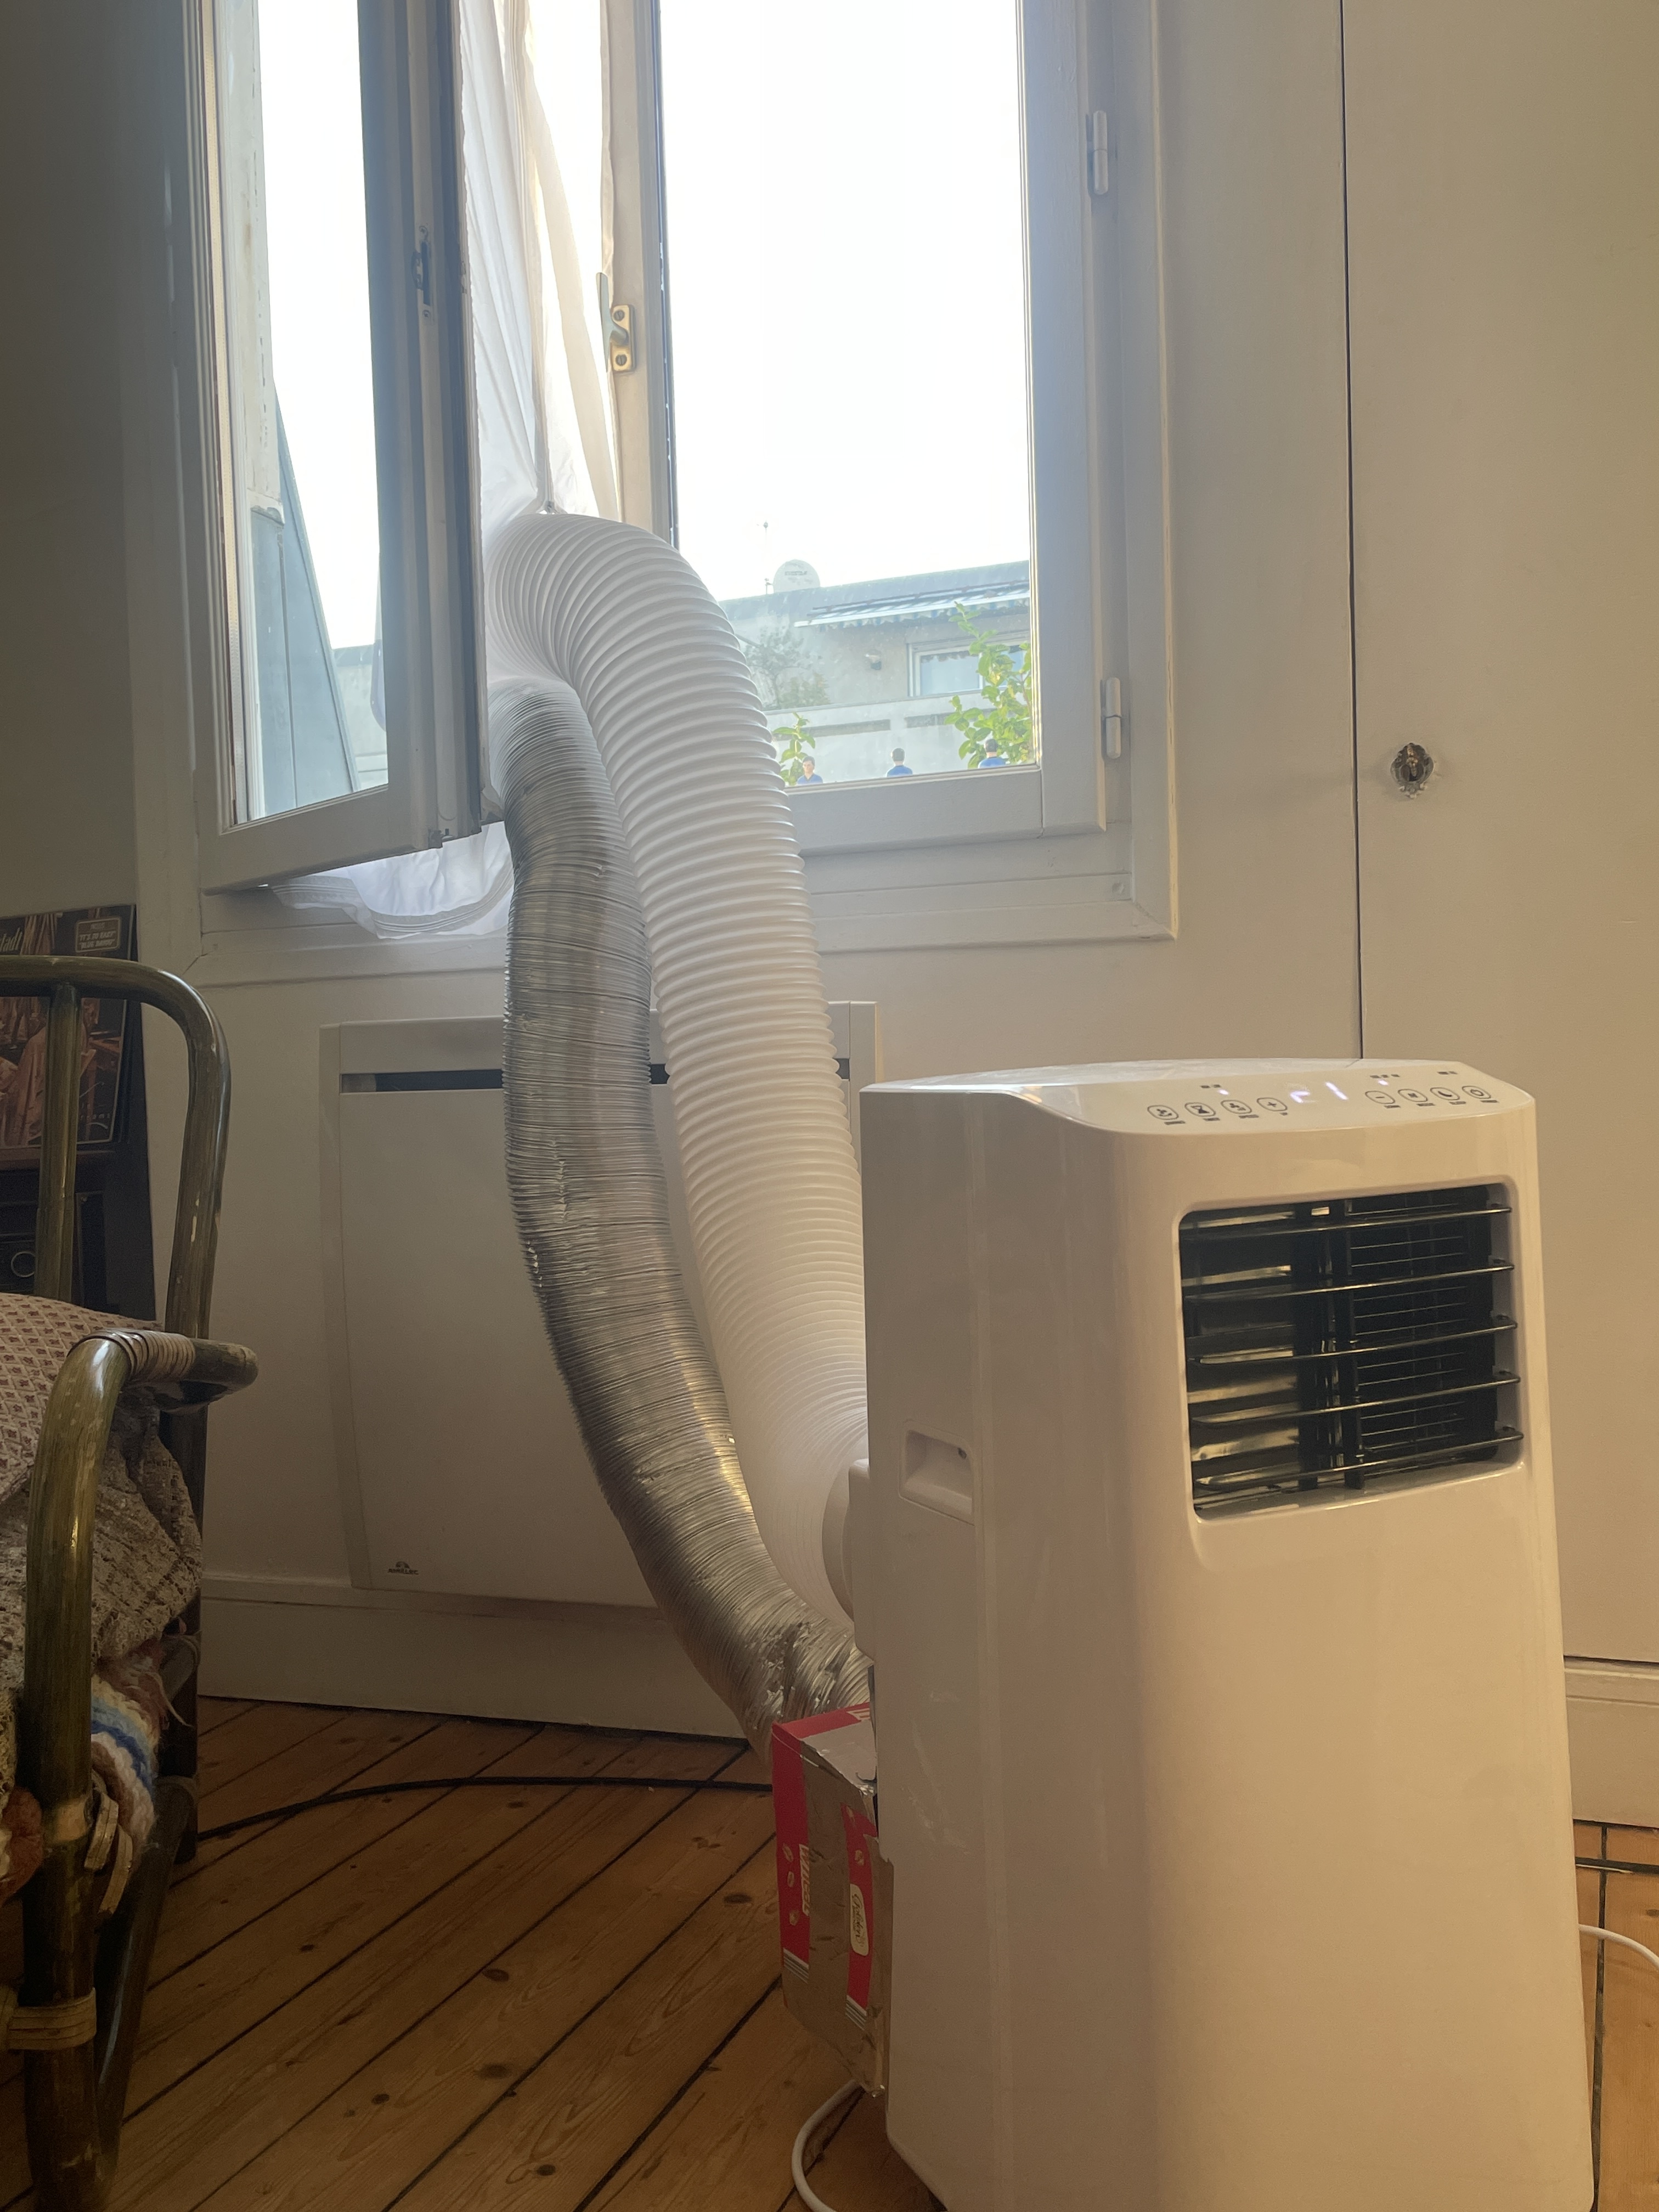
TRONIC TLK 7000 C2
Félix sent in this successful modification of a TRONIC TLK 7000 C2, a 7000 BTU portable air conditioner sold by Lidl in France, Germany and the UK:
Many thanks for the AC tutorial. I managed to pull it off on a TRONIC 7000 BTU - the cheapest AC you can find in france atm. works wonders, even though my flat is still too wide for the cold air flux.
I aim at upgrading it soon to some tupperware; we’ll see.
Using a box of Honey Wheats as a ducting adapter is one of my favourites so far.
MeacoCool MC12000CHR Pro
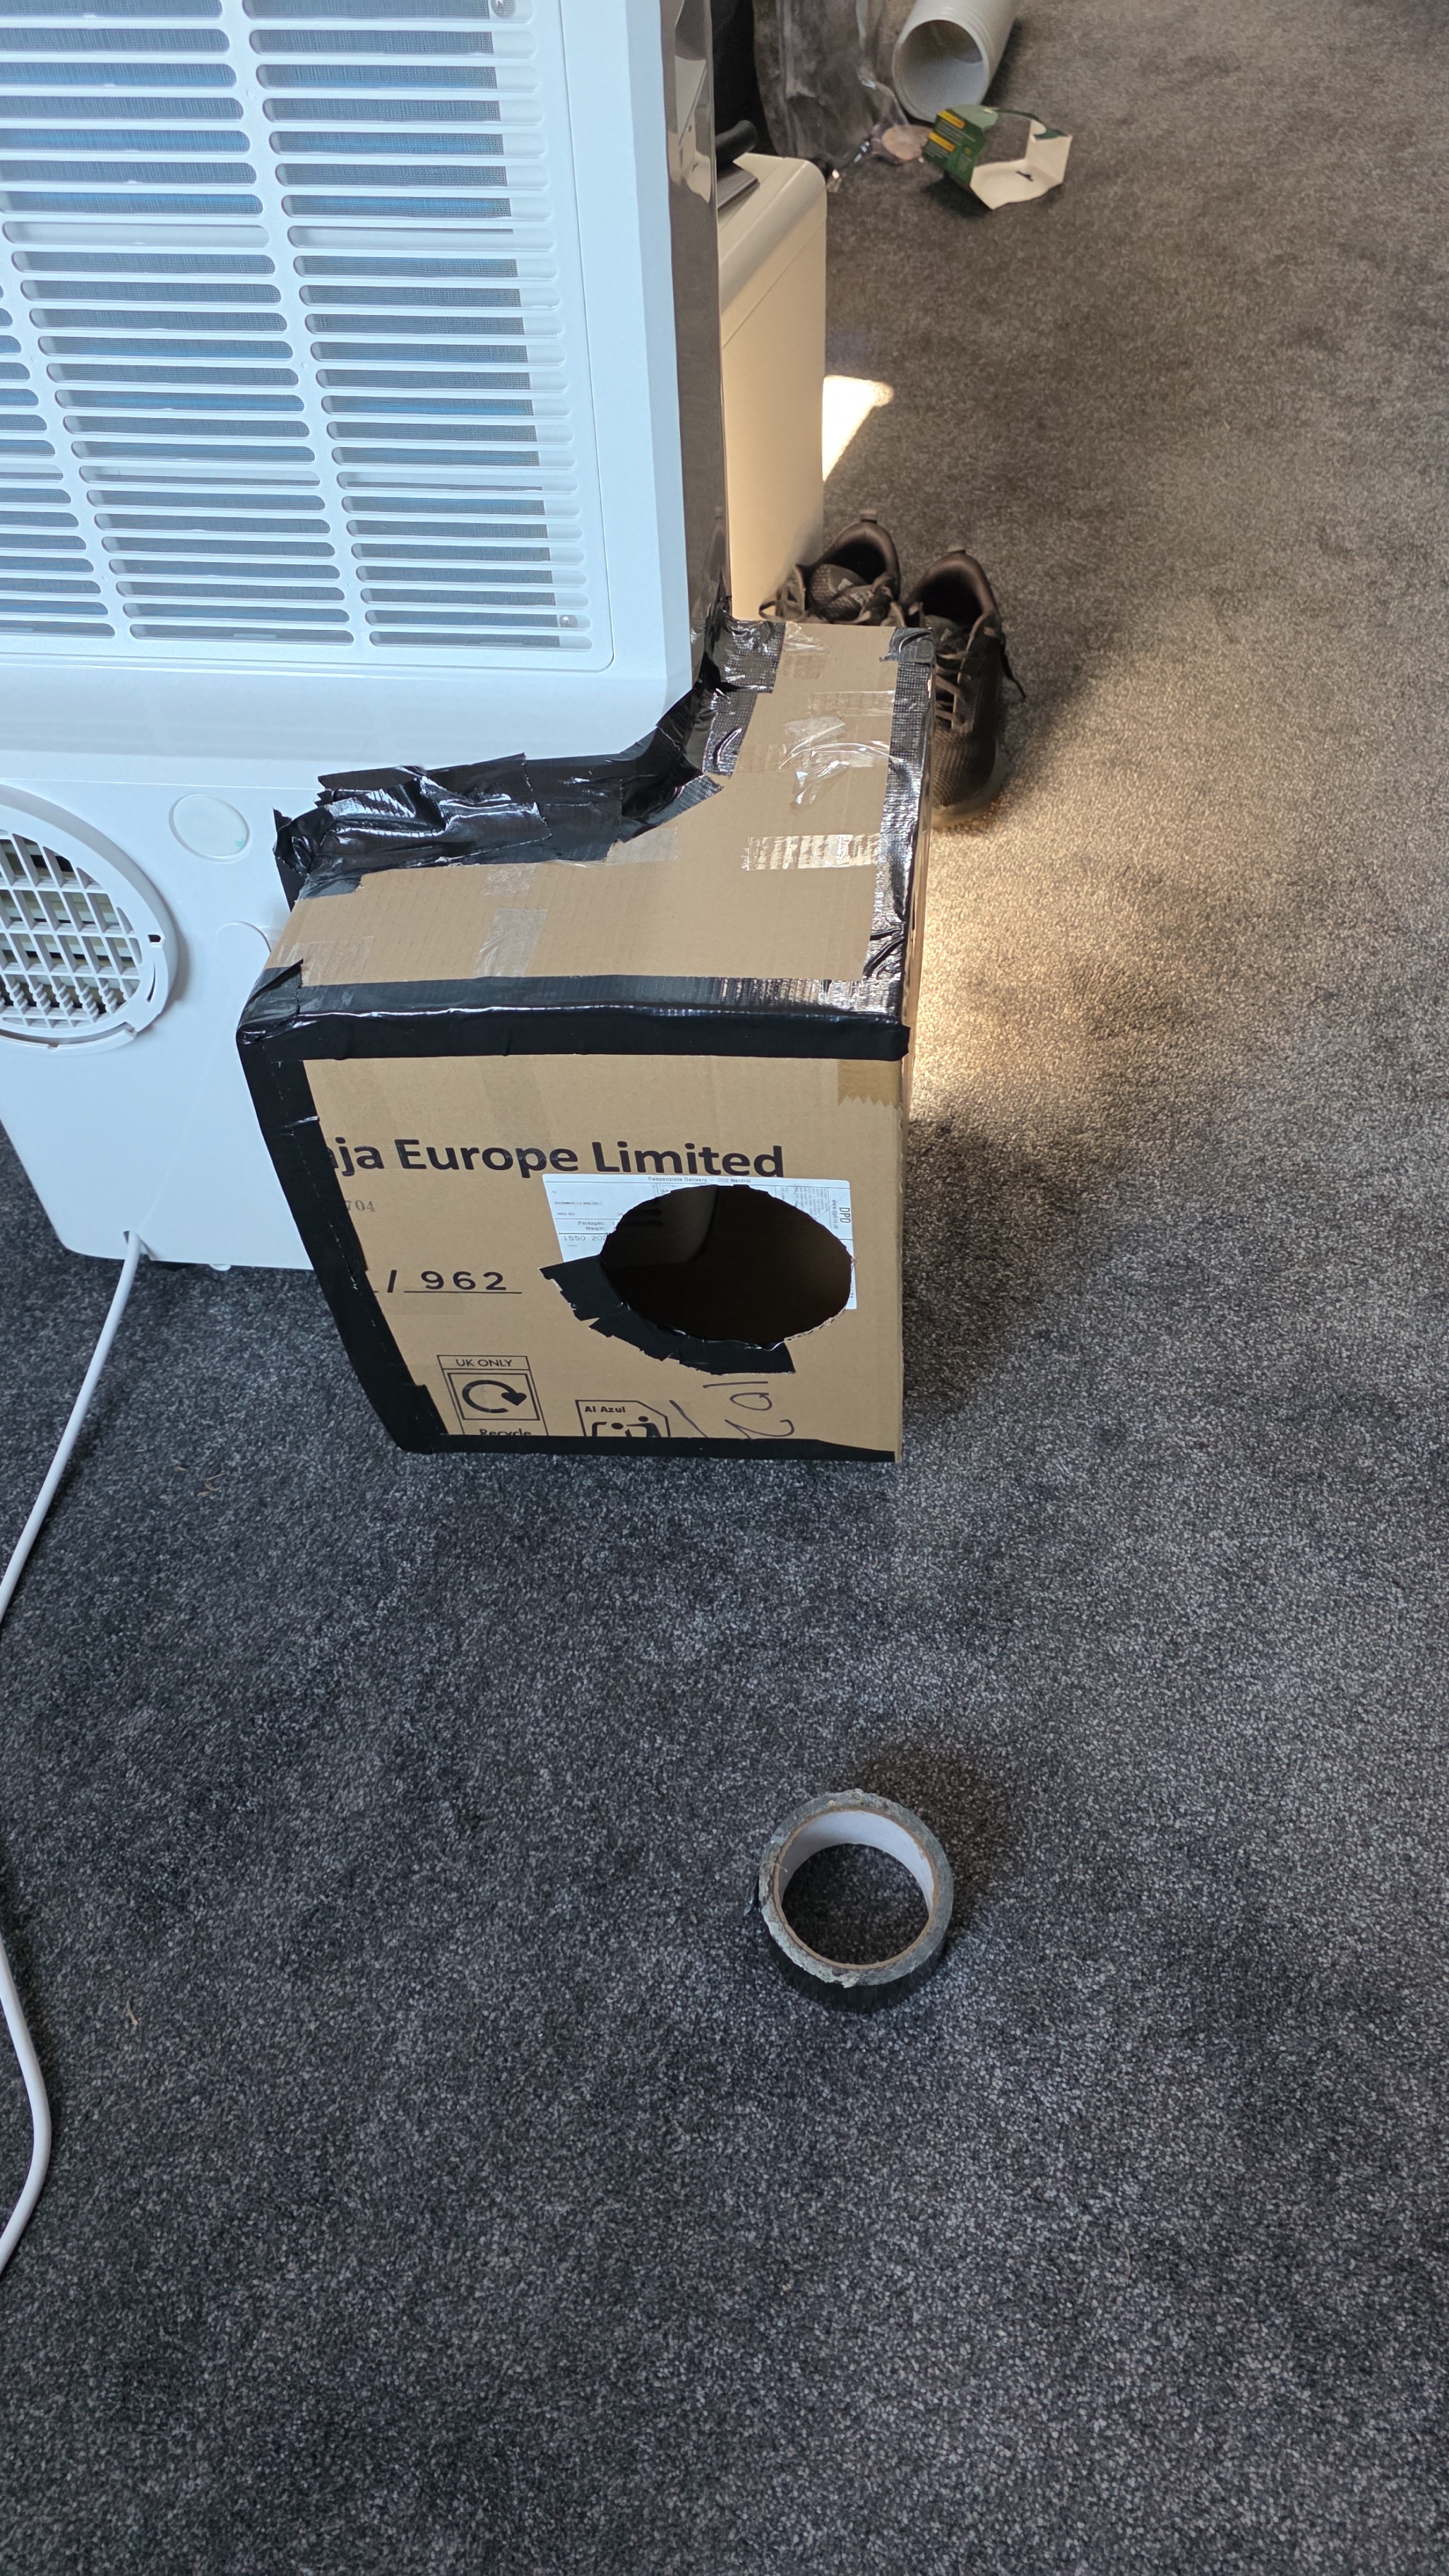
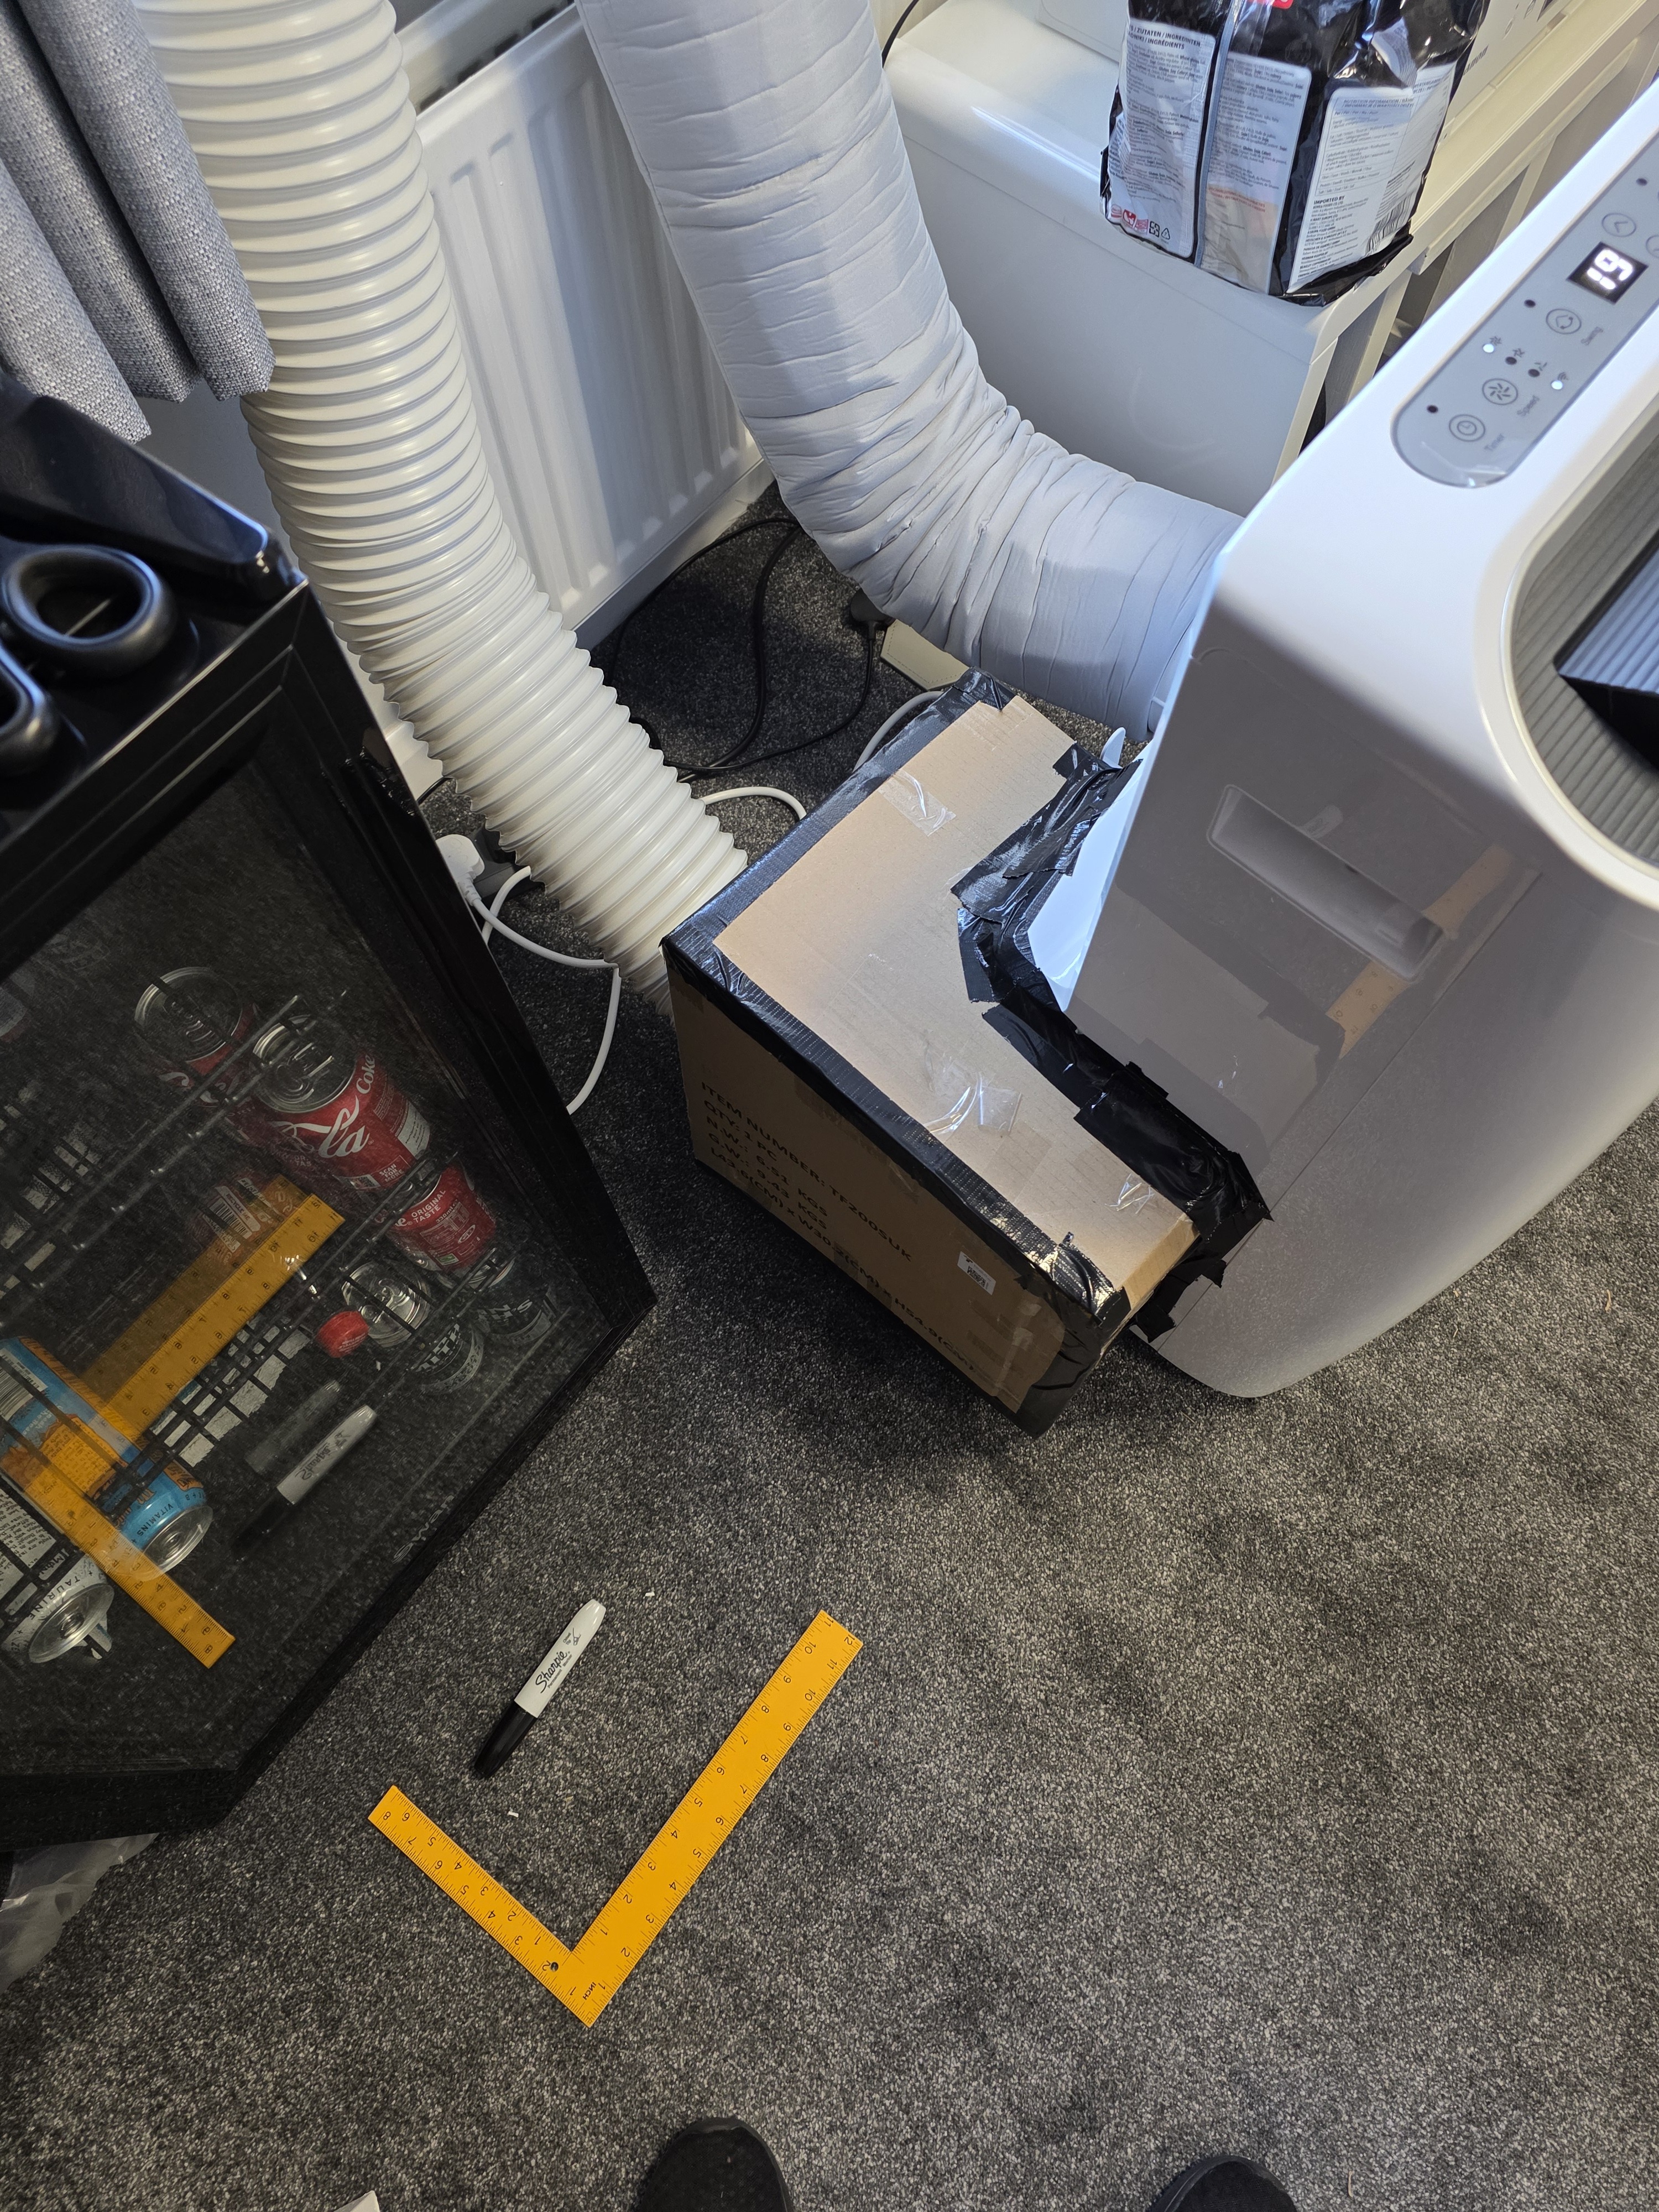
Ian sent in this successful modification of a MeacoCool MC12000CHR Pro:
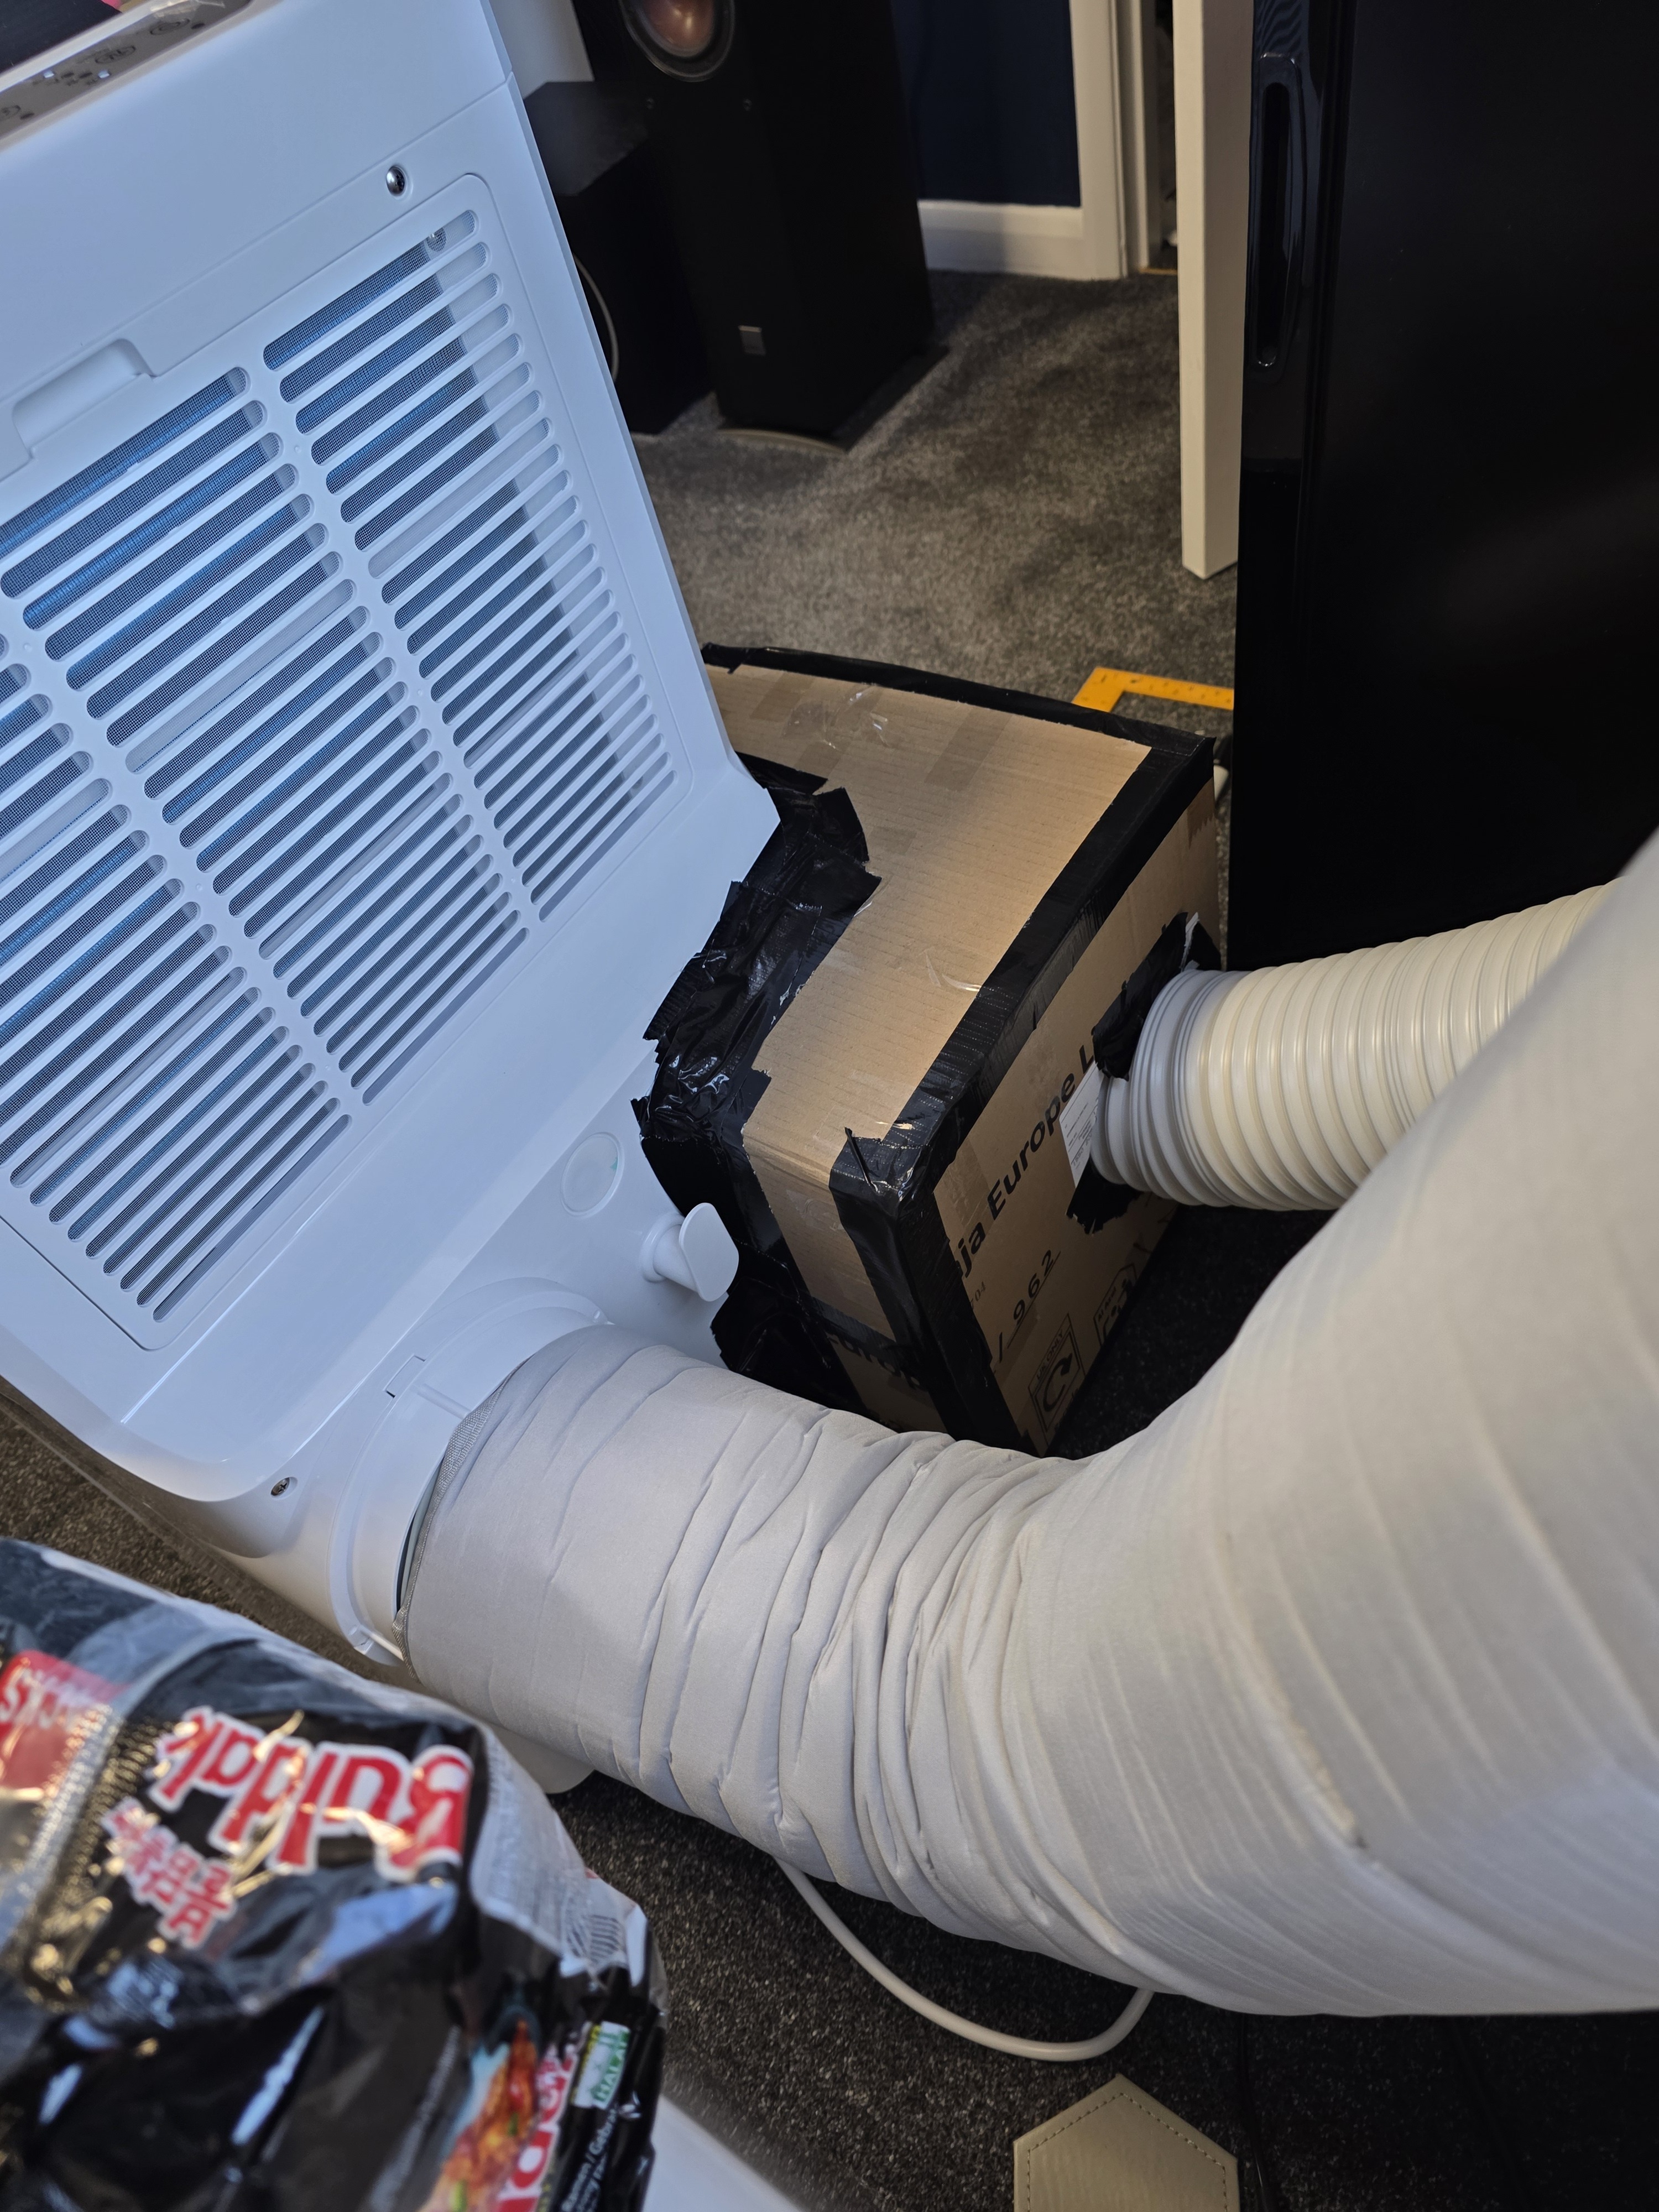
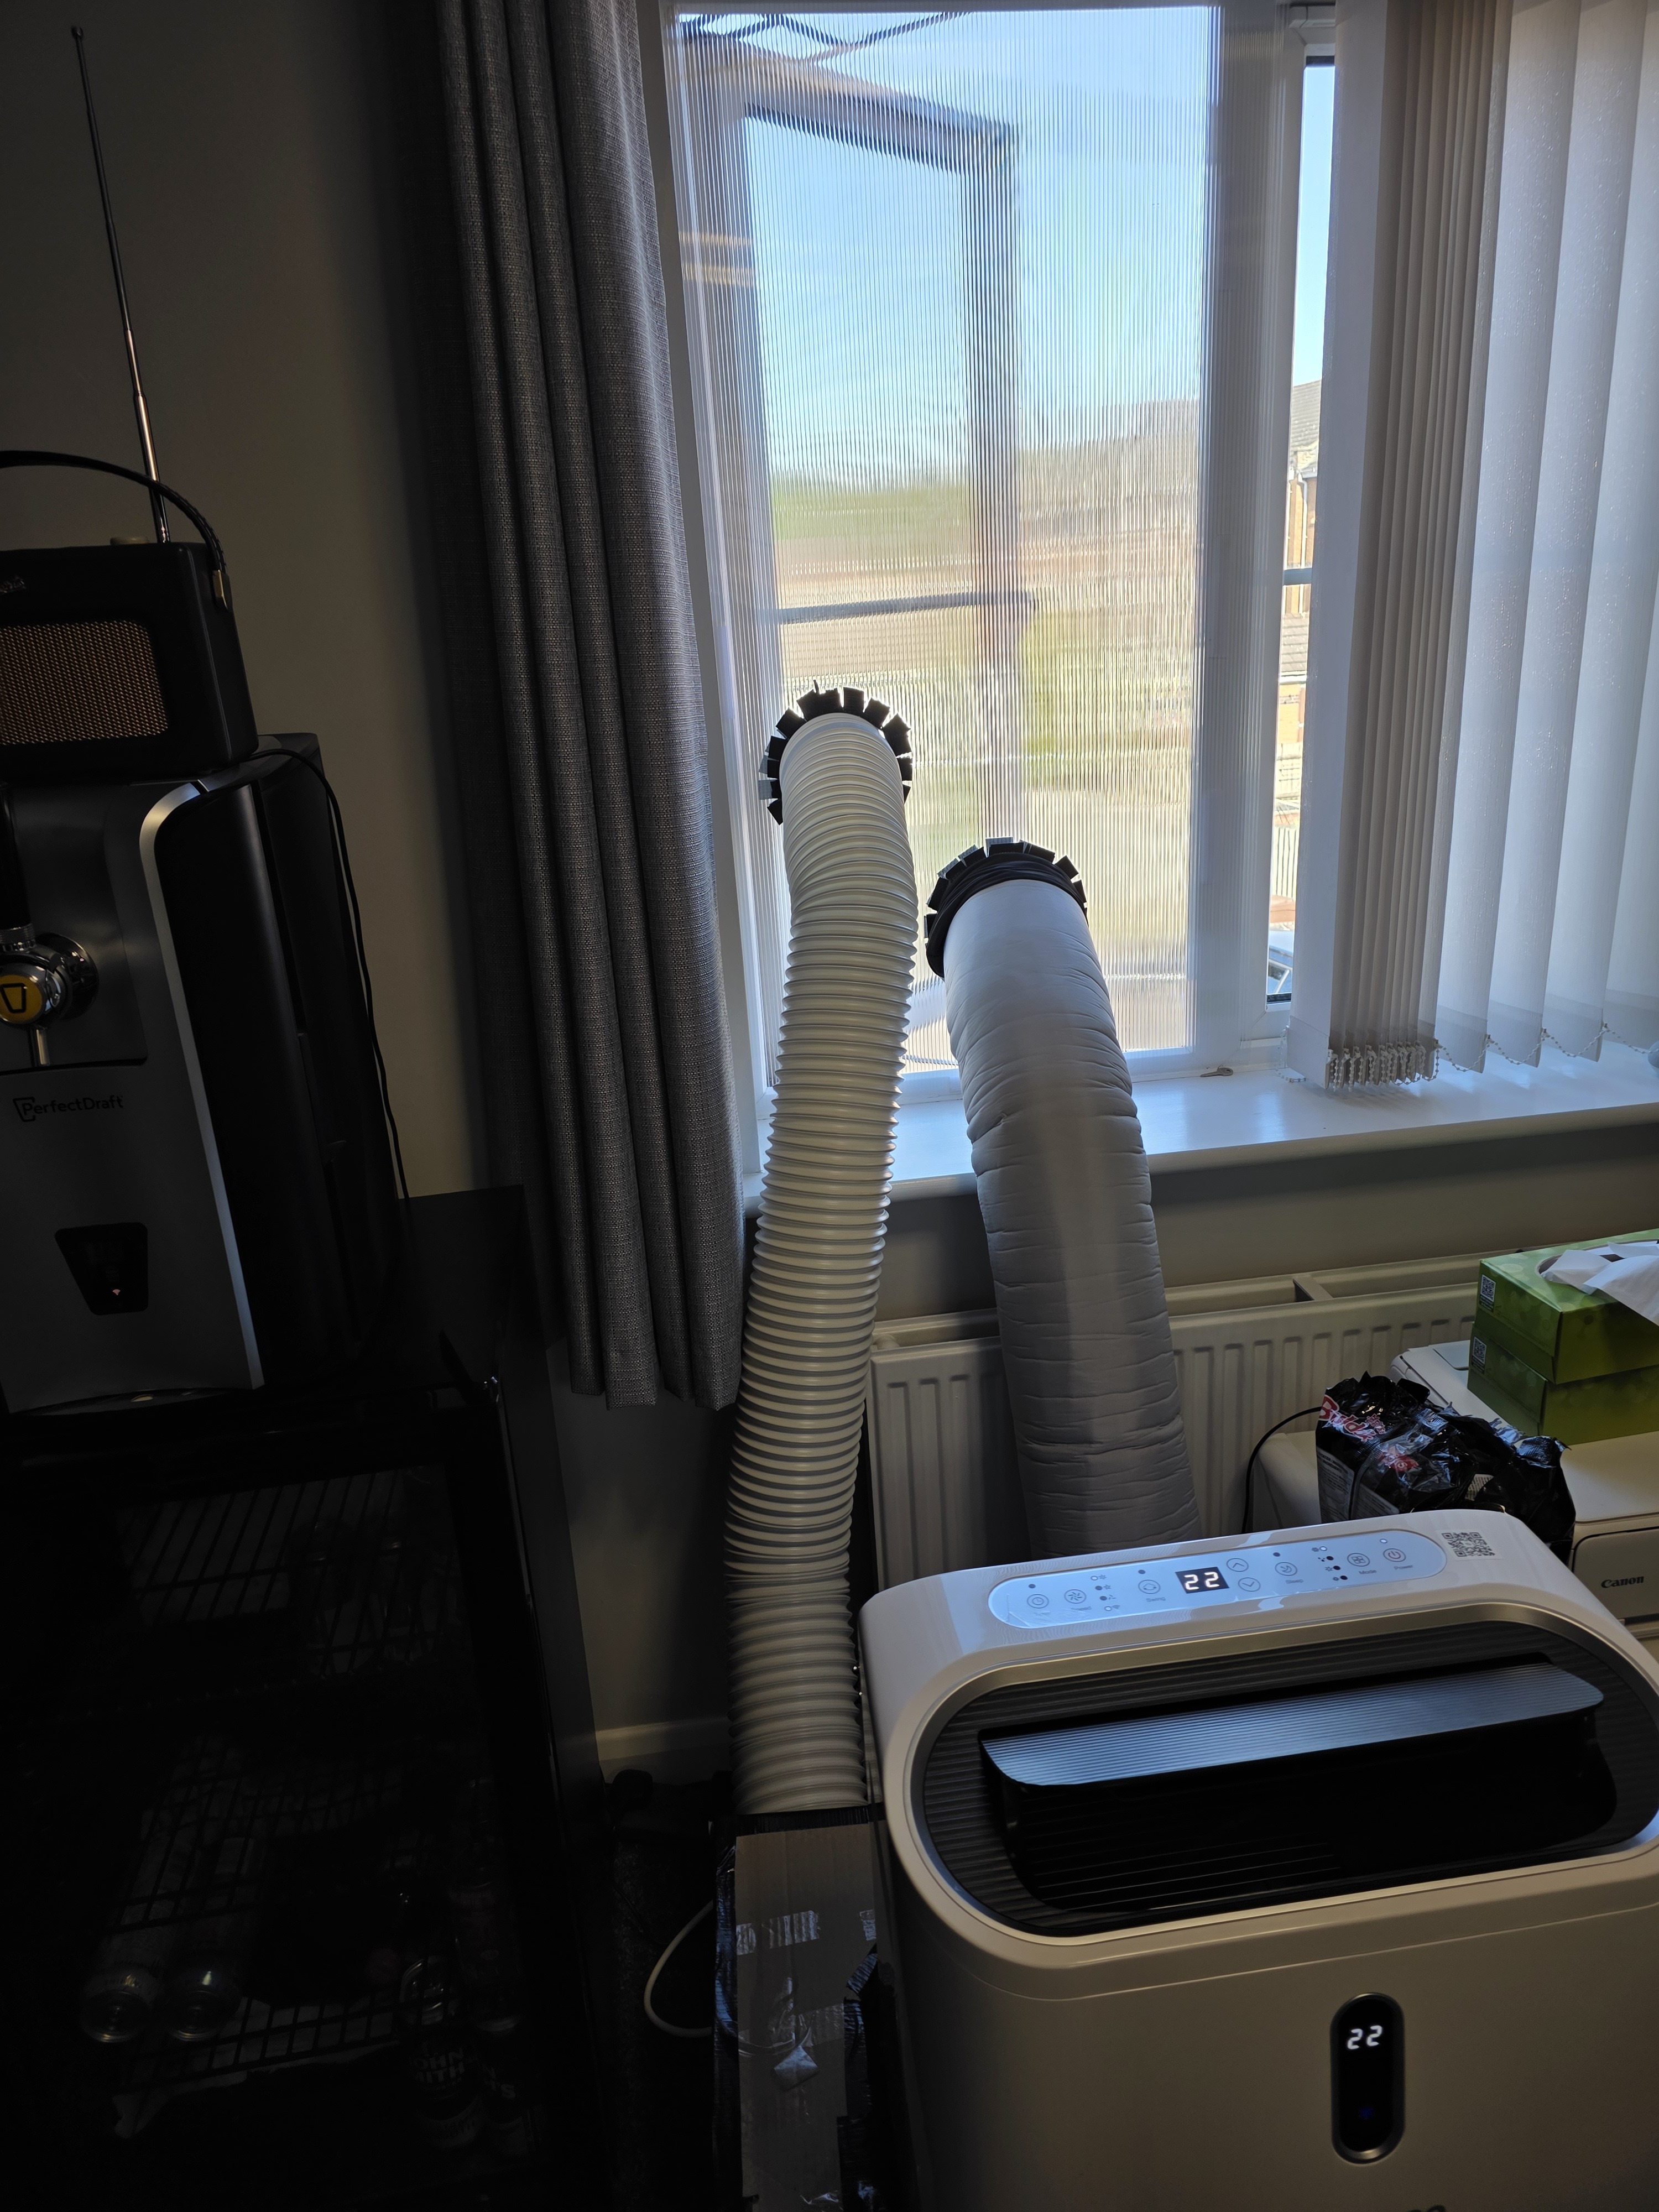
I’ve managed to box my air intake on my MeacoCool MC12000 Pro ch. I used cardboard for now and a few miles of gaffer tape.. I plan to make it in plastic now i know it works. It is day and night difference. The noise has halved and it has dropped the temperature in the room by 2° in half hour. No more hot air being sucked in the room around the doors and from the kitchen cupboards on the outside wall. Its got a slightly smaller diameter hose on the intake atm. As its the only one I had to hand. Ive ordered another 150mm one and will be using that when it lands.
Converted your model successfully?
If you’d like to help others and include a picture of how to convert your specific model on this page, please get in touch using the contact details on the about page. It’s helpful if you could let me know:
- What name you’d like to be used, or whether you’d prefer to be anonymous.
- Whether you’re ok with your photos and message being used on the page.